Have you ever wanted to elevate your cooking with that perfect punch of heat and flavor that only comes from authentic chili paste? I’ve spent years perfecting my chili paste recipes, and today I’m thrilled to share everything I’ve learned about creating this fundamental condiment that forms the backbone of countless cuisines around the world.
Traditional chili paste isn’t just about heat—it’s a complex blend of flavors that can transform ordinary dishes into extraordinary culinary experiences. Whether you’re looking to recreate authentic Asian dishes, spice up your Mexican favorites, or simply add depth to your everyday cooking, mastering homemade chili paste will revolutionize your kitchen endeavors.
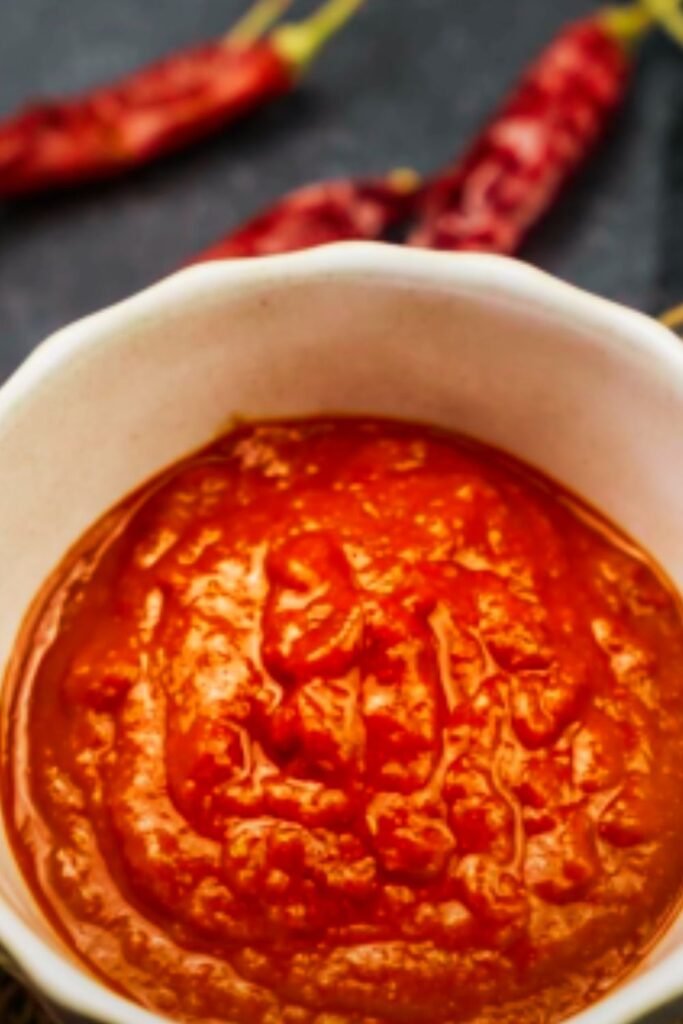
What Makes a Great Chili Paste?
Before diving into specific recipes, let’s understand what sets apart an exceptional chili paste from a mediocre one:
Flavor depth : The best chili pastes offer layers of flavor beyond mere heat—they provide smokiness, sweetness, earthiness, and umami notes that develop and mature over time.
Balanced heat : While certainly spicy, quality chili paste doesn’t overwhelm with capsaicin burn but delivers a measured heat that enhances rather than dominates the dish.
Proper consistency : A well-made paste should have the right texture—neither too watery nor too thick—allowing it to blend seamlessly into dishes or stand proudly as a condiment.
Aromatics : The supporting ingredients—garlic, shallots, lemongrass, etc.—play crucial roles in creating a harmonious flavor profile that makes your paste distinctive.
Preservation quality : Traditional methods ensure your paste keeps well and actually improves in flavor as it ages properly.
Essential Equipment for Chili Paste Making
Before getting started, gather these tools to ensure smooth preparation:
- Mortar and pestle (preferably stone) – Traditional and gives superior texture
- Food processor or blender – For larger batches or if you prefer a smoother consistency
- Heat-resistant gloves – To protect hands when handling hot chilies
- Glass jars with tight-fitting lids – For fermenting and storing the finished paste
- Heavy-bottomed pan – For recipes requiring cooking
- Fine mesh strainer – For certain varieties that need straining
- Dehydrator or oven – If using dried chilies that need rehydrating
Chili Selection Guide
The heart of any chili paste is, of course, the chilies themselves. Here’s my comprehensive guide to selecting the right varieties for your paste:
| Chili Variety | Heat Level (1-10) | Flavor Profile | Best Used For | Origin |
|---|---|---|---|---|
| Bird’s Eye (Thai) | 8-9 | Sharp, clean heat with citrusy notes | Southeast Asian pastes | Thailand |
| Guajillo | 3-5 | Sweet, berry-like with moderate heat | Mexican adobos and salsas | Mexico |
| Kashmiri | 2-3 | Mild with bright color and fruity notes | Indian curries and masalas | India |
| Gochugaru | 4-6 | Sweet, slightly smoky | Korean gochujang | Korea |
| Árbol | 7-8 | Sharp, grassy heat | Mexican salsas and marinades | Mexico |
| Ancho | 2-3 | Rich, smoky, raisin-like sweetness | Mexican moles and marinades | Mexico |
| Scotch Bonnet | 8-10 | Fruity, sweet with intense heat | Caribbean pastes and sauces | Caribbean |
| Chipotle | 5-6 | Deeply smoky with earthy undertones | Latin American adobos | Mexico |
| Cayenne | 6-7 | Clean, sharp heat | Universal usage | Americas |
| Aleppo | 3-4 | Fruity, cumin-like with moderate heat | Middle Eastern pastes | Syria/Turkey |
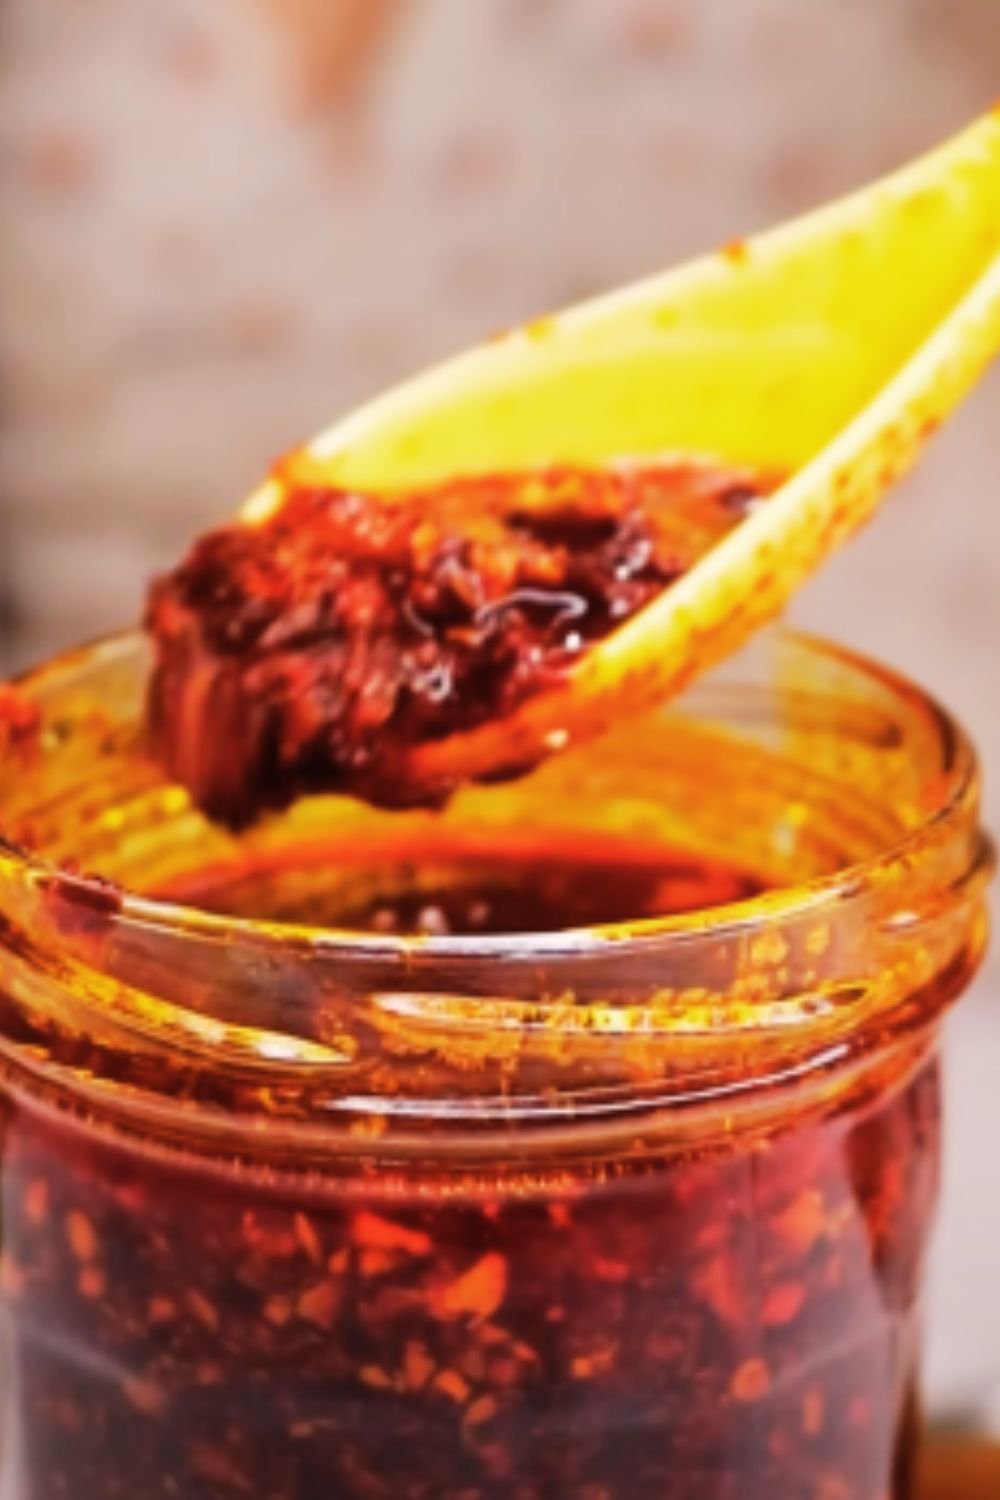
Basic Red Chili Paste Recipe (Thai Style)
This foundational recipe mirrors the traditional Thai nam prik pao that I learned while traveling through northern Thailand. It delivers a beautiful balance of heat, sweetness, and umami depth.
Ingredients:
- 100g (about 1 cup) dried red chilies (I prefer a mix of Thai and mild varieties)
- 8-10 garlic cloves, peeled
- 3 medium shallots, roughly chopped
- 3 tablespoons vegetable oil (or traditional palm oil)
- 2 tablespoons palm sugar (or brown sugar)
- 1 tablespoon tamarind paste
- 2 tablespoons fish sauce (use soy sauce for vegetarian version)
- 1 teaspoon shrimp paste (omit for vegetarian version)
- ½ teaspoon salt
- 2 tablespoons water (as needed)
Preparation Method:
- Begin by preparing your chilies. If using dried ones, remove stems and soak in warm water for 20-30 minutes until softened. Drain well.
- For a less spicy paste, split the chilies and remove some or all seeds. For maximum heat, keep them intact.
- In a dry pan over medium heat, toast the chilies until fragrant but not burnt, about 2-3 minutes. Remove and set aside.
- In the same pan, add 1 tablespoon of oil and toast the garlic and shallots until golden and aromatic, about 3-4 minutes.
- If using traditional methods, place toasted chilies, garlic, and shallots in a stone mortar and pestle and pound until a rough paste forms. This takes effort but produces superior texture and flavor release. Alternatively, pulse in a food processor.
- Heat the remaining oil in a heavy-bottomed pan over medium-low heat. Add the chili mixture and cook, stirring constantly to prevent burning, for about 5 minutes until fragrant.
- Add palm sugar, tamarind paste, fish sauce, and shrimp paste (if using). Continue cooking for another 5-7 minutes, stirring frequently until the mixture darkens slightly and oil begins to separate.
- Taste and adjust seasonings – it should have a balance of spicy, sweet, salty, and sour notes.
- Allow to cool completely before transferring to sterilized glass jars. A thin layer of oil on top helps preservation.
This paste will keep refrigerated for 2-3 weeks, but the flavor actually improves over the first few days as the ingredients meld together.

Fermented Chili Paste (Korean-Inspired)
Fermentation adds complexity and probiotic benefits to chili paste. This recipe draws inspiration from Korean traditions but incorporates my own adaptations.
Ingredients:
- 500g fresh red chilies (preferably Korean or similar mild-medium varieties)
- 8 cloves garlic, peeled
- 1 thumb-sized piece ginger, peeled
- 2 tablespoons sea salt (non-iodized)
- 3 tablespoons glutinous rice flour
- 250ml water
- 2 tablespoons brown rice syrup (or honey)
- 1 tablespoon fish sauce (optional)
Preparation Method:
- Thoroughly clean and sterilize all fermentation equipment and jars.
- Wash chilies, remove stems, and roughly chop. For a milder paste, remove seeds.
- In a food processor, combine chilies, garlic, and ginger. Pulse until finely chopped but not completely pureed.
- Transfer to a large bowl and mix in the salt thoroughly. Allow to sit for about 30 minutes to draw out moisture.
- Meanwhile, create a rice porridge by whisking rice flour with water in a small saucepan. Heat over medium, stirring constantly until it thickens to a pudding-like consistency. Allow to cool completely.
- Mix the cooled rice porridge with the chili mixture, adding brown rice syrup and fish sauce if using. The mixture should be thick but slightly wet.
- Pack the mixture tightly into clean glass jars, leaving about an inch of headspace. Press down to remove air pockets and ensure the surface is even.
- Seal jars and place in a cool, dark place (around 60-70°F/15-21°C is ideal). Place jars on a tray to catch any overflow during fermentation.
- Allow to ferment for 3-7 days, “burping” the jars daily by briefly opening them to release pressure. The mixture will bubble and develop a tangy aroma.
- Once fermentation is active (usually by day 3-5), transfer to the refrigerator to slow the process. The paste can be used immediately but improves with age, developing deeper flavors over 2-3 weeks.
This fermented paste will keep for several months in the refrigerator, becoming more complex over time.
Dry-Roasted Smoky Chili Paste (Mexican-Inspired Adobo)
This richly flavored paste forms the basis of many Mexican sauces and marinades, with intense depth from multiple dried chilies.
Ingredients:
- 30g dried ancho chilies
- 20g dried guajillo chilies
- 10g dried chipotle chilies
- 5 cloves garlic, unpeeled
- 1 medium onion, quartered
- 1 tablespoon whole cumin seeds
- 1 teaspoon dried oregano (Mexican if available)
- 2 tablespoons apple cider vinegar
- 1 tablespoon brown sugar
- ½ teaspoon ground cinnamon
- ¼ teaspoon ground cloves
- 1 teaspoon salt
- Water as needed
Preparation Method:
- Heat a large, dry cast-iron skillet over medium heat. Working in batches, toast the dried chilies for about 20-30 seconds per side until they become aromatic but not burnt. They should remain pliable, not crisp.
- Remove stems and seeds from the toasted chilies and place them in a bowl. Cover with hot water and soak for 30 minutes until soft and pliable.
- In the same dry skillet, roast the unpeeled garlic cloves and onion quarters until charred in spots and softened, about 8-10 minutes, turning occasionally.
- Briefly toast cumin seeds until fragrant, about 30 seconds, then remove from heat immediately to prevent burning.
- Peel the roasted garlic cloves and add them to a blender along with the drained chilies (reserve some soaking liquid), roasted onion, toasted cumin, oregano, vinegar, sugar, cinnamon, cloves, and salt.
- Blend until smooth, adding small amounts of the reserved soaking liquid as needed to create a thick, smooth paste.
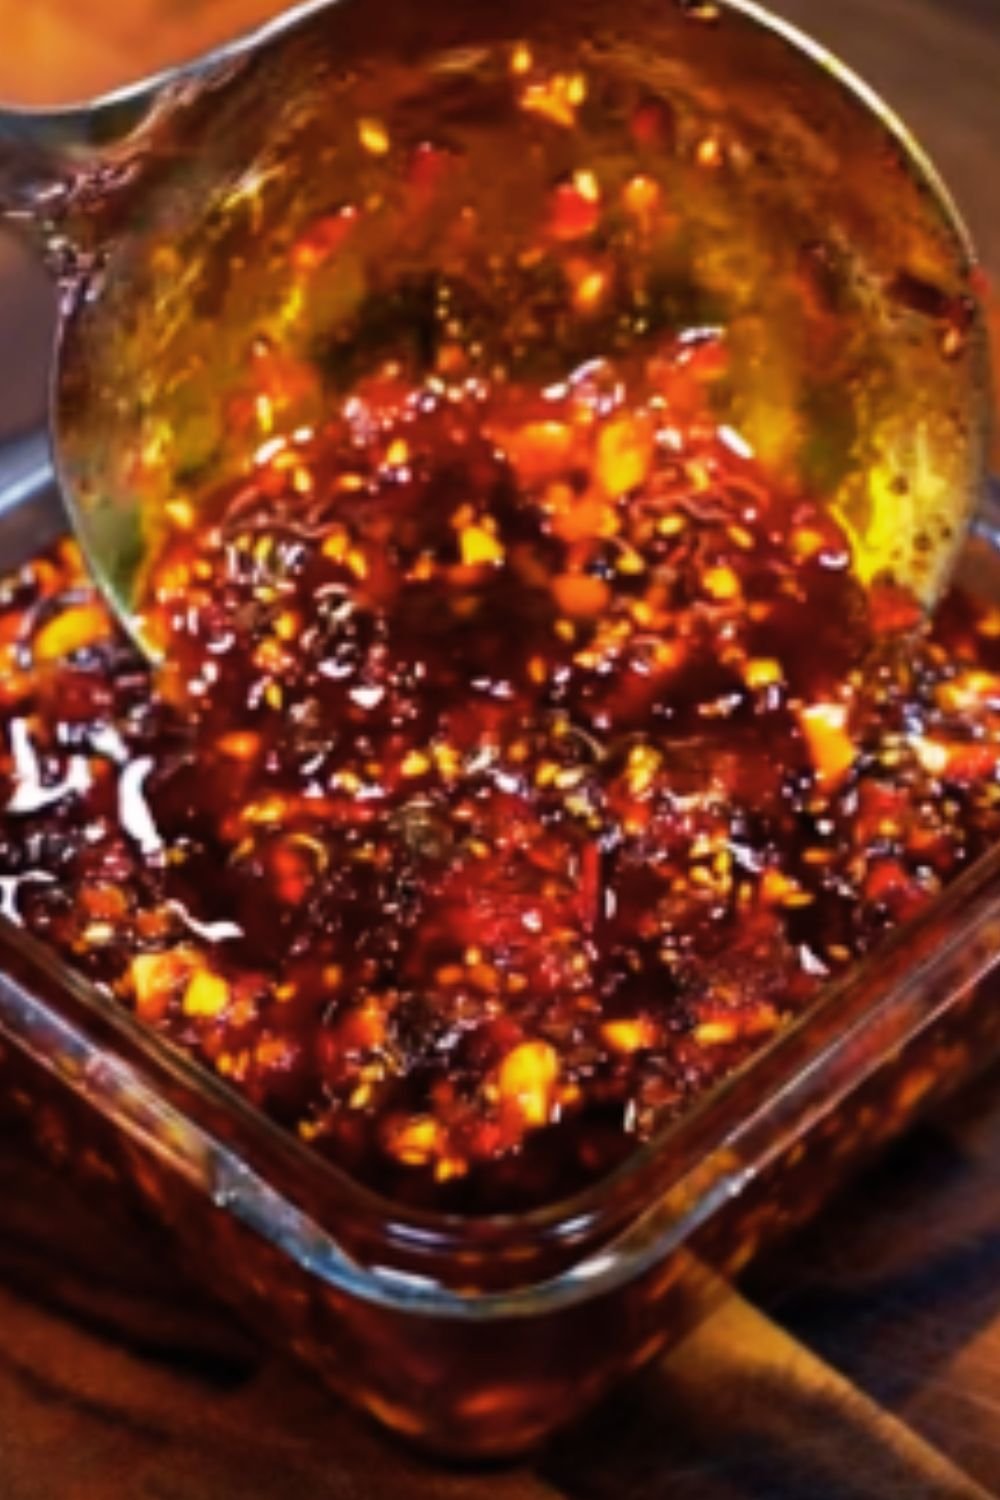
- Transfer the blended mixture to a saucepan and simmer over low heat for about 15-20 minutes, stirring frequently to prevent sticking. The paste will darken and become more concentrated as water evaporates.
- The paste is ready when it’s thick enough that a spoon drawn through it leaves a path that fills in slowly.
- Allow to cool completely before transferring to sterilized jars. Cover with a thin layer of oil for preservation.
This smoky paste will keep refrigerated for up to a month and freezes beautifully for longer storage.
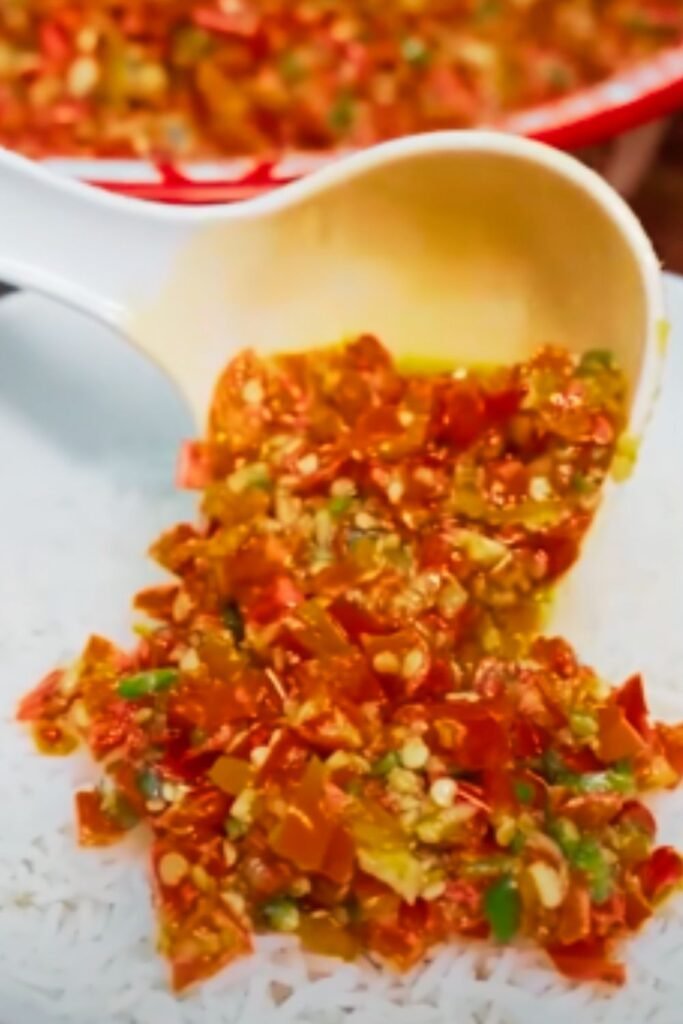
Green Chili Paste with Herbs (Southeast Asian Style)
This vibrant, herb-forward paste is perfect for seafood dishes, soups, and marinades, offering a fresher flavor profile than red varieties.
Ingredients:
- 100g green Thai chilies (or serrano/jalapeño for milder heat)
- 6 cloves garlic
- 3 shallots
- 2 stalks lemongrass, tough outer layers removed, tender parts only
- 1 thumb-sized piece galangal or ginger
- 4-5 kaffir lime leaves, stems removed (or substitute lime zest)
- 1 bunch cilantro, including stems
- 10-15 Thai basil leaves
- 2 tablespoons vegetable oil
- 1 tablespoon fish sauce (or soy sauce for vegetarian version)
- 1 tablespoon lime juice
- 1 teaspoon palm sugar or brown sugar
- ½ teaspoon salt
Preparation Method:
- Roughly chop all fresh ingredients to help your processor or mortar work more efficiently.
- If using a mortar and pestle (traditional method), start by pounding the hardest ingredients: lemongrass, galangal/ginger, and chilies until broken down.
- Add garlic and shallots and continue pounding until a rough paste forms.
- Add herbs and lime leaves, working them into the mixture until well incorporated but still retaining some fresh color.
- If using a food processor, add all ingredients except oil, fish sauce, lime juice, sugar, and salt. Pulse until finely chopped, scraping down sides as needed.
- Heat oil in a wok or skillet over medium-low heat. Add the paste mixture and cook gently for 3-5 minutes, stirring constantly to prevent burning. The raw edge will cook off and the flavors will meld.
- Add fish sauce, lime juice, sugar, and salt. Continue cooking for another 2-3 minutes.
- Taste and adjust seasonings as needed – this paste should be bright, aromatic, and balanced between salty, sour, and spicy.
- Allow to cool completely before storing in airtight containers. This fresh paste is best used within 1-2 weeks when kept refrigerated.
For longer storage, freeze in ice cube trays then transfer the frozen cubes to freezer bags for convenient portioning.
Preservation and Storage Tips
Proper storage is crucial for maintaining the quality and extending the life of your homemade chili pastes:
- Always use thoroughly cleaned, preferably sterilized glass jars
- Create an “oil cap” by pouring a thin layer of neutral oil on top of the paste to prevent air exposure
- Store in the refrigerator between uses
- Always use clean utensils when scooping from the jar to prevent contamination
- For longer storage, freeze in ice cube trays then transfer to freezer bags
- Label with date and ingredients for easy reference
- Most cooked pastes will keep 2-4 weeks refrigerated, while fermented versions can last months
- Watch for signs of spoilage: off smells, mold, or bubbling (unless intentionally fermented)
Using Your Chili Paste in Cooking
Now that you’ve created these wonderful flavor bases, here’s how to incorporate them into your cooking:
Marinades
For delicious marinades, mix 1-2 tablespoons of chili paste with:
- Coconut milk for Southeast Asian-inspired grilled meats
- Olive oil and lemon juice for Mediterranean-style proteins
- Yogurt for Indian-style tandoori preparations
- Orange juice and soy sauce for fusion stir-fry marinades
Soups and Stews
- Add 1-2 teaspoons to broth-based soups for instant depth
- Stir into coconut curries for authentic flavor
- Mix with tomato base for chili con carne or similar dishes
- Use in seafood stews for complex heat that doesn’t overpower
Stir-Fries and Sautés
- Start your stir-fry by frying 1 tablespoon of paste in oil to release flavors
- Add a small dollop to finish vegetable sautés
- Mix with a touch of honey for sweet-spicy glazed vegetables
- Combine with soy sauce and vinegar for quick stir-fry sauce
Dips and Spreads
- Mix with mayonnaise for spicy sandwich spread
- Blend with avocado for kicked-up guacamole
- Stir into hummus for heat and complexity
- Combine with Greek yogurt for a quick vegetable dip
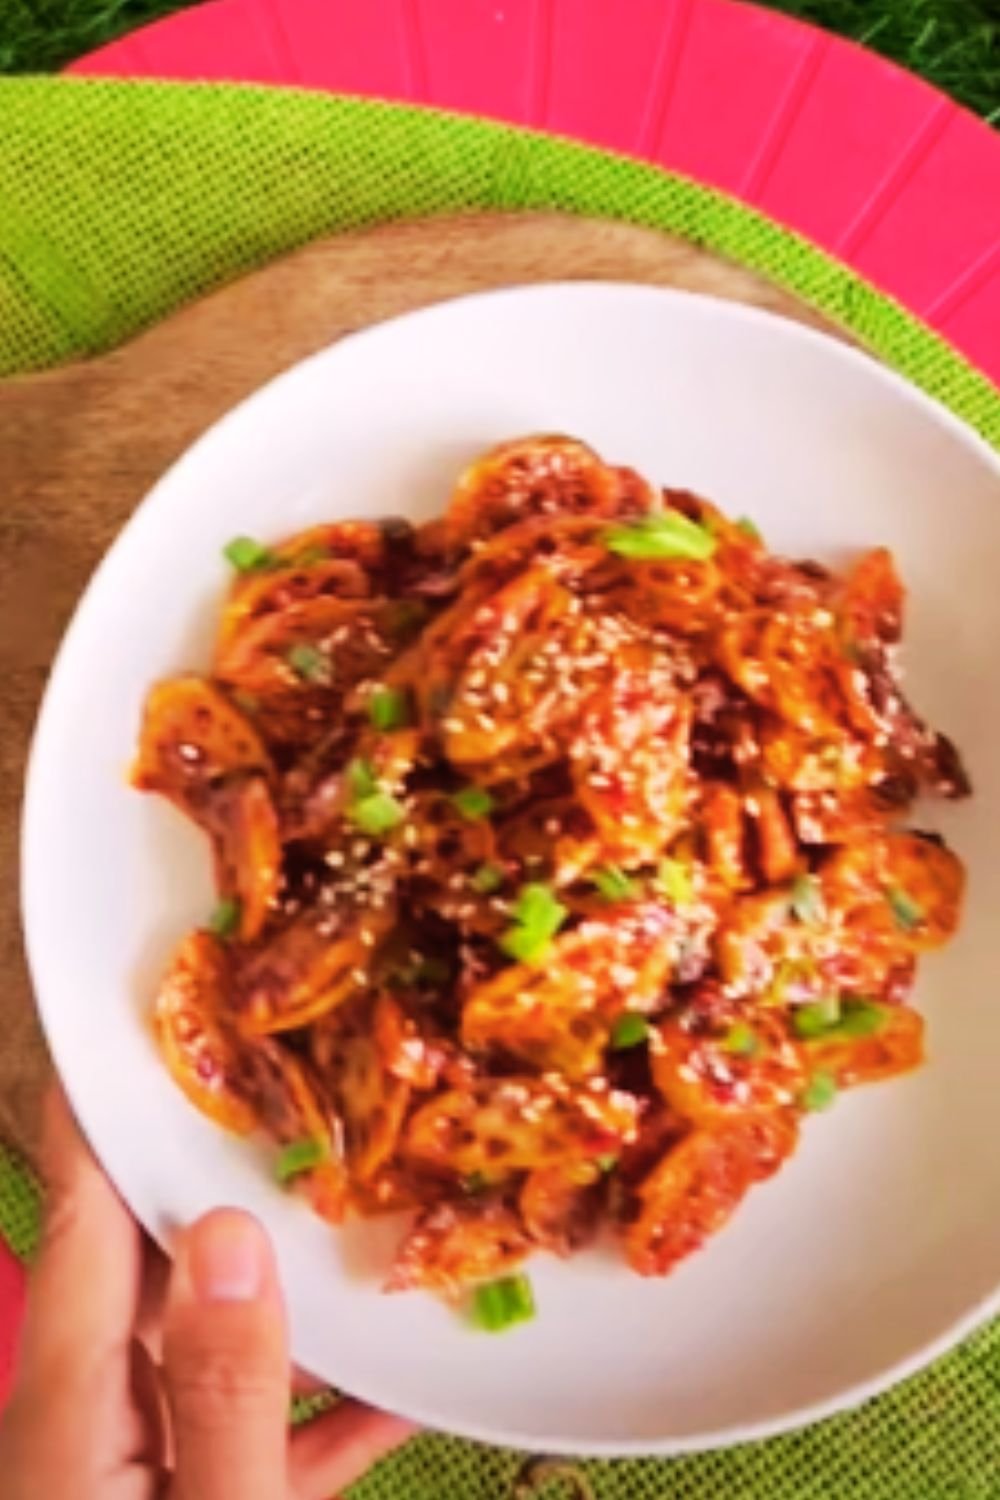
Serving Suggestions and Pairings
Different chili pastes pair beautifully with specific ingredients:
- Red Thai-style paste: Perfect with coconut milk curries, grilled chicken, pork
- Fermented Korean-style paste: Excellent with grilled beef, stir-fried vegetables, rice dishes
- Smoky Mexican adobo: Ideal for slow-cooked meats, bean dishes, and rich sauces
- Green herb paste: Delicious with seafood, light soups, and fresh summer dishes
Non-alcoholic pairing suggestions:
- Coconut water helps balance the heat of spicier pastes
- Cucumber-based drinks offer refreshing contrast
- Mango lassi complements Indian-inspired dishes
- Cold brewed tea with citrus provides pleasant acidity against rich, spicy flavors
Adjusting Heat Levels
Not everyone enjoys the same level of spiciness. Here are my tried-and-true methods for adjusting heat while maintaining flavor integrity:
To increase heat:
- Add more chili seeds during preparation
- Incorporate a small amount of cayenne pepper
- Add a pinch of crushed pepper flakes
- Include a tiny amount of pure capsaicin extract (use with extreme caution)
To decrease heat:
- Remove all seeds and membranes from chilies before processing
- Increase the proportion of sweet ingredients like onions and garlic
- Add more acidic components like vinegar or lime juice
- Incorporate a small amount of neutral oil to dilute capsaicin
Troubleshooting Common Issues
| Problem | Possible Cause | Solution |
|---|---|---|
| Paste too watery | Insufficient cooking time | Continue cooking to reduce moisture content |
| Too much liquid added | Add more solids (more chilies/aromatics) to balance | |
| Bitter taste | Burned ingredients | Start over with more careful heat control |
| Seeds included from bitter varieties | Remove seeds before processing | |
| Paste too salty | Over-seasoning | Add more chilies and aromatics to dilute |
| Reduction concentrating salt | Add a small amount of vinegar or citrus to balance | |
| Mold developing during storage | Contamination | Always use clean utensils and sterilized jars |
| Insufficient oil barrier | Add more oil to create proper seal on surface | |
| Paste too mild | Wrong chili varieties | Incorporate some hotter varieties |
| Seeds removed | Include some seeds for added heat | |
| Fermentation not starting | Too cool environment | Move to slightly warmer location |
| Insufficient natural yeasts | Add small amount of whey or brine from previous ferments |
Health Benefits of Homemade Chili Paste
Beyond the incredible flavor they add to dishes, homemade chili pastes offer impressive health benefits:
- Capsaicin (the compound that makes chilies hot) has anti-inflammatory properties
- Fresh ingredients provide numerous vitamins and antioxidants
- Fermented versions offer probiotic benefits for gut health
- Minimal processing preserves nutritional integrity
- No artificial preservatives or excessive sodium like commercial versions
- Compounds in chilies may help boost metabolism
- Many ingredients like garlic and ginger have documented immune-supporting properties
Q&A Section
Q: How long can I store homemade chili paste? Cooked chili pastes typically last 2-4 weeks in the refrigerator when stored properly with an oil cap. Fermented pastes can last several months. For longest shelf life, freeze portions in ice cube trays, then transfer to freezer bags for up to 6 months.
Q: Can I make chili paste without a mortar and pestle? Absolutely! While traditional methods yield slightly different textures and flavor release, a food processor or blender works well for modern preparations. For optimal results, pulse rather than continuously blend to maintain some texture.
Q: What’s the best way to reduce the heat while maintaining flavor? Remove the seeds and white membranes from chilies before processing, as they contain most of the capsaicin. You can also balance heat with more aromatics like garlic and shallots, or add a touch more sweetener or acid to create balance.
Q: My homemade chili paste tastes bitter. What went wrong? Bitterness usually comes from burning ingredients during the toasting or frying step. Make sure to use moderate heat and constant stirring. Some chili varieties are naturally more bitter than others, so adjust your selections accordingly.
Q: Is it normal for oil to separate in my chili paste? Yes! Oil separation is actually a sign of a properly made paste. This is particularly true for cooked varieties where the oil acts as a natural preservative. Simply stir before using or leave the oil cap intact for storage.
Q: Can I make chili paste without garlic for dietary restrictions? Certainly! Substitute with additional shallots or onions, or try using asafoetida powder (a pinch goes a long way) for a similar aromatic quality without garlic.
Q: How do I know when my fermented chili paste is ready? Look for these signs: a pleasantly sour aroma (not putrid), small bubbles forming throughout, a slight increase in volume, and most importantly, a tangy, complex flavor. This typically takes 3-7 days depending on ambient temperature.
Q: Can I use any chilies for these recipes? While you can substitute based on availability, each chili variety brings unique flavor notes. Try to match the general profile: use sweet/mild chilies for sweet/mild varieties in the recipe, and hot ones for hot varieties. The flavor complexity comes from using multiple types when possible.
By creating your own traditional chili pastes at home, you’re connecting with culinary traditions that span centuries and cultures. The initial effort pays dividends in flavor that simply can’t be matched by commercial products. I hope these recipes inspire you to experiment with different varieties and techniques to discover your personal favorite. Your cooking will never be the same once you’ve mastered the art of homemade chili paste!