There’s something utterly magical about the combination of bright, zesty lemon and delicate, floral lavender that transforms an ordinary pound cake into an extraordinary centerpiece worthy of any garden party. I’ve been perfecting this recipe for years, and I can confidently say it’s become my signature dessert for outdoor gatherings. The gentle perfume of lavender paired with the vibrant citrus notes creates a sophisticated flavor profile that never fails to impress guests.
This Garden Party Pound Cake represents the perfect marriage of classic baking techniques with modern flavor innovation. Unlike traditional pound cakes that can sometimes feel heavy or overly sweet, my lemon-lavender version offers a lighter, more refined experience while maintaining that beloved dense, buttery texture we all crave in a proper pound cake.
Understanding the Foundation: What Makes a Perfect Pound Cake
Before diving into this specific recipe, I want to share what I’ve learned about creating the ideal pound cake foundation. The name “pound cake” originates from the traditional recipe calling for a pound each of butter, sugar, eggs, and flour. While modern recipes have evolved for better balance and flavor, the fundamental principles remain unchanged.
Key Elements for Success:
- Room temperature ingredients for proper emulsification
- Gradual incorporation of ingredients to prevent curdling
- Proper creaming technique for optimal texture
- Careful baking to achieve the perfect crumb
The science behind pound cake success lies in creating a stable emulsion between fats and liquids, which requires patience and attention to temperature and timing.
The Magic of Lemon and Lavender
Lemon: This citrus powerhouse brings brightness and acidity that cuts through the richness of butter and sugar. I use both fresh lemon juice and zest to maximize flavor impact. The zest contains essential oils that provide intense citrus aroma, while the juice adds necessary acidity for proper chemical reactions during baking.
Lavender: Culinary lavender offers a sophisticated floral note that elevates this cake from simple to sublime. However, lavender requires a delicate touch – too much can make your cake taste like soap, while too little won’t provide the desired impact. I’ve found that English lavender works best for baking applications.
Essential Ingredients Breakdown
| Ingredient | Quantity | Purpose | Quality Notes |
|---|---|---|---|
| Unsalted Butter | 1 cup (2 sticks) | Provides richness and structure | European-style preferred for higher fat content |
| Granulated Sugar | 1½ cups | Sweetness and texture | Fine granulation works best |
| Large Eggs | 4 whole | Binding and leavening | Room temperature essential |
| All-Purpose Flour | 2 cups | Structure and body | Sifted for lighter texture |
| Fresh Lemon Juice | ¼ cup | Acidity and flavor | Freshly squeezed only |
| Lemon Zest | 2 tablespoons | Intense citrus oils | From 2-3 large lemons |
| Dried Culinary Lavender | 1 tablespoon | Floral complexity | Food-grade only |
| Vanilla Extract | 1 teaspoon | Flavor enhancement | Pure extract preferred |
| Salt | ½ teaspoon | Flavor balance | Fine sea salt recommended |
| Baking Powder | ½ teaspoon | Additional lift | Fresh, not expired |
Equipment and Preparation
Essential Tools:
- 10-inch bundt pan or 9×5-inch loaf pan
- Stand mixer or hand mixer
- Fine-mesh strainer
- Microplane grater for zesting
- Digital kitchen scale (recommended)
Preparation Steps:
- Position rack in center of oven
- Preheat oven to 325°F (165°C)
- Thoroughly grease and flour your chosen pan
- Bring all ingredients to room temperature (crucial step)
Step-by-Step Recipe Instructions
Preparing the Lavender Infusion
I always start by creating a lavender-infused mixture that distributes the floral flavor evenly throughout the cake. This technique prevents concentrated pockets of lavender that could overwhelm certain bites.
- Combine dried lavender with lemon zest in a small bowl
- Using your fingers, gently rub the mixture together for 30 seconds
- This releases the essential oils and creates a fragrant blend
- Set aside to infuse while preparing other ingredients
Creating the Perfect Batter
Stage 1: Creaming Process
- In your mixer bowl, cream butter until light and fluffy (approximately 3-4 minutes)
- Gradually add sugar, continuing to beat for another 3-4 minutes
- The mixture should be noticeably paler and increased in volume
Stage 2: Egg Incorporation
- Add eggs one at a time, beating well after each addition
- Scrape down bowl sides between additions
- Don’t worry if mixture looks slightly curdled – this is normal
Stage 3: Dry Ingredient Integration
- Sift flour, baking powder, and salt together
- Add dry ingredients to butter mixture in three additions
- Alternate with lemon juice, beginning and ending with flour mixture
- Mix just until combined – overmixing creates tough cake
Stage 4: Final Flavor Additions
- Fold in the lavender-lemon zest mixture
- Add vanilla extract
- Give final gentle stir to ensure even distribution
Baking Techniques and Timing
Temperature Control: I’ve found that 325°F provides the ideal baking environment for this cake. Higher temperatures can cause the exterior to brown too quickly while leaving the center underbaked.
Baking Timeline:
- Bundt pan: 55-65 minutes
- Loaf pan: 60-70 minutes
- Test with toothpick inserted in center – it should come out with just a few moist crumbs
Visual Cues:
- Cake should pull slightly away from pan edges
- Top should be golden brown and spring back when lightly touched
- Internal temperature should reach 205°F (96°C)
Cooling and Storage Guidelines
| Stage | Duration | Method | Important Notes |
|---|---|---|---|
| Initial Cooling | 15 minutes | In pan on wire rack | Prevents sticking while maintaining structure |
| Pan Removal | After 15 minutes | Invert onto rack | Tap gently if cake resists |
| Complete Cooling | 2-3 hours | On wire rack | Essential before glazing |
| Storage | Up to 5 days | Wrapped in plastic | Room temperature storage |
| Freezing | Up to 3 months | Double-wrapped | Thaw completely before serving |
Glaze Options and Finishing Touches
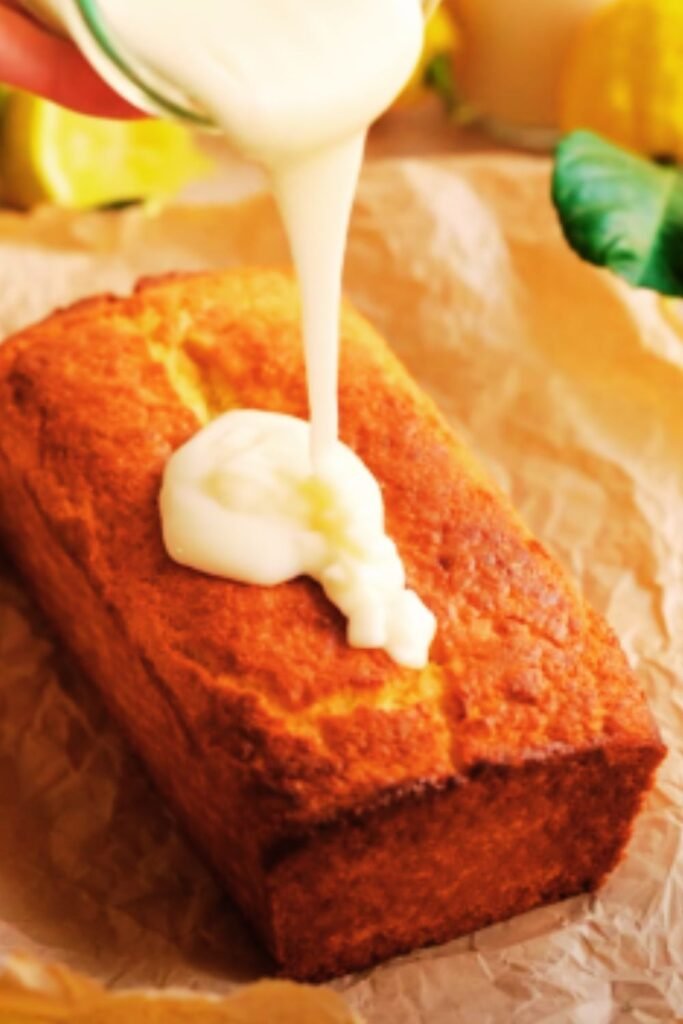
Classic Lemon Glaze
Ingredients:
- 1½ cups powdered sugar
- 3-4 tablespoons fresh lemon juice
- 1 tablespoon lemon zest
Method:
- Whisk ingredients until smooth
- Adjust consistency with additional juice or sugar
- Drizzle over completely cooled cake
Lavender Honey Glaze
Ingredients:
- 1 cup powdered sugar
- 2 tablespoons honey
- 2-3 tablespoons milk
- ½ teaspoon lavender extract
Method:
- Warm honey slightly for easier mixing
- Combine all ingredients until smooth
- Apply while glaze is still warm for better adherence
Serving Suggestions and Pairings
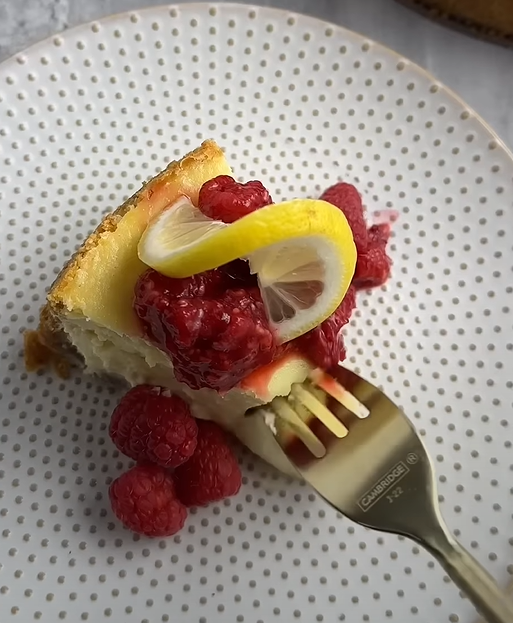
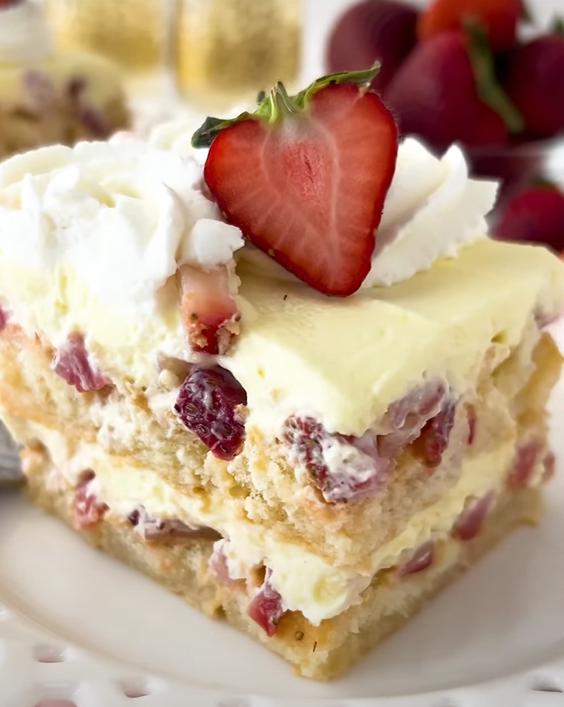
This cake shines in both casual and formal settings. For garden parties, I love serving it alongside fresh berries and whipped cream. The cake’s sophisticated flavor profile pairs beautifully with:
Fruit Accompaniments:
- Fresh strawberries and raspberries
- Lemon curd or lavender honey
- Vanilla bean ice cream
- Fresh mint garnish
Beverage Pairings:
- Earl Grey or chamomile tea
- Fresh lemonade with lavender simple syrup
- Sparkling water with lemon
- Cold brew coffee with vanilla
Presentation Ideas:
- Dust with powdered sugar and fresh lavender sprigs
- Serve on vintage china for garden party elegance
- Garnish individual slices with candied lemon peel
- Create a dessert station with multiple accompaniments
Troubleshooting Common Issues
Problem: Dense, Heavy Texture
- Cause: Overmixing or cold ingredients
- Solution: Ensure all ingredients are at room temperature and mix just until combined
Problem: Dry Cake
- Cause: Overbaking or too much flour
- Solution: Check oven temperature accuracy and measure flour by weight when possible
Problem: Uneven Baking
- Cause: Incorrect oven rack position or temperature fluctuations
- Solution: Use center rack and avoid opening oven door during first 45 minutes
Problem: Cake Sticks to Pan
- Cause: Insufficient greasing or removing too soon
- Solution: Thoroughly grease and flour pan, cool 15 minutes before removing
Variations and Adaptations
Seasonal Adaptations
Spring Version: Add fresh thyme or rosemary instead of lavender Summer Version: Incorporate fresh blueberries or peach pieces Fall Version: Substitute orange zest and add cardamom Winter Version: Include cranberries and orange zest
Dietary Modifications
Gluten-Free Option: Replace all-purpose flour with 1:1 gluten-free flour blend Reduced Sugar: Decrease sugar to 1¼ cups and add stevia to taste Dairy-Free: Substitute butter with high-quality vegan butter alternative
The Science Behind Success
Understanding the chemistry of pound cake baking has transformed my results. The creaming process incorporates air bubbles that provide structure, while proper ingredient temperatures ensure smooth emulsification. The acid in lemon juice reacts with baking powder to create additional lift, while the small amount of baking powder compensates for the cake’s density.
Temperature control during baking is crucial – too high and the outside sets before the interior cooks through, creating a dome shape. The gentle 325°F temperature allows for even cooking throughout.
Storage and Make-Ahead Tips
This cake actually improves with age, as the flavors meld and intensify over 24-48 hours. For optimal freshness:
Short-term Storage (1-3 days):
- Cover tightly with plastic wrap
- Store at room temperature
- Avoid refrigeration, which can dry out the crumb
Long-term Storage (up to 5 days):
- Wrap in plastic, then foil
- Store in airtight container
- Refresh with brief warming in low oven
Freezing Instructions:
- Wrap completely cooled cake in plastic wrap
- Cover with aluminum foil
- Label with date and contents
- Thaw at room temperature for 4-6 hours
Frequently Asked Questions
Q. Can I use fresh lavender instead of dried? A. I recommend sticking with dried culinary lavender as it’s more concentrated and provides consistent results. If using fresh, triple the amount and ensure it’s pesticide-free.
Q. Why is my cake cracking on top? A. Top cracking usually indicates the oven temperature is too high. Reduce temperature by 25°F and extend baking time as needed.
Q. Can I make this cake in advance for a party? A. Absolutely! This cake is actually better after sitting for 24 hours. Bake 1-2 days ahead, wrap tightly, and glaze the day of serving.
Q. What’s the best way to measure flour for consistent results? A. I always recommend weighing flour (120g per cup) for accuracy. If using measuring cups, spoon flour into cup and level with a knife – don’t pack or tap.
Q. How do I know when the cake is properly done? A. Insert a toothpick in the center – it should come out with just a few moist crumbs, not wet batter. The internal temperature should reach 205°F.
Q. Can I substitute the lemon with other citrus fruits? A. Yes! Orange, lime, or grapefruit work beautifully. Adjust quantities to taste, as some citrus fruits are more potent than others.
Q. Is there a way to make this cake less sweet? A. Reduce sugar to 1¼ cups and increase lemon juice slightly. The extra acidity will balance the sweetness while maintaining proper texture.
Q. What should I do if my cake is browning too quickly? A. Tent loosely with aluminum foil for the remaining baking time. This prevents over-browning while allowing the interior to finish cooking.
This Garden Party Pound Cake has become my go-to recipe for special occasions, and I hope it brings as much joy to your gatherings as it has to mine. The combination of classic technique with sophisticated flavors creates a dessert that’s both comforting and elegant – perfect for those moments when you want to create lasting memories around the table.