There’s something irresistible about bite-sized food that brings people together. As someone who’s hosted countless gatherings, I’ve learned that the perfect appetizer should be colorful, flavorful, and simple to prepare. That’s exactly why these cream cheese stuffed mini peppers have become my go-to recipe for everything from casual family dinners to elegant cocktail parties. The vibrant colors, creamy filling, and subtle crunch make them impossible to resist, and I love watching them disappear minutes after hitting the table!
What makes this recipe truly special is its versatility. You can prepare these stuffed peppers in advance, customize the filling to suit your taste preferences, and serve them year-round. They’re substantial enough to satisfy hungry guests but light enough not to spoil appetites before the main course. Plus, they’re naturally gluten-free and can easily be adapted for various dietary needs.
In this article, I’ll walk you through my tried-and-true method for creating these delightful appetizers, share some of my favorite flavor variations, and provide helpful tips for making the process effortless. So let’s dive in and discover why cream cheese stuffed mini peppers deserve a permanent spot in your recipe collection!
What Makes Mini Peppers Perfect for Stuffing
Mini sweet peppers (sometimes called baby bell peppers) are the ideal vessel for creamy fillings. Unlike their spicier jalapeño cousins, these colorful little gems offer a mild, sweet flavor that appeals to everyone, including those who typically shy away from peppers. Their convenient size makes them perfect for appetizers—just right for a two-bite delight.
I particularly love that mini peppers come in a rainbow of colors: red, orange, and yellow varieties all bring different subtle flavor notes and visual appeal to your serving platter. Their walls are thin enough to cook quickly but sturdy enough to hold their shape when stuffed and baked.
From a nutritional standpoint, these peppers are packed with vitamins A and C, making this appetizer not just delicious but surprisingly healthful. The combination of nutrient-rich peppers with protein from the cheese creates a more balanced bite than many traditional appetizers.
Essential Ingredients for Perfect Stuffed Mini Peppers

The beauty of this recipe lies in its simplicity. With just a handful of quality ingredients, you can create something truly spectacular. Here’s what you’ll need:
- Mini sweet peppers: Look for firm, brightly colored peppers with smooth skin. I typically use a 1-pound bag, which contains about 15-20 peppers depending on their size.
- Cream cheese: The foundation of our filling. Choose full-fat cream cheese for the richest flavor and creamiest texture. Be sure to let it soften at room temperature for about 30 minutes before mixing.
- Sharp cheddar cheese: Adds depth and tanginess to the filling. I prefer sharp cheddar for its robust flavor, but you can substitute with pepper jack for heat or smoked gouda for complexity.
- Fresh herbs: Chives and parsley bring freshness and color to the filling. The subtle onion flavor of chives perfectly complements the creamy cheese mixture.
- Garlic: Just a touch adds aromatic complexity. Fresh minced garlic provides the best flavor, but garlic powder works in a pinch.
- Seasonings: Simple salt, black pepper, and a pinch of smoked paprika enhance the filling without overwhelming the peppers’ natural sweetness.
- Optional toppings: Crispy bacon bits, toasted breadcrumbs, or a sprinkle of extra herbs can add texture and visual appeal.
Equipment You’ll Need
One of the reasons I turn to this recipe so often is that it requires minimal equipment:
- Sharp knife and cutting board
- Mixing bowl and spatula
- Baking sheet lined with parchment paper
- Spoon or piping bag for filling the peppers
- Grater for the cheese (unless using pre-shredded)
The Perfect Cream Cheese Filling
The heart of this recipe is undoubtedly the cream cheese filling. I’ve experimented with countless variations over the years, but this base recipe consistently receives rave reviews:
| Ingredient | Amount | Notes |
|---|---|---|
| Cream cheese | 8 oz (1 block) | Room temperature |
| Sharp cheddar cheese | 1/2 cup | Freshly grated |
| Fresh chives | 2 tablespoons | Finely chopped |
| Fresh parsley | 1 tablespoon | Finely chopped |
| Garlic | 2 cloves | Minced |
| Smoked paprika | 1/4 teaspoon | Plus extra for garnish |
| Salt | 1/4 teaspoon | Adjust to taste |
| Black pepper | 1/8 teaspoon | Freshly ground |
| Lemon zest (optional) | 1/2 teaspoon | For brightness |
The secret to a smooth, evenly flavored filling is ensuring your cream cheese is properly softened before mixing. I place the unwrapped block on a plate at room temperature for 30 minutes, which makes it easy to incorporate the other ingredients without lumps.
When mixing, fold the ingredients together gently rather than whipping them. This preserves the texture and prevents the filling from becoming too soft. If you have time, prepare the filling a few hours ahead and refrigerate it to allow the flavors to meld.
Step-by-Step Preparation Method
Preparing the Peppers:
- Preheat your oven to 375°F (190°C).
- Wash the mini peppers thoroughly and pat them dry with paper towels.
- Cut each pepper in half lengthwise, keeping the stem intact when possible for presentation.
- Using a small spoon or your fingers, carefully remove the seeds and white membrane from inside each pepper half.
- Arrange the pepper halves on your parchment-lined baking sheet, cut side up.
Creating the Filling:
- In a medium bowl, combine the softened cream cheese, grated cheddar, chopped chives, parsley, minced garlic, smoked paprika, salt, and pepper.
- Mix gently until all ingredients are evenly incorporated. Take care not to overmix.
- Taste the filling and adjust seasonings if needed. Remember that the flavors will mellow slightly when baked.
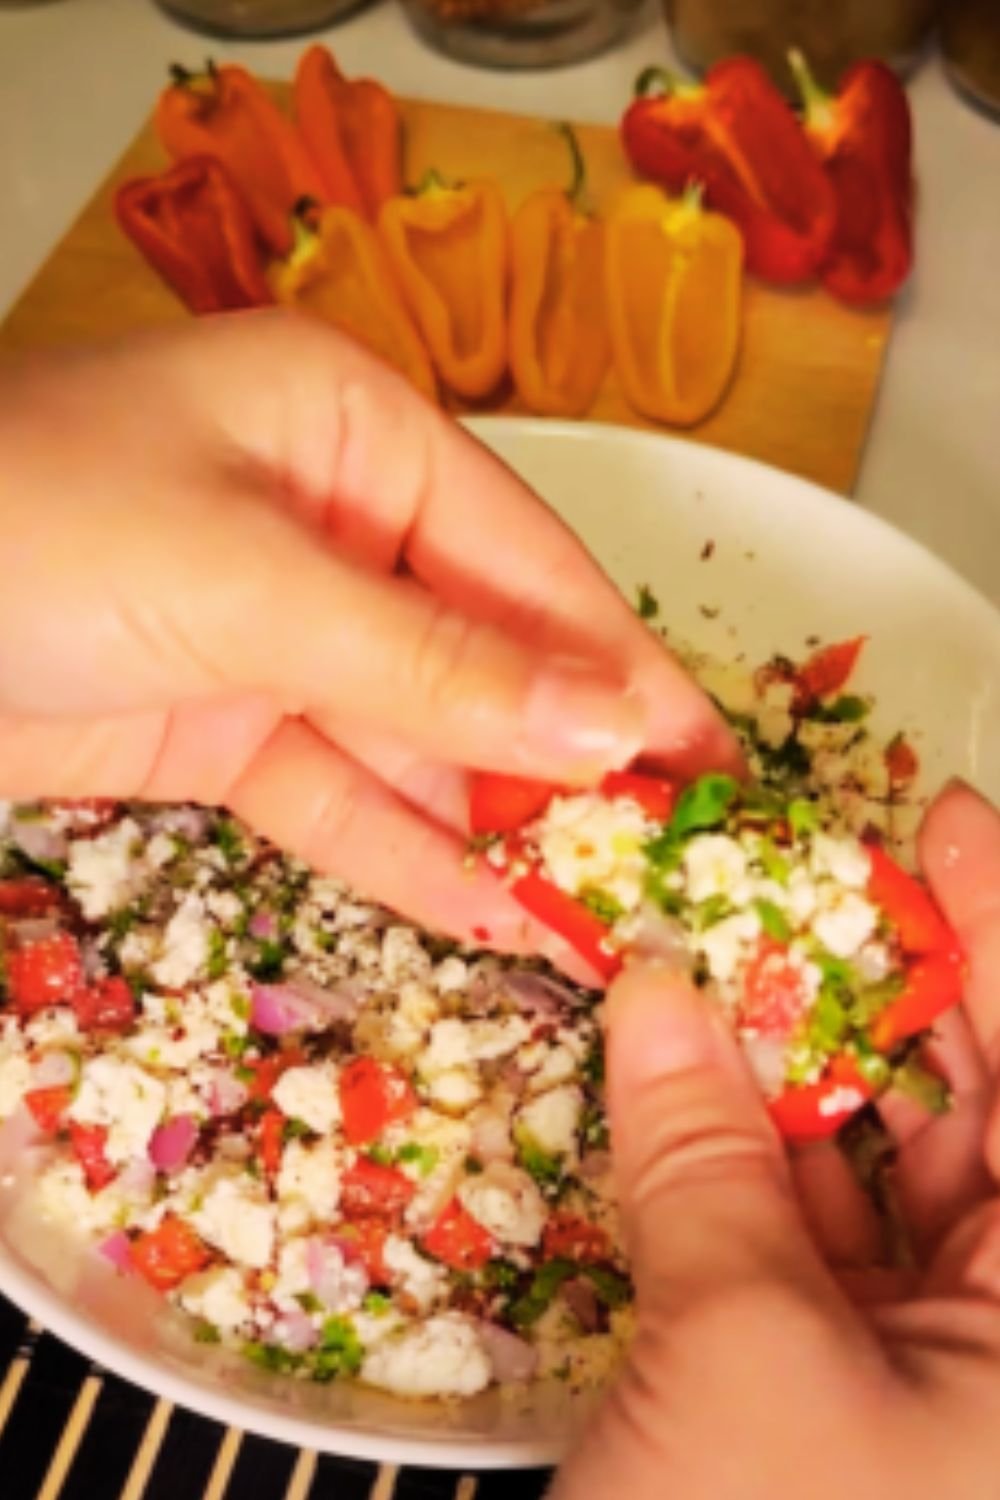
Stuffing and Baking:
- Spoon the cream cheese mixture into each pepper half, filling them just above level with the edges.
- For a more elegant presentation, transfer the filling to a piping bag and pipe it into the peppers.
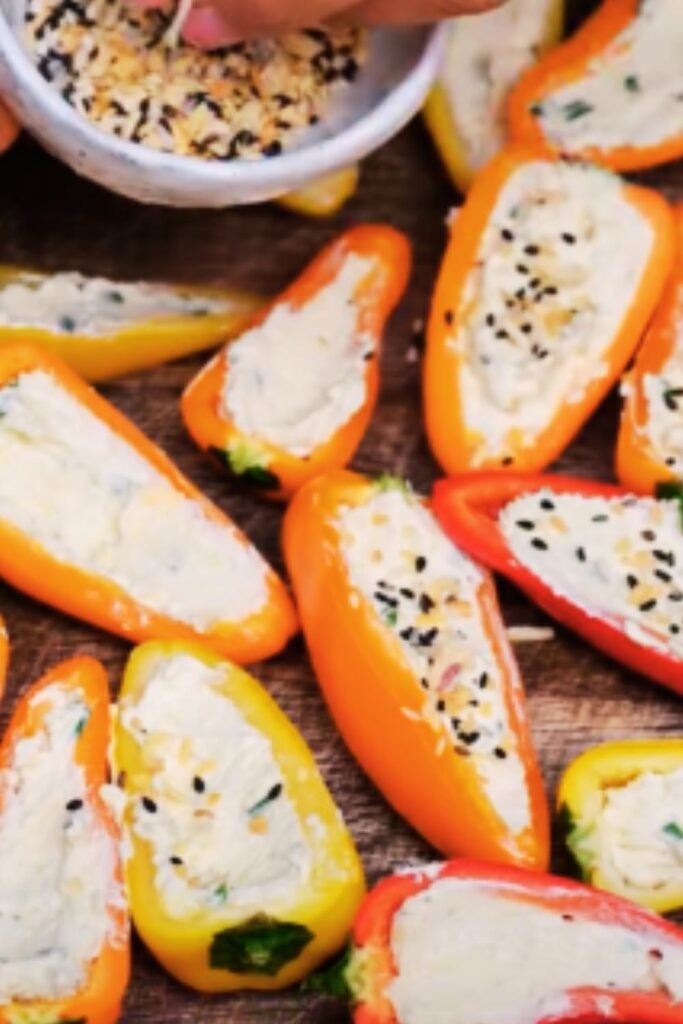
- Sprinkle the tops lightly with additional smoked paprika or paprika for color.
- Bake for 15-20 minutes, until the peppers have softened slightly but still maintain their shape and the filling is heated through.
- For a golden top, switch your oven to broil for the final 1-2 minutes, watching carefully to prevent burning.
Make-Ahead Options:
I often prepare these peppers in advance, especially when entertaining. Here are my tested methods:
- Same-day prep: Stuff the peppers and refrigerate uncovered for up to 8 hours. Add 2-3 minutes to the baking time when cooking from cold.
- Longer storage: Prepare the filling and clean the peppers up to 2 days in advance, storing separately in airtight containers. Stuff and bake just before serving.
- Fully prepared: These peppers can be enjoyed cold or at room temperature, making them perfect for buffets or picnics. Bake them ahead, refrigerate, and serve within 24 hours.
Flavor Variations to Keep Things Interesting
While the classic recipe is undeniably delicious, I love experimenting with different flavor profiles. Here are some of my favorite variations:
Mediterranean Inspired
| Ingredient | Amount | Notes |
|---|---|---|
| Cream cheese | 8 oz | Base |
| Feta cheese | 1/4 cup | Crumbled |
| Sun-dried tomatoes | 2 tablespoons | Finely chopped |
| Kalamata olives | 2 tablespoons | Pitted and chopped |
| Fresh basil | 1 tablespoon | Chiffonade |
| Dried oregano | 1/2 teaspoon | |
| Lemon zest | 1/2 teaspoon | |
| Black pepper | To taste |
Southwest Style
| Ingredient | Amount | Notes |
|---|---|---|
| Cream cheese | 8 oz | Base |
| Pepper jack cheese | 1/2 cup | Shredded |
| Green onions | 2 tablespoons | Chopped |
| Cilantro | 1 tablespoon | Chopped |
| Canned green chilies | 2 tablespoons | Drained and chopped |
| Ground cumin | 1/2 teaspoon | |
| Chili powder | 1/4 teaspoon | |
| Lime zest | 1/2 teaspoon |
Bacon Lover’s
| Ingredient | Amount | Notes |
|---|---|---|
| Cream cheese | 8 oz | Base |
| Cheddar cheese | 1/2 cup | Shredded |
| Bacon | 4 slices | Cooked crisp and crumbled |
| Green onions | 2 tablespoons | Chopped |
| Garlic powder | 1/4 teaspoon | |
| Onion powder | 1/4 teaspoon | |
| Smoked paprika | 1/4 teaspoon |
Herb Garden (Vegetarian)
| Ingredient | Amount | Notes |
|---|---|---|
| Cream cheese | 8 oz | Base |
| Goat cheese | 2 oz | Crumbled |
| Fresh herbs (mix of basil, thyme, chives, parsley) | 1/4 cup | Finely chopped |
| Lemon zest | 1 teaspoon | |
| Lemon juice | 1 teaspoon | Fresh |
| Ground black pepper | 1/4 teaspoon | |
| Pine nuts | 2 tablespoons | Lightly toasted |
Tips for Perfect Results Every Time
Over the years, I’ve discovered several tricks that elevate these stuffed mini peppers from good to unforgettable:
Pepper Selection and Preparation:
- Choose peppers of similar size for even cooking.
- Don’t remove the stems—they make beautiful handles and add visual appeal.
- If a pepper won’t sit flat, slice a tiny bit off the bottom to create a stable base.
- Pat the peppers completely dry after washing to ensure the filling adheres well.
Filling Techniques:
- For the smoothest filling, ensure all dairy ingredients are at room temperature before mixing.
- Use a fork rather than a whisk to combine ingredients, preventing air from making the filling too fluffy.
- If using a piping bag, choose a larger star tip for the most attractive presentation.
- Fill the peppers generously—the filling may shrink slightly during baking.
Baking Secrets:
- Line your baking sheet with parchment paper for easy cleanup and to prevent sticking.
- If your peppers keep tipping over, create a support system by scrunching small pieces of aluminum foil between them.
- For larger gatherings, prepare these on rimmed baking sheets that can go straight from oven to table.
- Monitor the peppers closely during the final minutes of baking—you want them tender-crisp, not soft and collapsed.
Serving Suggestions
These versatile peppers can be presented in countless ways depending on the occasion:
Casual Gatherings:
- Arrange on a rustic wooden board with other finger foods like olives, nuts, and sliced baguette.
- Serve warm from the oven with toothpicks for easy handling.
- Include a simple dipping sauce like ranch or sriracha mayo on the side.
Elegant Affairs:
- Present on a tiered serving platter with fresh herb garnishes between layers.
- Alternate colors for visual impact.
- Pair with champagne or sparkling water with citrus slices.
Family Meals:
- Serve alongside a light soup for a complete light dinner.
- Create a build-your-own stuffed pepper station with various fillings for personalized options.
- Arrange in a circular pattern around a central dipping sauce on a lazy Susan.
Picnics and Potlucks:
- Transport in a single layer in a shallow container with a tight-fitting lid.
- Choose room temperature-friendly fillings without ingredients that spoil quickly.
- Pack extra herbs or paprika for a fresh sprinkle just before serving.
Nutritional Benefits
While these stuffed peppers feel indulgent, they also pack surprising nutritional benefits:
| Nutrient | Benefit | Source in Recipe |
|---|---|---|
| Vitamin C | Immune support, collagen production | Mini peppers (high content) |
| Vitamin A | Vision health, immune function | Red and orange peppers |
| Calcium | Bone health | Cheese varieties |
| Protein | Muscle maintenance, satiety | Cream cheese, cheddar |
| Capsanthin | Antioxidant properties | Red peppers |
| Probiotics | Gut health | Some cream cheese varieties |
| Herbs (various) | Antioxidants, anti-inflammatory compounds | Chives, parsley, etc. |
A typical serving of 3-4 stuffed mini pepper halves contains approximately:
- 180-220 calories
- 16-18g fat (mostly from cheese)
- 8-10g protein
- 6-8g carbohydrates
- 1-2g fiber
Storage and Reheating
If you’re lucky enough to have leftovers (which rarely happens in my house!), here’s how to keep them at their best:
Refrigeration:
- Store in an airtight container in the refrigerator for up to 3 days.
- Layer with parchment paper if stacking to prevent them from sticking together.
Reheating:
- For best results, reheat in a 350°F oven for 5-7 minutes until warmed through.
- Avoid microwave reheating if possible, as it can make the peppers soggy.
- Allow refrigerated peppers to sit at room temperature for 15 minutes before reheating for more even warming.
Freezing:
While these peppers are best enjoyed fresh, you can freeze the filling separately for future use:
- Prepare the cream cheese mixture and freeze in an airtight container for up to 1 month.
- Thaw overnight in the refrigerator and allow to come to room temperature before using.
- The texture may change slightly, so refresh with a sprinkle of fresh herbs before stuffing.
Troubleshooting Common Issues
Even experienced cooks encounter challenges sometimes. Here are solutions to common problems:
Watery Filling:
- Cause: Excess moisture in ingredients or overmixing
- Solution: Pat vegetables dry before chopping and fold ingredients gently rather than beating
Peppers Too Soft:
- Cause: Overcooking or using peppers past their prime
- Solution: Reduce baking time by 2-3 minutes and look for firm peppers when shopping
Filling Falls Out:
- Cause: Pepper cavities too large or filling too cold
- Solution: Use room temperature filling that adheres better and choose peppers with deeper cavities
Bland Flavor:
- Cause: Under-seasoning or not allowing cheese to reach room temperature
- Solution: Taste filling before stuffing peppers and adjust seasonings accordingly
Frequently Asked Questions
Q: Can I make these peppers ahead of time for a party?
Absolutely! These peppers are perfect for make-ahead entertaining. You can prepare them completely up to 24 hours in advance and refrigerate. For the freshest taste, I recommend taking them out of the refrigerator about 30 minutes before baking to remove the chill, then baking as directed, adding 2-3 extra minutes to the cooking time.
Q: How spicy are mini sweet peppers?
The mini sweet peppers used in this recipe are very mild—almost not spicy at all. They’re much more sweet than hot, making them perfect for guests who don’t enjoy spicy food. If you want to add heat, incorporate it into the filling with ingredients like pepper jack cheese, red pepper flakes, or a dash of hot sauce.
Q: Can I make a dairy-free version of this recipe?
Yes! Plant-based cream cheese has improved tremendously in recent years. Choose a high-quality dairy-free cream cheese and vegan cheese shreds. The texture will be slightly different, but still delicious. Add a bit of nutritional yeast to the filling for extra cheesy flavor without the dairy.
Q: My peppers keep falling over on the baking sheet. How can I keep them upright?
If your peppers won’t stay positioned with the filling facing up, try this trick: crumple small pieces of aluminum foil and nestle them between the peppers to create a support system. Alternatively, create a “bed” of salt on your baking sheet and nestle the peppers into it to keep them stable during baking.
Q: How many stuffed peppers should I prepare per person?
For appetizers, I generally plan on 3-4 halves (1.5-2 whole peppers) per person if serving with other appetizers, or 5-6 halves per person if they’re the main appetizer. For a light meal alongside soup or salad, 6-8 halves per person is usually sufficient. It’s always better to have a few extra than not enough!
Q: Can I grill these instead of baking them?
Yes! Grilled stuffed mini peppers are delicious. Prepare them as directed, then place them on a medium-heat grill (around 350°F) with the lid closed for 8-10 minutes until the bottoms have grill marks and the filling is heated through. Use a grill basket or aluminum foil with holes poked in it to prevent smaller peppers from falling through the grates.
Q: What’s the best way to transport these to a potluck?
I recommend baking them at home and transporting them in a single layer in a shallow container. They’re delicious at room temperature, so no need to worry about keeping them hot. If you prefer them warm, ask the host if you can pop them in the oven for 5 minutes before serving.
Why You’ll Love This Recipe
There’s something magical about the combination of sweet mini peppers and creamy, savory filling that keeps people coming back for “just one more.” These stuffed peppers hit all the right notes: they’re colorful, flavorful, and satisfying without being heavy. The contrast between the tender-crisp peppers and the rich, creamy filling creates a perfect bite every time.
What I love most about this recipe is its versatility. Whether I’m hosting an elegant cocktail party, contributing to a casual potluck, or simply looking for a healthier evening snack, these stuffed peppers always fit the bill. They’re equally at home on a holiday buffet or a weeknight dinner table.
The simplicity of preparation, combined with the impressive presentation, makes this recipe a true keeper. Even novice cooks can achieve spectacular results, and experienced cooks will appreciate the blank canvas for creative flavor experiments.
So the next time you’re looking for an appetizer that’s sure to impress without causing kitchen stress, reach for this recipe. These colorful little bites will brighten your table and delight your guests—I guarantee it!