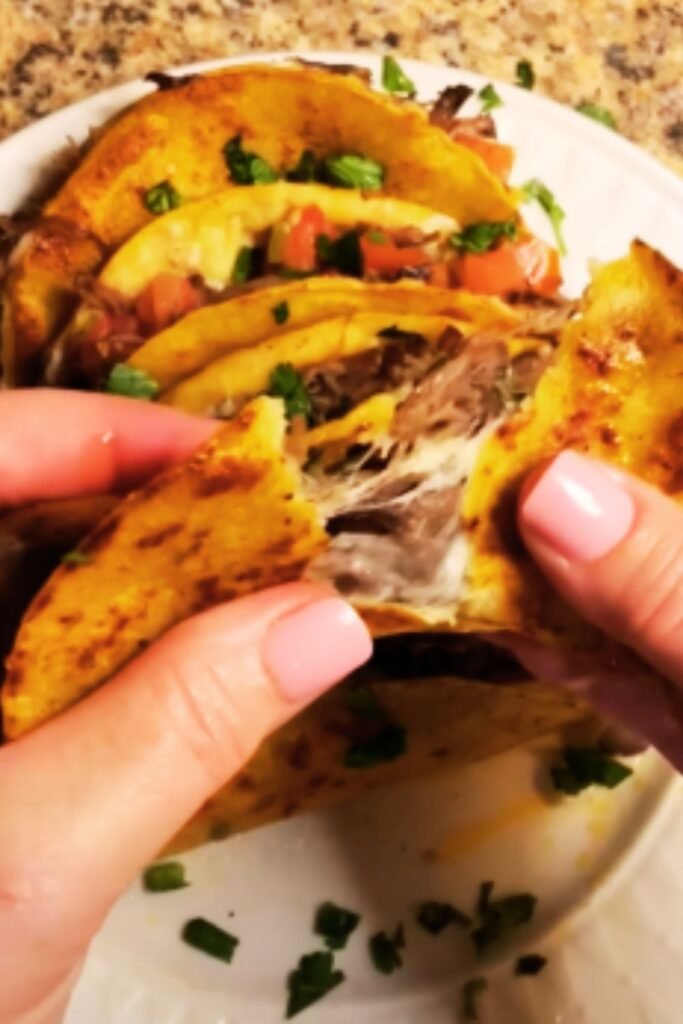
Have you ever experienced that moment at a party when a particular appetizer disappears within minutes of hitting the table? That’s exactly what happens whenever I bring out my Cheesy Taco Sticks. These crispy, gooey treats combine everything we love about tacos with the irresistible appeal of cheese-filled breadsticks, creating what I can only describe as appetizer perfection.
I stumbled upon this recipe during a particularly chaotic game day gathering at my home. With unexpected guests arriving and my planned snacks looking woefully inadequate, I rummaged through my pantry and refrigerator in a mild panic. Ground beef, taco seasoning, some pizza dough I had been saving for the weekend, and a generous amount of cheese later—my happy accident was born. The first batch vanished so quickly that I barely managed to grab one for myself!
Since that fateful day, I’ve refined the recipe, experimenting with different fillings, cheeses, and dipping sauces until reaching what I consider the ultimate version. Whether you’re hosting a movie night, game day festivities, or simply craving a delicious snack, these Cheesy Taco Sticks are guaranteed to impress.
Why These Cheesy Taco Sticks Stand Out
Before diving into the recipe itself, let me tell you why these aren’t just any ordinary appetizer:
- Perfect Portability: Unlike traditional tacos that fall apart with the first bite, these sticks keep all the delicious fillings securely wrapped inside.
- Make-Ahead Friendly: You can prepare them hours in advance and bake just before serving.
- Customizable: The basic recipe is just the beginning—the variations are endless!
- Kid-Approved: Even the pickiest eaters can’t resist these cheesy treats.
- Freezer-Friendly: Make a double batch and freeze half for future snack emergencies.
I’ve brought these to countless gatherings, and the recipe has been requested so many times that I finally decided to share all my secrets. Let’s get cooking!
Ingredients You’ll Need
For the Taco Meat Filling:
- 1 pound ground beef (80/20 lean-to-fat ratio works best)
- 1 small onion, finely diced
- 2 cloves garlic, minced
- 1 packet taco seasoning (or 2 tablespoons homemade mix)
- ¼ cup water
- ½ cup black beans, rinsed and drained (optional)
- ¼ cup corn kernels (optional)
- 1 small jalapeño, seeds removed and finely diced (optional for heat lovers)
For the Sticks:
- 2 tubes refrigerated pizza dough (or 2 pounds homemade dough)
- 3 cups Mexican cheese blend, shredded
- ½ cup cream cheese, softened
- 1 egg, beaten (for egg wash)
- 2 tablespoons butter, melted
- 1 tablespoon fresh cilantro, chopped
- 1 teaspoon garlic powder
- ½ teaspoon chili powder
- ¼ teaspoon salt
For Serving:
- 1 cup sour cream
- 1 cup guacamole
- 1 cup salsa
- ¼ cup fresh cilantro, chopped
- 1 lime, cut into wedges
Equipment Needed
When I first made these, I learned the hard way that having the right tools makes the process much smoother:
- Large skillet for cooking the meat
- Mixing bowls (various sizes)
- Rolling pin
- Sharp knife or pizza cutter
- Baking sheets
- Parchment paper
- Pastry brush
- Measuring cups and spoons
- Small bowls for serving dipping sauces
Step-by-Step Instructions
Preparing the Taco Meat Filling
- Heat a large skillet over medium-high heat. Once hot, add the ground beef and break it apart with a wooden spoon.
- When the meat begins to brown (about 3-4 minutes), add the diced onions and garlic. Continue cooking until the onions are translucent and the meat is fully browned.
- Drain excess fat if necessary. I usually leave a little for flavor, but you can drain it completely if preferred.
- Sprinkle the taco seasoning over the meat mixture and add ¼ cup water. Stir to combine.
- Reduce heat to medium-low and simmer for 5-7 minutes until most of the liquid has evaporated.
- If using, add the black beans, corn, and jalapeño. Stir to combine and cook for an additional 2 minutes.
- Remove from heat and let cool for at least 15 minutes. This is crucial—adding hot filling to the dough will make it difficult to work with and can melt the cheese too quickly.
Preparing the Cheese Mixture
While the meat is cooling, prepare the cheese mixture:
- In a medium bowl, combine the shredded Mexican cheese blend with the softened cream cheese.
- Mix thoroughly until well incorporated. The cream cheese helps bind the shredded cheese and adds an extra layer of creaminess.
- Set aside until ready to assemble.
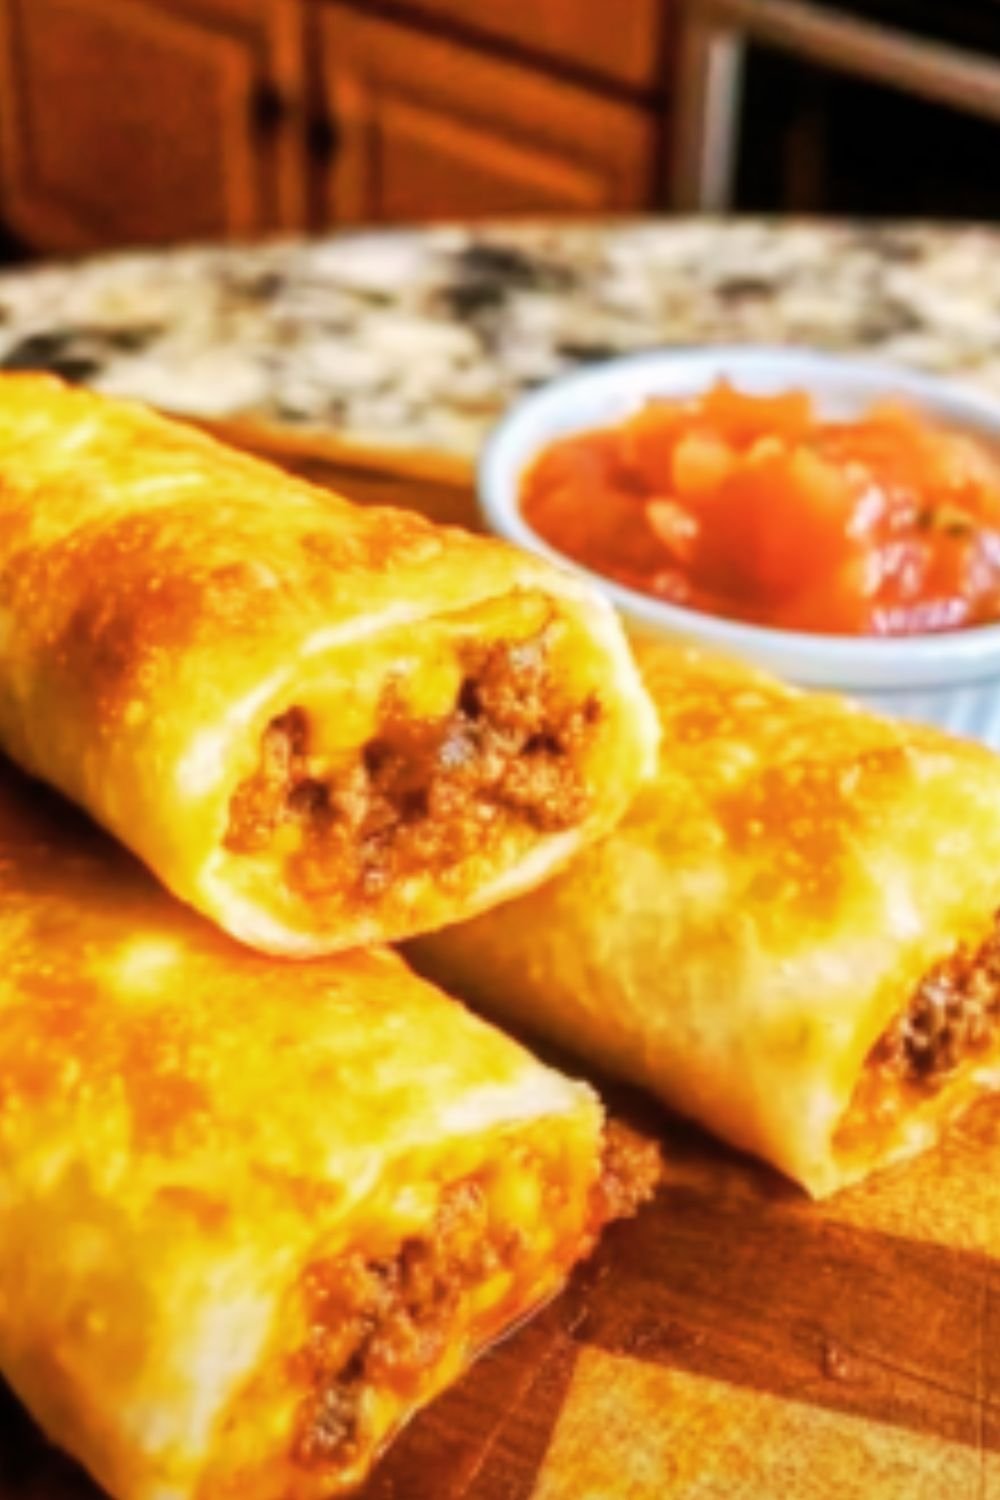
Assembling the Cheesy Taco Sticks
Now comes the fun part—assembling these delicious treats:
- Preheat your oven to 425°F (220°C) and line two baking sheets with parchment paper.
- Unroll the pizza dough onto a lightly floured surface. If using homemade dough, divide it in half and roll each half into a rectangle approximately 12×16 inches.
- Cut each rectangle in half lengthwise, giving you four long strips of dough.
- Down the center of each strip, spread a quarter of the cheese mixture, leaving about ½ inch border on all sides.
- Top the cheese with a quarter of the cooled taco meat mixture, distributing it evenly.
- Carefully fold the long edges of the dough over the filling, pinching to seal. Then pinch the ends closed as well.
- Gently roll the filled dough so the seam is on the bottom and transfer to the prepared baking sheet.
- Using a sharp knife or pizza cutter, cut each log into 5-6 sticks, about 2-3 inches long each.
- Brush each stick with beaten egg wash for a golden finish.
- Bake for 12-15 minutes or until golden brown and slightly crisp on the outside.
Finishing Touches
- While the sticks are baking, prepare the butter topping by combining melted butter, chopped cilantro, garlic powder, chili powder, and salt in a small bowl.
- When the sticks come out of the oven, immediately brush them with the seasoned butter mixture.
- Allow to cool for 5 minutes before serving (if you can wait that long—I often can’t!).
Serving Suggestions
I’ve found that these Cheesy Taco Sticks are incredibly versatile when it comes to serving:
- Arrange them on a large platter surrounded by small bowls of dipping sauces (sour cream, guacamole, and salsa are my go-to options).
- Sprinkle extra cilantro over the platter and provide lime wedges for squeezing.
- For a more substantial meal, serve alongside a fresh green salad with a lime vinaigrette.
- Create a Mexican-inspired appetizer spread by adding nachos, quesadilla wedges, and stuffed jalapeños.
- For a refreshing non-alcoholic pairing, serve with homemade agua fresca, virgin margaritas, or sparkling limeade.
Storage and Reheating
One of the things I love most about this recipe is how well these sticks keep and reheat:
- Refrigerator: Store cooled sticks in an airtight container for up to 3 days.
- Freezer: Place completely cooled sticks in a single layer on a baking sheet and freeze until solid (about 2 hours). Transfer to a freezer bag and store for up to 3 months.
- Reheating: For refrigerated sticks, reheat in a 350°F (175°C) oven for 5-7 minutes. For frozen sticks, add an additional 5-8 minutes. You can also use an air fryer at 350°F for 3-4 minutes for perfectly crispy results.
Nutritional Information
I believe in transparent recipe sharing, so here’s a breakdown of what you’re getting in each stick:
| Nutrient | Amount per Stick | % Daily Value |
|---|---|---|
| Calories | 245 | |
| Total Fat | 14g | 18% |
| Saturated Fat | 7g | 35% |
| Cholesterol | 45mg | 15% |
| Sodium | 520mg | 23% |
| Total Carbohydrates | 18g | 7% |
| Dietary Fiber | 1g | 4% |
| Sugars | 2g | |
| Protein | 12g | 24% |
Values are approximate and based on using standard refrigerated pizza dough and 80/20 ground beef.
Variations to Try
Over the years, I’ve experimented with numerous variations of this recipe. Here are some of my favorites:
Protein Options
| Original | Alternatives | Flavor Profile |
|---|---|---|
| Ground Beef | Ground Turkey | Lighter, works well with added spices |
| Ground Chicken | Milder flavor, great with green chilies | |
| Plant-Based Meat | Surprisingly authentic with the right seasonings | |
| Shredded Chicken | More tender texture, works well with verde sauce | |
| Chorizo | Adds incredible flavor, but reduce other seasonings |
Cheese Combinations
| Base Cheese | Add-in Options | Best Paired With |
|---|---|---|
| Mexican Blend | Pepper Jack | Spicier meat fillings |
| Queso Fresco | Traditional taco flavors | |
| Cotija | Corn and black bean filling | |
| Monterey Jack | Milder, kid-friendly option | |
| Gouda | Smoky flavor profile |
Dough Alternatives
| Standard Option | Alternative | Special Notes |
|---|---|---|
| Pizza Dough | Crescent Roll Dough | Flakier texture, shorter baking time |
| Puff Pastry | Ultra crispy, elegant presentation | |
| Corn Tortillas | More authentic taco flavor, different assembly method | |
| Flour Tortillas | Softer texture, requires different folding technique | |
| Gluten-Free Dough | Works well but may need additional binding ingredients |

Troubleshooting Common Issues
Even though this recipe is relatively straightforward, I’ve encountered a few hiccups along the way. Here’s how to avoid them:
Leaky Sticks
If your filling keeps escaping during baking:
- Make sure your meat filling has cooled completely
- Don’t overfill the dough strips
- Pinch and seal the edges thoroughly
- Double-check for any small openings before baking
Doughy Centers
If the centers aren’t cooking through:
- Cut your sticks slightly smaller
- Lower the oven temperature to 400°F and bake longer
- Make sure the filling is evenly distributed
- Allow the sticks to rest for 2-3 minutes after baking
Bland Flavor
If your sticks lack flavor:
- Use the full amount of taco seasoning
- Don’t forget the seasoned butter after baking
- Add a dash of hot sauce to the meat mixture
- Incorporate fresh herbs like cilantro or oregano
Special Diet Adaptations
I believe everyone should be able to enjoy these delicious treats, so here are some modifications for various dietary needs:
Gluten-Free Version
- Replace regular pizza dough with gluten-free pizza dough
- Check your taco seasoning for hidden gluten
- Serve with gluten-free dipping options
Dairy-Free Option
- Use dairy-free cheese alternatives (there are several good Mexican-style options available)
- Skip the cream cheese or use a plant-based alternative
- Use plant-based butter for the topping
Vegetarian Adaptation
- Replace the ground beef with:
- Plant-based ground meat substitute
- Extra firm tofu, crumbled and well-seasoned
- A mixture of black beans and walnuts (surprisingly meaty texture!)
- Roasted and seasoned cauliflower and mushrooms
Lower-Carb Version
- Use fathead dough or other low-carb dough alternatives
- Focus more on the protein and cheese, less on beans and corn
- Serve with avocado-based dips rather than ones with added sugars
Budget-Friendly Tips
One thing I’ve learned over years of cooking is how to make delicious food without breaking the bank. Here are some money-saving tips for this recipe:
- Buy ground beef in bulk when on sale and freeze in 1-pound portions
- Use block cheese and grate it yourself (pre-shredded cheese is more expensive and contains anti-caking agents)
- Make your own taco seasoning in bulk (it’s primarily chili powder, cumin, paprika, garlic powder, onion powder, oregano, salt, and pepper)
- Skip optional ingredients like jalapeños if they’re not in season
- Use homemade pizza dough (flour, yeast, water, salt, and a bit of oil) which costs a fraction of store-bought
Perfect Pairings
These Cheesy Taco Sticks work beautifully as part of a larger menu. Here are some of my favorite pairings:
- Mexican-style rice and refried beans for a complete meal
- Fresh corn salad with lime dressing for a light contrast
- Watermelon and cucumber salad for a refreshing side
- Chocolate-cinnamon cookies or churros for dessert
- Homemade horchata or fresh limeade for a beverage pairing
Q&A Section
Over the years, I’ve received numerous questions about this recipe. Here are the most common ones:
Q: Can I make these ahead of time for a party?
Absolutely! You have two options: either prepare them completely up to the baking stage, refrigerate (covered) for up to 24 hours, and bake just before serving; or bake them earlier in the day, refrigerate, and reheat in a 350°F oven for 5-7 minutes before serving.
Q: My kids don’t like spicy food. How can I adapt this recipe?
Easy! Skip the jalapeños, use a mild taco seasoning (or make your own with reduced chili powder), and omit the chili powder from the butter topping. You can always serve hot sauce on the side for adults who prefer more heat.
Q: Can I use homemade pizza dough?
Definitely! Homemade dough works wonderfully and often tastes better than store-bought. Just make sure it’s rolled to about ¼-inch thickness for best results.
Q: What’s the best way to serve these at a party?
I find that arranging them on a large platter surrounded by small bowls of different dipping sauces works beautifully. You can keep extras warm in a low oven (200°F) until needed.
Q: I don’t eat beef. What’s the best alternative?
Ground turkey works exceptionally well, as does ground chicken. For a vegetarian option, a mixture of black beans, corn, and diced bell peppers makes a delicious filling.
Q: Can I add more vegetables to make these healthier?
Absolutely! Finely diced bell peppers, zucchini, or spinach can be added to the meat mixture. Just make sure to cook out most of the moisture first to prevent soggy sticks.
Q: How spicy are these as written in the recipe?
I’d say they’re medium spicy—enough flavor to be interesting but not overwhelming. The heat level comes primarily from the taco seasoning and optional jalapeño, so adjust according to your preference.
Q: Can I use crescent roll dough instead of pizza dough?
Yes! Crescent roll dough creates a flakier texture. Press the perforations together before adding filling, and reduce the baking time by about 2-3 minutes as it tends to brown faster.
Final Thoughts
What began as a desperate attempt to feed unexpected guests has become one of my signature recipes. I love how these Cheesy Taco Sticks bring together familiar flavors in a fun, portable format that works for everything from casual gatherings to more formal parties.
The real beauty of this recipe lies in its versatility—you can follow it exactly as written or use it as a template for your own creativity. Don’t be afraid to experiment with different fillings, cheeses, or dipping sauces based on what you have on hand or what your family enjoys.
I hope these Cheesy Taco Sticks bring as much joy to your table as they have to mine. There’s something truly special about watching people’s faces light up when they take that first bite, discovering the perfect combination of crispy exterior, savory meat, and gooey, melted cheese.
Happy cooking, and remember—if you’re planning to serve these at a gathering, you might want to make a double batch. Trust me, they disappear quickly!