Have you ever wondered how to transform ordinary asparagus into something extraordinary? When I first discovered the magic of combining fresh asparagus with melted cheese, it completely changed my vegetable game. Today, I’m excited to share my favorite method for creating cheesy baked asparagus that’s become a staple side dish in my home.
The Beauty of Asparagus
Asparagus has always had a special place in my kitchen. Those tender green spears not only add a sophisticated touch to any meal but also pack a surprising nutritional punch. I’ve found that even veggie skeptics tend to enjoy asparagus when it’s prepared with the right combination of flavors and textures.
What makes asparagus truly remarkable is its versatility. While there are countless ways to prepare this spring vegetable, baking it with cheese creates a harmonious blend that highlights its natural earthiness while adding rich, savory notes that complement almost any main course.
Why This Recipe Works
Before diving into the cooking process, let me explain why this particular preparation method stands out from the rest. The combination of high-heat roasting and a blanket of cheese creates multiple layers of flavor that simply can’t be achieved with steaming or sautéing alone.
- The roasting process caramelizes the natural sugars in asparagus
- The cheese forms a crispy, golden crust while keeping the asparagus moist
- Garlic and herbs infuse the dish with aromatic complexity
- The entire preparation takes less than 30 minutes from start to finish
- It’s equally impressive for weeknight dinners or special occasions
My journey with this recipe began years ago when I was looking for ways to incorporate more vegetables into family meals without complaints. The addition of cheese was the perfect compromise, and over time, I’ve refined the technique to ensure perfectly cooked asparagus every single time.
Selecting the Perfect Asparagus
The foundation of great cheesy baked asparagus starts at the market. When I’m shopping for asparagus, I look for specific indicators of freshness and quality:
- Spear thickness: While both thick and thin asparagus work for this recipe, I prefer medium-thickness spears that offer the perfect balance of tender interiors and caramelized exteriors. Thin spears cook too quickly and can become mushy, while extremely thick ones might remain too fibrous.
- Tips condition: Fresh asparagus should have tightly closed, compact tips. If you see flowering or spreading tips, the asparagus is past its prime.
- Stalk firmness: Give the bunch a gentle squeeze – the spears should feel firm and snap when bent, not limp or rubbery.
- Color: Look for vibrant green stalks with hints of purple at the tips. Avoid specimens that appear yellowed or faded.
- Bundle uniformity: Try to select bundles with spears of similar thickness to ensure even cooking.
I’ve found that spring asparagus tends to be the most tender and flavorful, but good-quality asparagus is available year-round in most supermarkets. When possible, I support local farmers markets, where asparagus is often harvested just hours before sale.
Ingredients: Quality Matters
For this simple dish, the quality of each ingredient significantly impacts the final result. Here’s what I use for my cheesy baked asparagus:
| Ingredient | Amount | Notes |
|---|---|---|
| Fresh asparagus | 2 pounds (about 2 bunches) | Look for medium-thickness spears |
| Olive oil | 2 tablespoons | Extra virgin for best flavor |
| Fresh garlic | 3-4 cloves, minced | Adjust according to taste preference |
| Kosher salt | 1 teaspoon | Sea salt works well too |
| Fresh ground black pepper | ½ teaspoon | Freshly ground adds more flavor |
| Parmesan cheese | ½ cup, freshly grated | Use Parmigiano-Reggiano for authentic flavor |
| Mozzarella cheese | 1 cup, shredded | Low-moisture, whole milk variety |
| Gruyère cheese (optional) | ¼ cup, shredded | Adds wonderful nutty flavor |
| Fresh lemon | 1 medium | For zest and optional wedges for serving |
| Red pepper flakes | ¼ teaspoon (optional) | For a subtle heat |
| Fresh herbs | 2 tablespoons chopped | Thyme, basil, or parsley work well |
While the recipe is forgiving, I never compromise on cheese quality. Pre-shredded cheeses often contain anti-caking agents that affect melting properties. Taking a few extra minutes to grate cheese fresh makes a noticeable difference in the final texture and flavor of the dish.
Essential Equipment
This recipe doesn’t require specialized equipment, but having the right tools makes preparation effortless:
- Large rimmed baking sheet (preferably non-stick)
- Parchment paper or silicone baking mat
- Sharp knife for trimming asparagus
- Cheese grater
- Mixing bowls
- Measuring cups and spoons
- Tongs for serving
I particularly recommend using a baking sheet with enough surface area to arrange the asparagus in a single layer. Overcrowding leads to steaming rather than roasting, which prevents proper caramelization.
Preparation Method
After years of experimentation, I’ve developed a foolproof method for preparing cheesy baked asparagus that consistently yields excellent results:
Step 1: Prep the Asparagus
First things first – proper asparagus preparation sets the stage for success:
- Preheat your oven to 425°F (218°C). This high temperature is crucial for achieving caramelization without overcooking.
- Rinse the asparagus thoroughly under cold running water to remove any grit or sand.
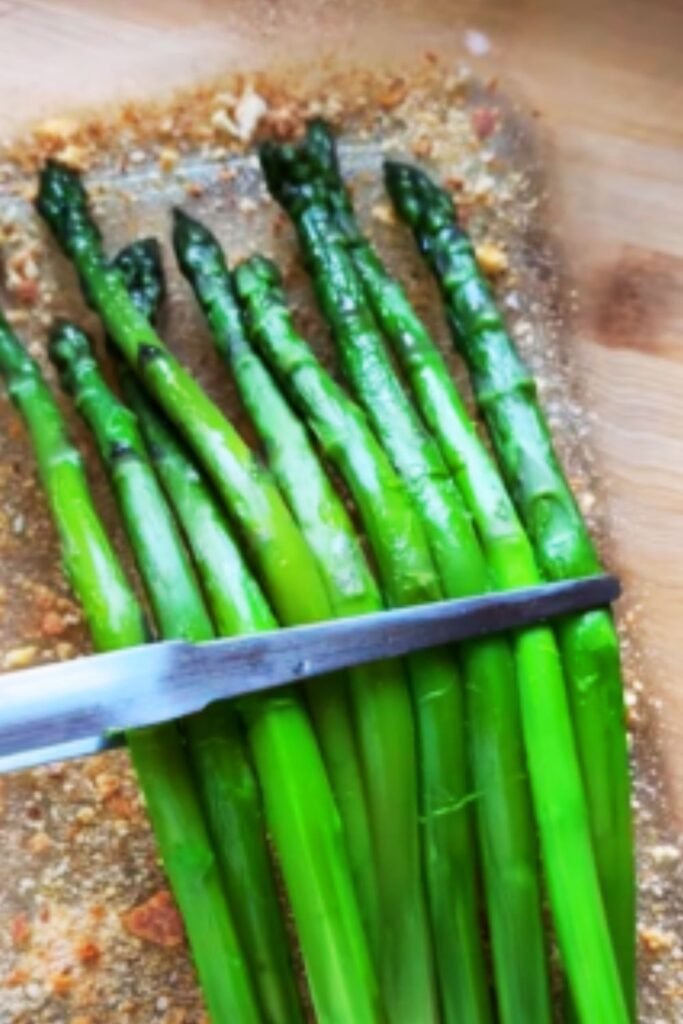
- Trim the woody ends. I find the natural snap method most reliable: hold each spear between your hands and bend until it breaks naturally. The spear will break exactly where the tough woody part ends and the tender edible portion begins. Alternatively, you can cut approximately 1-1.5 inches from the bottom of each spear.
- Pat the asparagus completely dry with clean kitchen towels or paper towels. Excess moisture will prevent proper browning.
Step 2: Season the Asparagus
The seasoning layer provides the foundation of flavor:
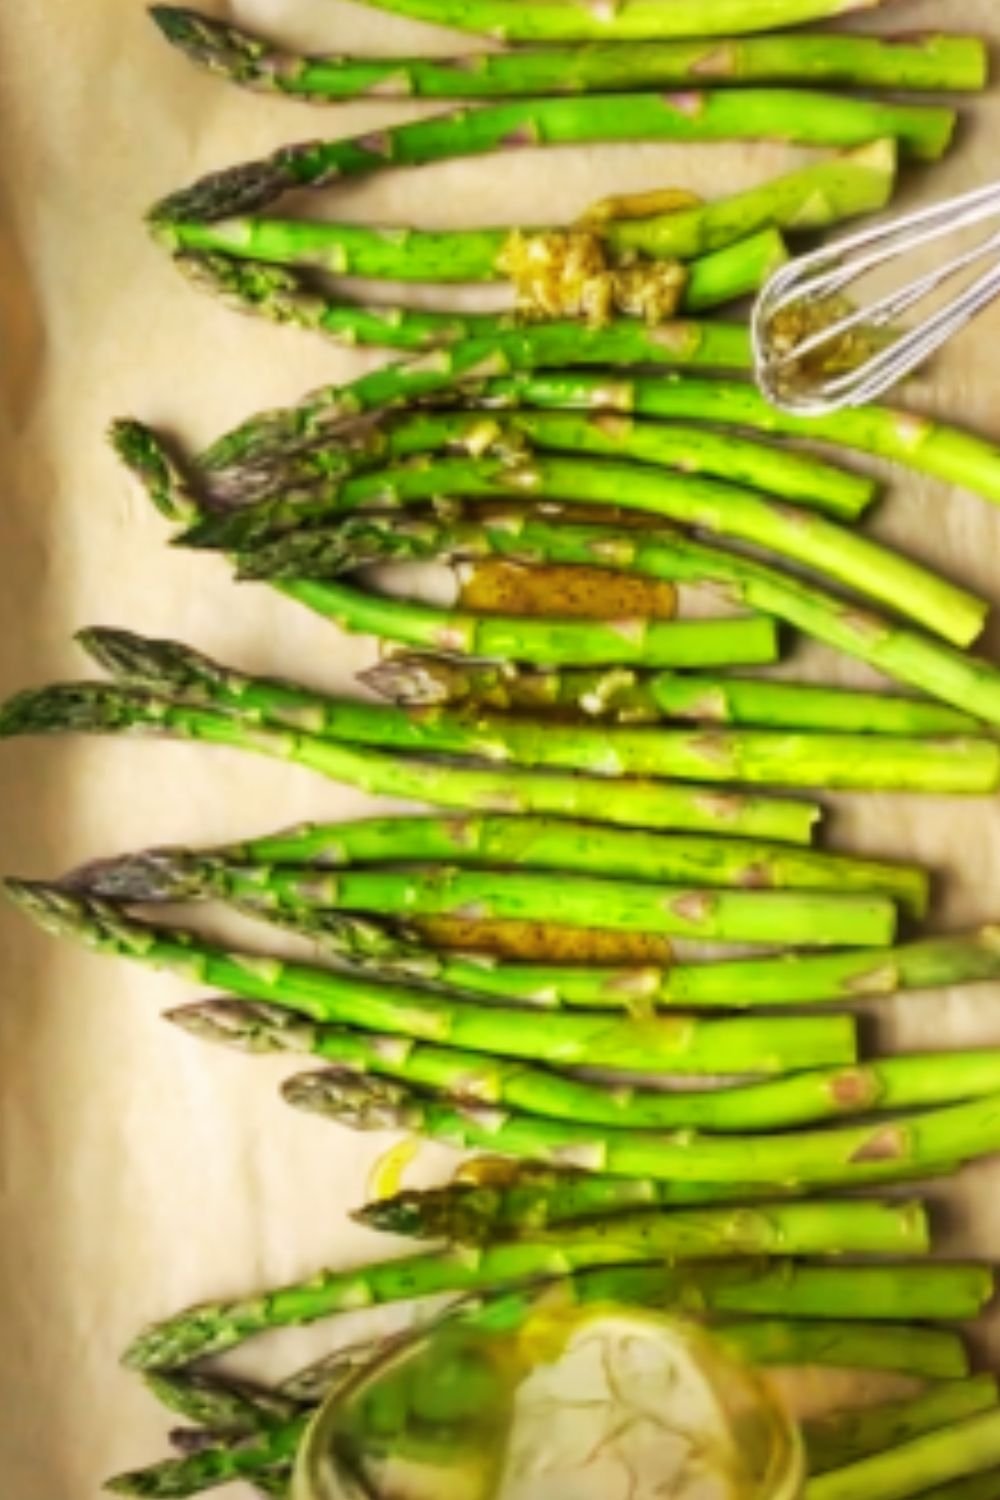
- Arrange the trimmed asparagus in a single layer on your prepared baking sheet.
- Drizzle the olive oil evenly over the asparagus.
- Sprinkle with minced garlic, salt, and pepper.
- Using clean hands, gently toss everything together until the asparagus is evenly coated. I make sure to distribute the garlic pieces so they don’t cluster in one area.
- Rearrange the spears into a single layer again, ensuring they’re not overlapping too much.
Step 3: Initial Roasting
This pre-cheese roasting step is crucial for proper doneness:
- Place the seasoned asparagus in the preheated oven and roast for 8-10 minutes for medium-thickness spears. (Adjust timing: 6-8 minutes for thin spears, 10-12 minutes for thick spears.)
- The asparagus should be partially cooked but still firm – it will continue cooking after you add the cheese.
Step 4: Add the Cheese Mixture
Now for the star of the show – the cheese layer:
- While the asparagus is roasting, combine the Parmesan, mozzarella, and Gruyère (if using) in a bowl with the lemon zest, red pepper flakes, and half of the fresh herbs.
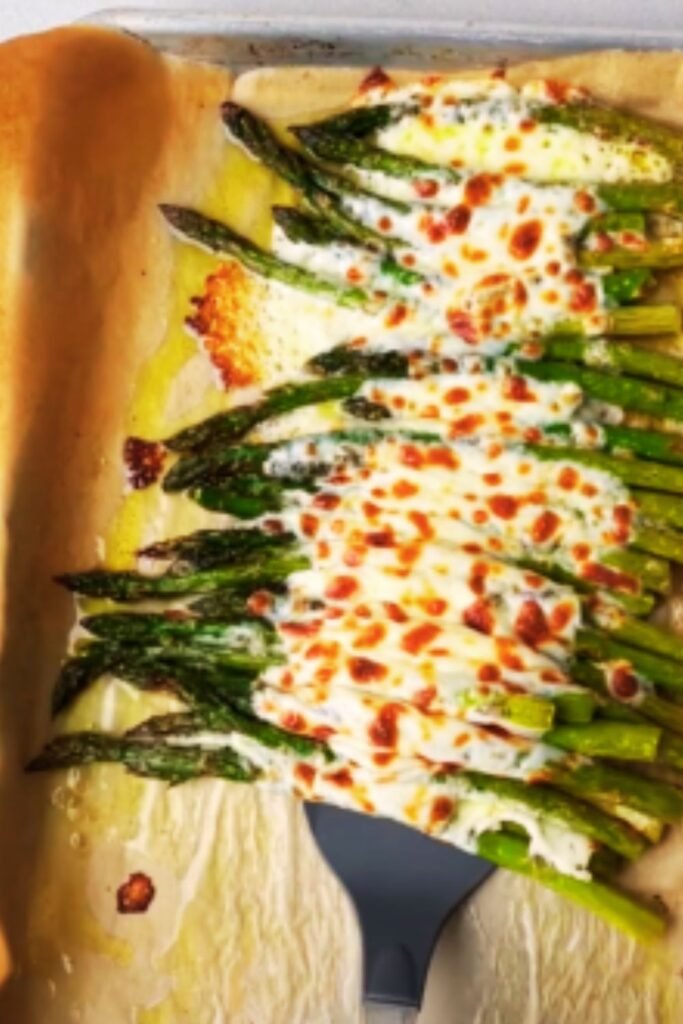
- Remove the partially roasted asparagus from the oven and sprinkle the cheese mixture evenly over the spears.
- Return to the oven and continue baking for another 5-7 minutes, or until the cheese is melted, bubbly, and beginning to brown in spots.
- For an extra golden top, switch to the broiler for the final 1-2 minutes, watching carefully to prevent burning.

Serving Suggestions
I find that cheesy baked asparagus is best served immediately, while the cheese is still warm and gooey. Before serving, I sprinkle the remaining fresh herbs on top and sometimes add a squeeze of fresh lemon juice to brighten the flavors.
This versatile side dish pairs beautifully with a variety of main courses:
- Grilled or roasted chicken
- Pan-seared or baked fish
- Beef tenderloin or prime rib
- Baked ham
- Risotto or pasta dishes
- As part of a vegetarian meal alongside a grain like quinoa or farro
For a complete meal, I often serve it with:
- Garlic mashed potatoes
- Wild rice pilaf
- Crusty artisan bread
- Sparkling water with a twist of citrus
- Iced tea with fresh mint
The dish can also be reimagined as an elegant appetizer by cutting the roasted spears into bite-sized pieces and serving with toothpicks.
Variations to Try
While the classic version is hard to beat, I’ve developed several variations that offer delightful alternatives:
Mediterranean Style
- Use feta cheese instead of mozzarella
- Add halved cherry tomatoes before baking
- Sprinkle with chopped Kalamata olives and fresh oregano after baking
Italian Inspiration
- Top with crispy prosciutto pieces after baking
- Use a combination of fontina and provolone cheeses
- Add sun-dried tomatoes to the cheese mixture
Spicy Kick
- Increase red pepper flakes to ½ teaspoon
- Add a pinch of cayenne to the cheese mixture
- Top with pickled jalapeño slices before adding cheese
Herb Garden Delight
- Double the herbs, using a mixture of thyme, basil, chives, and dill
- Add 1 tablespoon of herb-infused olive oil to the regular olive oil
- Finish with herb-infused finishing salt
Make-Ahead and Storage Tips
While cheesy baked asparagus is at its prime directly from the oven, there are ways to work ahead:
Prep ahead: Trim and season the asparagus up to 24 hours in advance. Store covered in the refrigerator until ready to roast.
Cheese prep: The cheese mixture can be combined and refrigerated up to 2 days ahead.
Leftovers: Store any leftovers in an airtight container in the refrigerator for up to 2 days. The texture will change somewhat, but the flavor remains delicious.
Reheating: For best results, reheat leftovers in a 350°F (175°C) oven for 5-7 minutes until warmed through. Microwave reheating works in a pinch but may make the asparagus softer than ideal.
Nutritional Benefits
One aspect I truly appreciate about this dish is that despite the indulgent cheese, it retains many of asparagus’s impressive nutritional benefits:
| Nutrient | Benefit |
|---|---|
| Folate | Essential for cell growth and DNA formation |
| Vitamin K | Important for bone health and blood clotting |
| Vitamin A | Supports immune function and vision |
| Vitamin C | Antioxidant that helps with immune function |
| Fiber | Promotes digestive health |
| Potassium | Helps maintain healthy blood pressure |
| Antioxidants | Help reduce oxidative stress |
The cheese adds calcium and protein, making this side dish more satiating than plain vegetables. When I’m watching my calorie intake, I simply adjust the cheese quantity without sacrificing the overall experience.
Seasonal Considerations
Asparagus season typically runs from February through June, with April being the peak month in many regions. During this time, I take full advantage of the fresher, more affordable spears.
In spring, when asparagus is at its most tender, I sometimes reduce the initial roasting time by a minute or two. Conversely, off-season asparagus might benefit from an extra minute of cooking.
The beauty of this recipe is its adaptability throughout the year. In winter, when fresh herbs might be less available, I substitute dried herbs (using about one-third the amount) and add them directly to the cheese mixture rather than as a garnish.
Troubleshooting Common Issues
Even experienced cooks occasionally encounter challenges. Here are solutions to common problems with cheesy baked asparagus:
Problem: Asparagus turns out stringy or tough Solution: The spears were likely too mature or not trimmed sufficiently. Be generous with trimming the woody ends, and consider peeling the lower portions of very thick stems.
Problem: Cheese browns too quickly before asparagus is tender Solution: Extend the initial roasting time before adding cheese, or lower the oven temperature to 400°F and extend the cooking time accordingly.
Problem: Cheese doesn’t brown properly Solution: Use the broiler for the final 1-2 minutes, or consider using a cheese with higher fat content that browns more readily.
Problem: Asparagus becomes too soft and mushy Solution: Reduce the overall cooking time, especially the initial roasting phase. Remember that the asparagus continues to cook while the cheese melts.
Problem: Garlic burns and tastes bitter Solution: Mix the minced garlic with the olive oil before applying to the asparagus, or add the garlic halfway through the initial roasting time.
Why I Love This Recipe
I’ve prepared asparagus countless ways over the years, but this cheesy baked version continues to be requested by family and friends. What I appreciate most is how it transforms a simple vegetable into something special without requiring complicated techniques or extensive preparation time.
The contrast between the slightly crisp tips of the asparagus and the tender stalks beneath the blanket of gooey cheese creates a textural experience that elevates the entire meal. The bright green color peeking through the golden cheese makes for a visually appealing presentation that always impresses guests.
Most importantly, this recipe strikes the perfect balance between wholesome and indulgent – substantial enough to satisfy comfort food cravings while still delivering the benefits of fresh vegetables.
Frequently Asked Questions
Q: Can I use frozen asparagus for this recipe? While fresh asparagus provides the best texture and flavor, you can use frozen in a pinch. Thaw completely and pat very dry before proceeding with the recipe. Reduce the initial roasting time by about 2 minutes since frozen asparagus is partially cooked.
Q: What’s the best cheese substitute for a lactose-free version? For those avoiding dairy, several plant-based cheese alternatives work well. Look for those specifically designed to melt, such as cashew-based or almond-based varieties. Nutritional yeast (about 2 tablespoons) can also provide a cheesy flavor profile.
Q: How can I tell when the asparagus is perfectly cooked? Perfectly cooked asparagus should be tender when pierced with a fork but still offer slight resistance. It should maintain its bright green color and not appear limp. When you pick up a spear with tongs, it should bend slightly but not droop completely.
Q: Can I make this recipe ahead for a dinner party? For the freshest result, complete the first roasting step ahead of time, then add the cheese and finish baking just before serving. The partially roasted asparagus can wait at room temperature for up to an hour before the final cheese step.
Q: How do I avoid soggy asparagus? Three key factors prevent sogginess: thoroughly drying the asparagus after washing, using high heat for roasting, and arranging the spears in a single layer with some space between them to allow moisture to evaporate.
Q: What other vegetables work well with this cheese treatment? This cheese topping works beautifully on broccoli, cauliflower, Brussels sprouts, and zucchini. The cooking times will vary depending on the vegetable, but the technique remains the same.
Q: Is there a way to make this dish healthier? Absolutely! Reduce the cheese by half and increase the herbs and lemon zest to maintain flavor complexity. You can also use part-skim mozzarella and reduce the olive oil to 1 tablespoon.
Q: My children don’t like asparagus. Any tips to make this more kid-friendly? In my experience, the cheese component already helps win over reluctant vegetable eaters. For particularly selective children, try cutting the asparagus into bite-sized pieces before roasting and consider adding a tablespoon of honey to the olive oil mixture for a subtle sweetness that often appeals to younger palates.
Final Thoughts
My journey with this cheesy baked asparagus recipe has spanned many seasons and special occasions. What began as a simple way to make vegetables more appealing has become a signature dish that connects my family around the table.
I encourage you to make this recipe your own by adjusting the seasonings and cheeses to suit your taste preferences. The fundamental technique – properly preparing the asparagus, seasoning well, roasting at high heat, and finishing with quality cheese – creates a framework for endless personalization.
Whether you’re preparing a holiday feast, a dinner party menu, or simply Tuesday night dinner, this versatile side dish delivers impressive results with minimal effort. I hope it becomes a favorite in your kitchen, just as it has in mine.