Who doesn’t love a plate of crispy, flavorful chicken wings? I’ve been perfecting my baked chicken wing recipe for years, and I’m excited to share all my secrets with you today. Forget about deep-frying—baking wings gives you that perfect crispiness without the mess or extra calories from oil. Whether you’re preparing for game day, planning a casual get-together, or simply craving some finger-licking goodness for dinner, these baked chicken wings will not disappoint.
Why Baked Wings Are Better Than Fried
When I first started making wings at home, I automatically reached for my deep fryer. It seemed like the only way to achieve that restaurant-quality crispiness. But after countless batches and experiments, I’ve found that baked wings can be even better than their fried counterparts. Here’s why:
- Healthier option: Significantly less oil means fewer calories without sacrificing flavor
- Crispier skin: When baked properly, the skin renders its fat naturally and becomes incredibly crispy
- Less mess: No splattered oil to clean up afterward
- Easier to make in large batches: Your oven can handle more wings than a typical fryer
- More consistent results: Even cooking temperature throughout the oven
The secret to achieving that perfect crispiness in the oven comes down to a few key techniques that I’ll share with you. Trust me—once you try these, you’ll never go back to fried wings again!
The Science Behind Crispy Baked Wings
Getting truly crispy skin on baked wings isn’t just about cranking up the oven temperature. There’s actually some food science at work here. The key is moisture management. For wings to crisp up properly, we need to:
- Remove excess moisture from the skin
- Render the subcutaneous fat
- Create the perfect environment for the Maillard reaction (that’s what gives us the golden-brown color and deep flavor)
A combination of proper preparation, the right oven temperature, and a few secret ingredients makes all this possible. I’ll walk you through each step to ensure perfect results.
Essential Ingredients
Here’s what you’ll need to make my ultimate baked chicken wings:
| Ingredient | Amount | Notes |
|---|---|---|
| Chicken wings | 2 pounds (about 20-24 wings) | Fresh or thawed frozen wings |
| Baking powder (NOT baking soda) | 2 tablespoons | The secret ingredient for crispy skin |
| Salt | 1 teaspoon | Kosher salt works best |
| Black pepper | 1/2 teaspoon | Freshly ground if possible |
| Garlic powder | 1 teaspoon | Optional but recommended |
| Onion powder | 1 teaspoon | Optional but adds great flavor |
| Paprika | 1 teaspoon | Adds color and mild flavor |
| Aluminum foil | Enough to line baking sheet | For easier cleanup |
| Wire rack | To fit baking sheet | Elevates wings for better air circulation |
Equipment You’ll Need
Before we dive into the preparation, let’s make sure you have the right tools on hand:
| Equipment | Purpose |
|---|---|
| Large mixing bowl | For tossing wings with seasonings |
| Baking sheet | Heavy-duty preferred for even heating |
| Wire cooling rack | Allows air to circulate around the wings |
| Paper towels | For patting wings dry |
| Tongs | For flipping and handling hot wings |
| Meat thermometer | Optional but helpful for food safety |
| Large serving platter | For the finished wings |
| Small bowls | For serving sauces and dips |
Preparation: The Key to Success
I’ve learned that proper preparation is crucial for achieving crispy baked wings. Follow these steps carefully:
- Pat the wings dry: This might seem tedious, but it’s essential. Remove the wings from their packaging and pat them thoroughly dry with paper towels. The drier the wings, the crispier they’ll get.
- Separate the wings: If your wings haven’t been separated yet, cut them at the joint to separate the drumette from the flat. You can also remove the wing tip (save these for making chicken stock!).
- The overnight trick: For next-level crispiness, place the wings on a wire rack over a baking sheet and let them sit uncovered in the refrigerator overnight. This allows the skin to dry out further.
- The baking powder mix: Combine the baking powder, salt, pepper, and any other seasonings in a large bowl. The baking powder is slightly alkaline and helps break down proteins in the chicken skin, leading to extra crispiness.
- Coat the wings: Add the dried wings to the baking powder mixture and toss until evenly coated. Make sure every wing is lightly dusted with the mixture.

The Baking Process
Now that your wings are prepared, it’s time to bake them to crispy perfection:
Step-by-Step Baking Instructions
- Preheat your oven: Set your oven to 250°F (120°C). We’ll start low and slow to render the fat before crisping the skin.
- Prepare your baking sheet: Line a baking sheet with aluminum foil and place a wire rack on top. Spray the rack lightly with cooking spray to prevent sticking.
- Arrange the wings: Place the wings on the rack, making sure they’re not touching. This ensures air can circulate freely around each wing.
- Initial baking: Bake the wings at 250°F for 30 minutes. This helps render the fat under the skin without crisping the exterior yet.
- Increase the temperature: Without removing the wings, increase the oven temperature to 425°F (220°C).
- Finish baking: Continue baking for another 40-50 minutes, flipping the wings halfway through. The wings should be golden brown and crispy when done.
- Check for doneness: Wings should reach an internal temperature of 165°F (74°C). The skin should be crispy and golden, and the meat should pull easily from the bone.
- Rest briefly: Let the wings rest for 5 minutes before tossing in sauce or serving.
Here’s a detailed baking temperature and time chart for reference:
| Stage | Temperature | Time | Purpose |
|---|---|---|---|
| Initial baking | 250°F (120°C) | 30 minutes | Rendering fat from skin |
| Final baking | 425°F (220°C) | 40-50 minutes | Crisping the skin |
| Rest period | Room temperature | 5 minutes | Allows juices to redistribute |
Essential Tips for Perfect Wings
Over the years, I’ve discovered a few game-changing tips that make all the difference:
- Don’t crowd the pan: Wings need space around them for proper air circulation. If you’re making a large batch, use multiple baking sheets rather than crowding them onto one.
- Flip them halfway: For even crispiness, be sure to flip the wings halfway through the high-temperature baking phase.
- The baking powder must be aluminum-free: Some people can detect a metallic taste if you use baking powder with aluminum. Look for aluminum-free varieties if you’re sensitive to this.
- Don’t confuse baking powder with baking soda: This is a critical mistake! Baking soda will make your wings inedible and bitter. Double-check that you’re using baking POWDER.
- Add sauce after baking: For maximum crispiness, toss the wings in sauce after they’re fully baked. If you sauce them before or during baking, they won’t get as crispy.
- Use a thermometer: Until you’re confident in your wing-baking skills, use a meat thermometer to ensure they reach 165°F (74°C) for food safety.
Flavor Variations: Dry Rubs
One of my favorite things about making wings at home is experimenting with different flavors. Here are some of my favorite dry rubs to apply before baking:
Classic Buffalo Dry Rub
| Ingredient | Amount |
|---|---|
| Paprika | 2 tablespoons |
| Cayenne pepper | 1-2 teaspoons (adjust for heat preference) |
| Garlic powder | 1 tablespoon |
| Onion powder | 1 tablespoon |
| Salt | 1 teaspoon |
| Black pepper | 1 teaspoon |
Lemon Pepper
| Ingredient | Amount |
|---|---|
| Lemon pepper seasoning | 3 tablespoons |
| Lemon zest | From 2 lemons |
| Garlic powder | 1 teaspoon |
| Salt | 1/2 teaspoon |
Sweet and Smoky BBQ Rub
| Ingredient | Amount |
|---|---|
| Brown sugar | 2 tablespoons |
| Smoked paprika | 1 tablespoon |
| Garlic powder | 1 teaspoon |
| Onion powder | 1 teaspoon |
| Mustard powder | 1 teaspoon |
| Salt | 1 teaspoon |
| Black pepper | 1 teaspoon |
| Cayenne pepper | 1/4 teaspoon |
Jamaican Jerk
| Ingredient | Amount |
|---|---|
| Allspice, ground | 1 tablespoon |
| Thyme, dried | 1 tablespoon |
| Brown sugar | 1 tablespoon |
| Garlic powder | 1 teaspoon |
| Onion powder | 1 teaspoon |
| Cinnamon | 1/4 teaspoon |
| Nutmeg | 1/4 teaspoon |
| Cayenne pepper | 1/2 teaspoon |
| Salt | 1 teaspoon |
| Black pepper | 1 teaspoon |

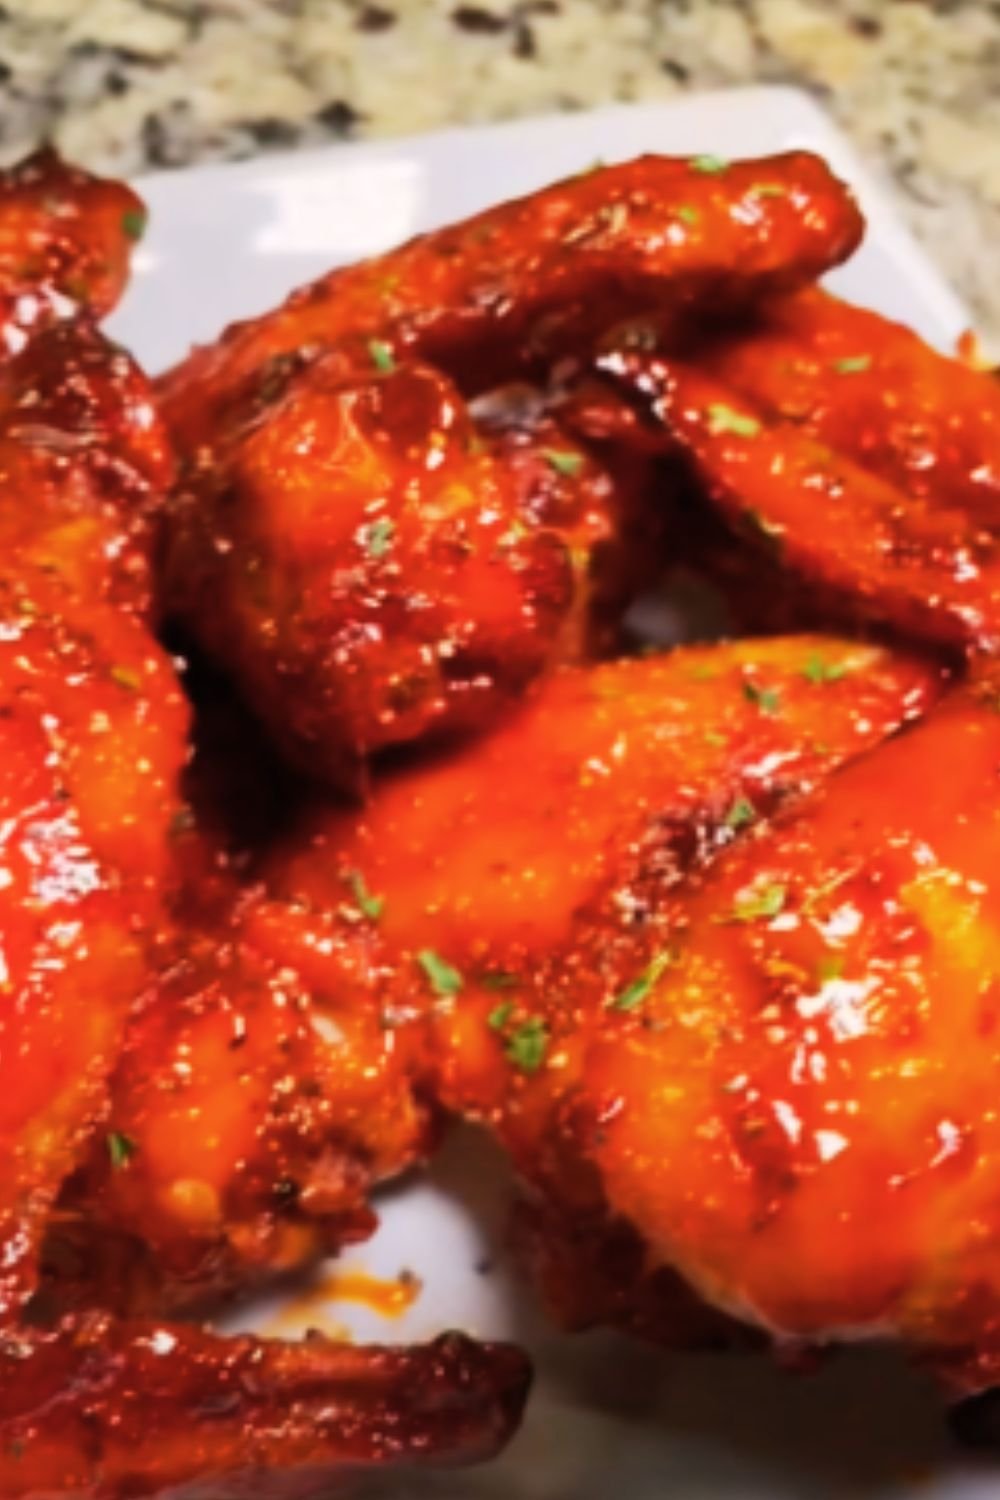
Sauces Worth Trying
If you prefer saucy wings over dry-rubbed ones, here are some delicious options to toss your wings in after baking:
Classic Buffalo Sauce
| Ingredient | Amount |
|---|---|
| Hot sauce (Frank’s RedHot recommended) | 1/2 cup |
| Unsalted butter | 4 tablespoons |
| White vinegar | 1 tablespoon |
| Worcestershire sauce | 1 teaspoon |
| Garlic powder | 1/2 teaspoon |
| Salt | Pinch |
Instructions: Melt butter in a small saucepan over medium heat. Add remaining ingredients and whisk until combined. Bring to a simmer, then remove from heat.
Honey Garlic Sauce
| Ingredient | Amount |
|---|---|
| Honey | 1/3 cup |
| Soy sauce | 1/4 cup |
| Garlic, minced | 4 cloves |
| Ginger, grated | 1 teaspoon |
| Red pepper flakes | 1/2 teaspoon |
| Cornstarch | 1 teaspoon |
| Water | 1 tablespoon |
Instructions: Mix cornstarch and water in a small bowl. Combine remaining ingredients in a saucepan over medium heat. When mixture begins to simmer, add cornstarch slurry and cook until thickened, about 1-2 minutes.
Korean-Style Sauce
| Ingredient | Amount |
|---|---|
| Gochujang (Korean chili paste) | 2 tablespoons |
| Soy sauce | 2 tablespoons |
| Rice vinegar | 1 tablespoon |
| Honey | 3 tablespoons |
| Sesame oil | 1 teaspoon |
| Garlic, minced | 2 cloves |
| Ginger, grated | 1 teaspoon |
| Green onions, sliced | 2 tablespoons |
| Toasted sesame seeds | 1 tablespoon |
Instructions: Combine all ingredients except green onions and sesame seeds in a small saucepan. Simmer over medium heat for 5 minutes. Remove from heat, then stir in green onions and sesame seeds.
Garlic Parmesan Sauce
| Ingredient | Amount |
|---|---|
| Butter | 4 tablespoons |
| Olive oil | 2 tablespoons |
| Garlic, minced | 4-6 cloves |
| Italian seasoning | 1 teaspoon |
| Red pepper flakes | 1/2 teaspoon (optional) |
| Parmesan cheese, grated | 1/2 cup |
| Fresh parsley, chopped | 2 tablespoons |
| Salt and pepper | To taste |
Instructions: Melt butter with olive oil in a small saucepan. Add garlic and sauté until fragrant. Add remaining ingredients except parmesan and parsley. Remove from heat, then stir in parmesan and parsley.
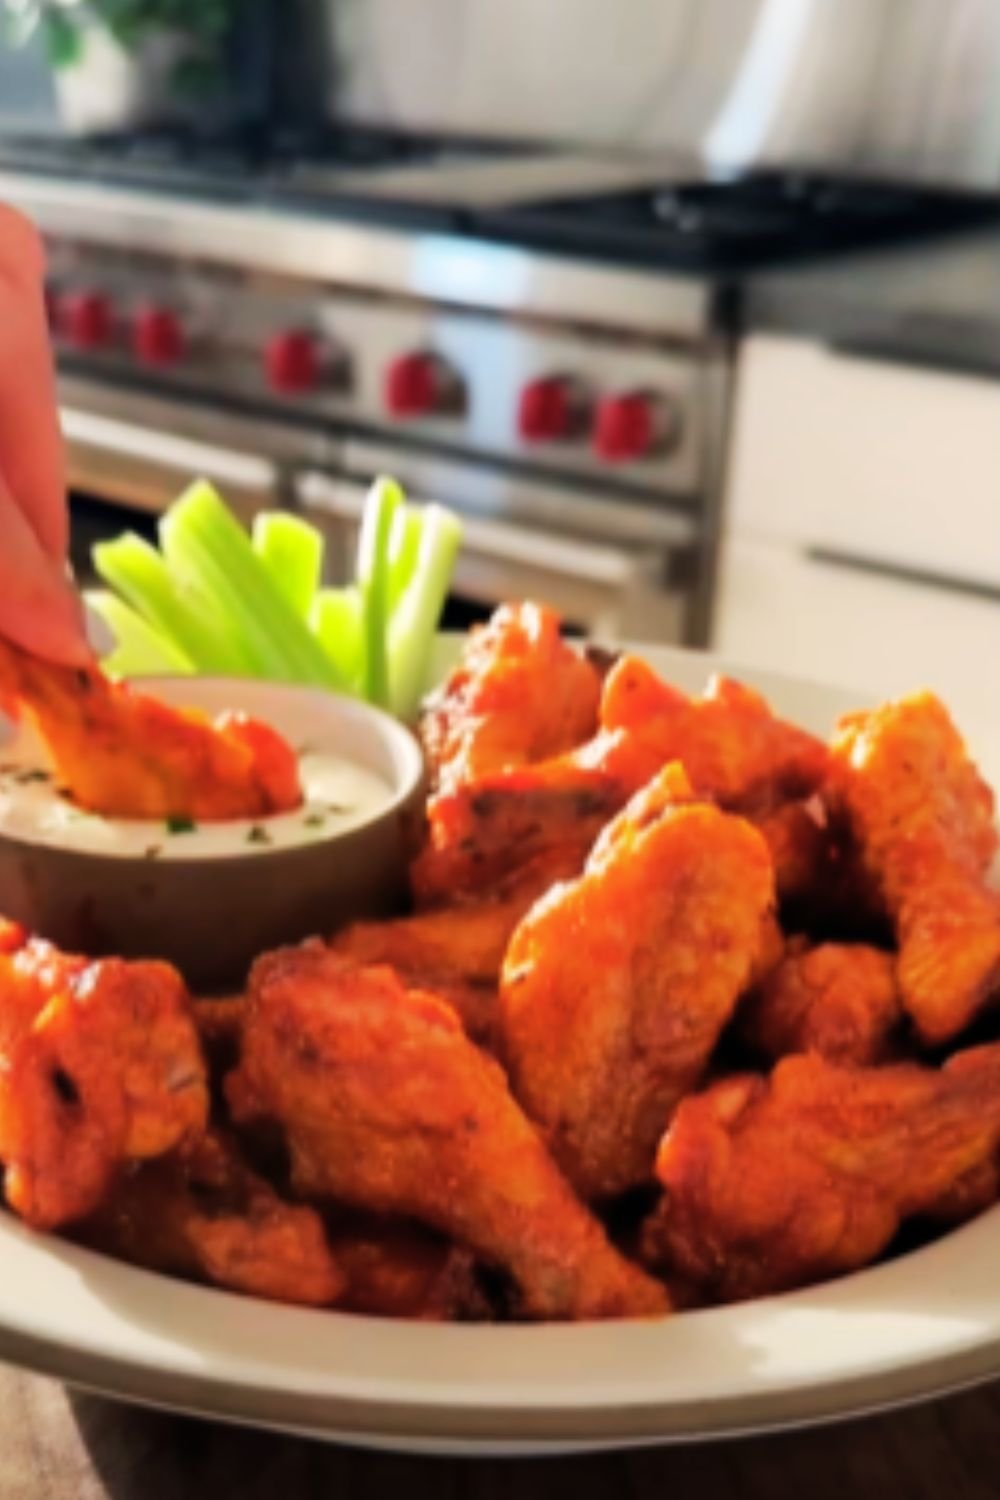
Serving Suggestions
Now that you’ve made perfect baked chicken wings, here are some ideas for serving them:
Dipping Sauces
Offer a variety of dipping sauces for an interactive experience:
- Blue cheese dressing
- Ranch dressing
- Honey mustard
- Additional buffalo sauce
Side Dishes
Complete your wing meal with these complementary sides:
- Celery and carrot sticks (the classic accompaniment)
- Potato wedges or fries
- Coleslaw
- Corn on the cob
- Garden salad
- Macaroni and cheese
Presentation Ideas
- Serve on a large platter lined with parchment paper
- Separate different flavors into sections if serving a variety
- Garnish with fresh herbs, lemon wedges, or sesame seeds depending on your flavor profile
- Provide plenty of napkins and possibly wet wipes for cleanup

Storage and Reheating
Made too many wings? Here’s how to store and reheat them properly:
Refrigeration
- Store leftover wings in an airtight container in the refrigerator for up to 3-4 days.
- Keep sauced and unsauced wings separate if possible.
Freezing
- Freeze cooked wings by placing them on a baking sheet until solid, then transfer to a freezer bag.
- They’ll keep well for up to 3 months.
- Label with the date and flavor for easy identification.
Reheating Methods
For the best results when reheating, follow these methods:
| Method | Temperature | Time | Notes |
|---|---|---|---|
| Oven | 350°F (175°C) | 10-15 minutes | Best for preserving crispiness |
| Air fryer | 370°F (188°C) | 5-7 minutes | Quick and excellent for restoring crispiness |
| Microwave | High | 1-2 minutes | Quickest method but wings may be soggy |
| Toaster oven | 350°F (175°C) | 8-10 minutes | Good option for small batches |
Pro tip: If using the oven or air fryer method, spritz the wings with a little oil before reheating to help restore crispiness.
Nutritional Information
For those keeping track of their nutritional intake, here’s an approximate breakdown for plain baked chicken wings (per 4-wing serving, without sauce):
| Nutrient | Amount |
|---|---|
| Calories | 320 |
| Protein | 27g |
| Fat | 24g |
| Saturated Fat | 7g |
| Carbohydrates | 0g |
| Sodium | 550mg |
| Cholesterol | 125mg |
Note that these values will change depending on the dry rubs or sauces you use.
Troubleshooting Common Issues
Even with the best recipe, things can sometimes go wrong. Here are solutions to common wing problems:
Wings Not Crispy Enough
Possible causes and solutions:
- Wings weren’t dried thoroughly: Pat them completely dry before applying baking powder mixture.
- Oven temperature too low: Verify your oven temperature with an oven thermometer.
- Wings were crowded on the baking sheet: Give them more space.
- Not enough baking powder: Make sure each wing is evenly coated.
Wings Too Dry
Possible causes and solutions:
- Overcooked: Reduce cooking time or use a meat thermometer to check for doneness.
- Wings were small: Smaller wings require less cooking time.
- Using previously frozen wings without adjusting cooking time: Thawed frozen wings may cook more quickly.
Baking Powder Taste
Possible causes and solutions:
- Too much baking powder: Use only enough to lightly coat the wings.
- Used baking powder with aluminum: Switch to aluminum-free baking powder.
- Didn’t rinse wings: Make sure wings are patted dry but not rinsed after the baking powder coating.
Q&A Section
Based on the questions I frequently receive about baked chicken wings, here are some helpful answers:
Q: Can I use frozen wings for this recipe? Yes, but you need to thaw them completely first and pat them very dry. Frozen wings contain excess moisture that can prevent the skin from crisping up properly.
Q: Why do I need to use baking powder? Baking powder is slightly alkaline and helps break down the proteins in the chicken skin, allowing it to crisp up more effectively in the oven. It’s the secret to achieving that fried-like texture without actually frying.
Q: Is it necessary to use a wire rack, or can I place the wings directly on the baking sheet? While you can place them directly on a baking sheet, using a wire rack allows air to circulate around the entire wing, resulting in crispier skin all around. If you don’t use a rack, make sure to flip the wings more frequently during baking.
Q: How do I know when the wings are done? The wings should reach an internal temperature of 165°F (74°C) when tested with a meat thermometer. Visually, they should be golden brown and crispy, and the meat should pull easily from the bone.
Q: Can I make these wings ahead of time for a party? Yes! You can bake them until they’re almost done, then refrigerate. When ready to serve, finish them in a hot oven (425°F/220°C) for 10-15 minutes until crispy and heated through.
Q: Why the two-temperature baking method? The initial low temperature (250°F/120°C) helps render the fat from under the skin without burning the exterior. The higher temperature (425°F/220°C) then crisps up the skin perfectly.
Q: How many wings should I make per person? For an appetizer or as part of a larger spread, plan for 4-6 wings per person. If they’re the main dish, 8-12 wings per person is a better estimate.
Q: Can I use chicken drumsticks or thighs instead of wings? Yes, but you’ll need to adjust the cooking time. Drumsticks and thighs are larger and will take longer to cook through. The baking powder trick works well on any chicken skin!
My Final Thoughts
After years of experimentation, I’ve found that these baked chicken wings rival any restaurant or deep-fried version. The combination of proper preparation, the two-temperature baking method, and that magic baking powder coating creates wings that are crispy on the outside, juicy on the inside, and absolutely delicious.
What I love most about this method is its versatility. You can adapt the seasonings and sauces to suit any preference or cuisine, making it perfect for family dinners or entertaining guests with diverse tastes. Plus, the reduced mess and healthier preparation make these a practical choice for regular enjoyment.
Remember that practice makes perfect—your first batch might not be absolutely perfect, but each time you make these wings, you’ll get better at judging the exact timing and seasoning levels that work for your oven and your taste preferences.
So grab some napkins, prepare your favorite dipping sauces, and get ready to enjoy some of the best chicken wings you’ve ever made. Your family and friends will be begging for your secret recipe!