There’s something magical about the bright, tangy flavor of homemade lemon curd that just can’t be matched by store-bought versions. I’ve been making this easy lemon curd recipe for years, and it never fails to impress friends and family who can’t believe something so delicious can be made with just a few simple ingredients.
As someone who has made countless batches of lemon curd over the years (and suffered through plenty of failed attempts!), I’m excited to share my foolproof method that produces silky smooth, perfectly balanced lemon curd every single time.
What is Lemon Curd?
Lemon curd is a rich, creamy spread made from lemon juice, zest, sugar, eggs, and butter. It has a smooth, velvety texture and a bright, tangy flavor that balances sweetness with the natural acidity of lemons. While it originated in England as a tea time treat spread on scones, today it’s used in countless desserts around the world.
I like to think of lemon curd as sunshine in a jar – it brings brightness to whatever you pair it with!
Why Make Homemade Lemon Curd?
I used to buy lemon curd from the store until I realized how simple (and economical) it is to make at home. Here’s why I’ll never go back to store-bought:
- Fresher flavor: The vibrant, zesty taste of fresh lemons simply can’t be preserved in jarred products
- No preservatives: Homemade lemon curd contains only natural ingredients
- Customizable: You can adjust the sweetness and tartness to your preference
- Cost-effective: Making your own costs a fraction of store-bought versions
- Impressive gift: Homemade lemon curd in decorative jars makes a thoughtful handmade gift
Ingredients for Perfect Lemon Curd
The beauty of lemon curd lies in its simplicity. You’ll need just five ingredients:
- Fresh lemons: 4-5 medium lemons
- Granulated sugar: 1 cup
- Unsalted butter: 1/2 cup (1 stick), cut into cubes
- Eggs: 4 large eggs
- Salt: 1/8 teaspoon (just a pinch)
Ingredient Notes:
Lemons: You’ll need about 1/2 cup of fresh lemon juice and 2-3 tablespoons of zest. Always use fresh lemons, never bottled juice, for the brightest flavor.
Eggs: Some recipes call for just yolks, but I use whole eggs. This makes the process simpler and gives a perfect consistency.
Butter: I strongly recommend unsalted butter so you can control the salt content. The butter should be cold, cut into small cubes for easier incorporation.
Sugar: Regular granulated sugar works perfectly. I don’t recommend substituting with alternative sweeteners as they can affect the setting properties.
Equipment You’ll Need
Making lemon curd doesn’t require fancy equipment, but these tools will make the process smoother:
- Microplane or zester: For removing just the yellow part of the lemon peel
- Heavy-bottomed saucepan: Distributes heat evenly to prevent scorching
- Whisk: Essential for smooth, lump-free curd
- Heat-resistant bowl: For the ice bath to quickly cool the curd
- Fine-mesh strainer: For the silkiest texture
- Glass jars with lids: For storage
Step-by-Step Instructions
I’ve refined this method over many years to prevent common issues like curdled eggs or grainy texture. Follow these steps carefully for perfect results every time.
1. Prepare Your Ingredients
Before you begin, make sure all ingredients are ready:
- Zest and juice your lemons
- Cut butter into small cubes
- Have eggs at room temperature (place in warm water for 5 minutes if cold)
- Measure out sugar and salt
2. Create the Base Mixture
- In a heavy-bottomed saucepan, whisk together the eggs, sugar, lemon juice, lemon zest, and salt until well combined.
- Place the pan over medium-low heat.
3. Cook to Perfection
This is the most crucial step where patience is key:
- Whisk continuously as the mixture heats up. Don’t increase the heat to speed things up – slow and steady wins the race here.
- After about 5-7 minutes, you’ll notice the mixture beginning to thicken. Keep whisking!
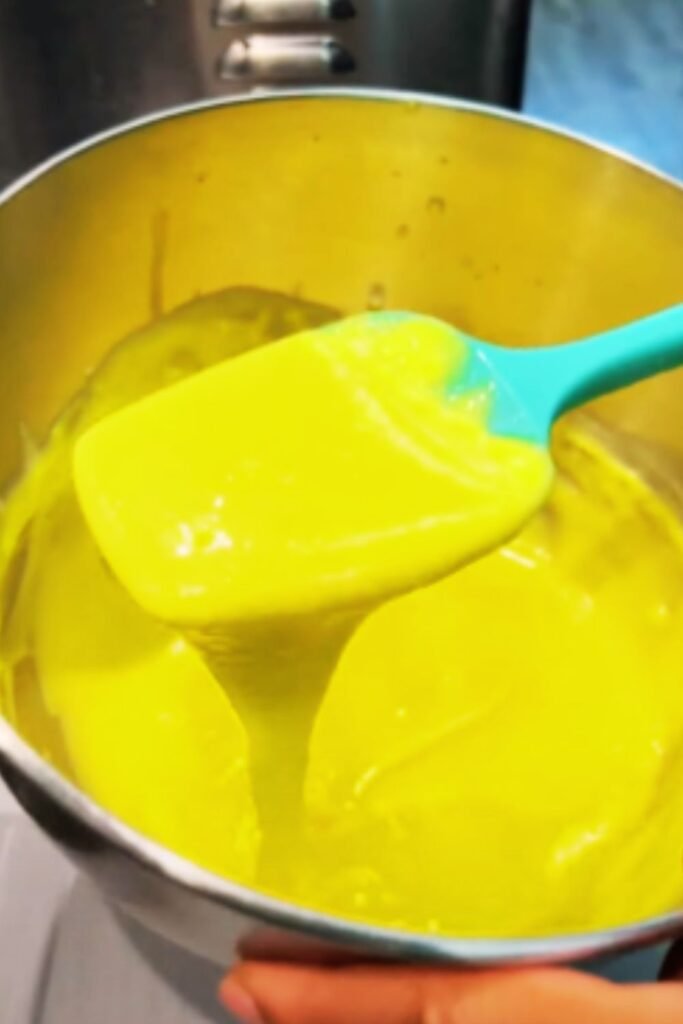
- Continue cooking and whisking until the mixture reaches 170°F (if using a thermometer) or until it’s thick enough to coat the back of a spoon. When you draw your finger across the spoon, it should leave a clear path that doesn’t immediately fill in.
- Remove from heat immediately once thickened to prevent overcooking.
4. Incorporate the Butter
- Add the cold butter cubes a few at a time, whisking after each addition until completely melted and incorporated.
- Continue until all butter is added and the curd is smooth and glossy.
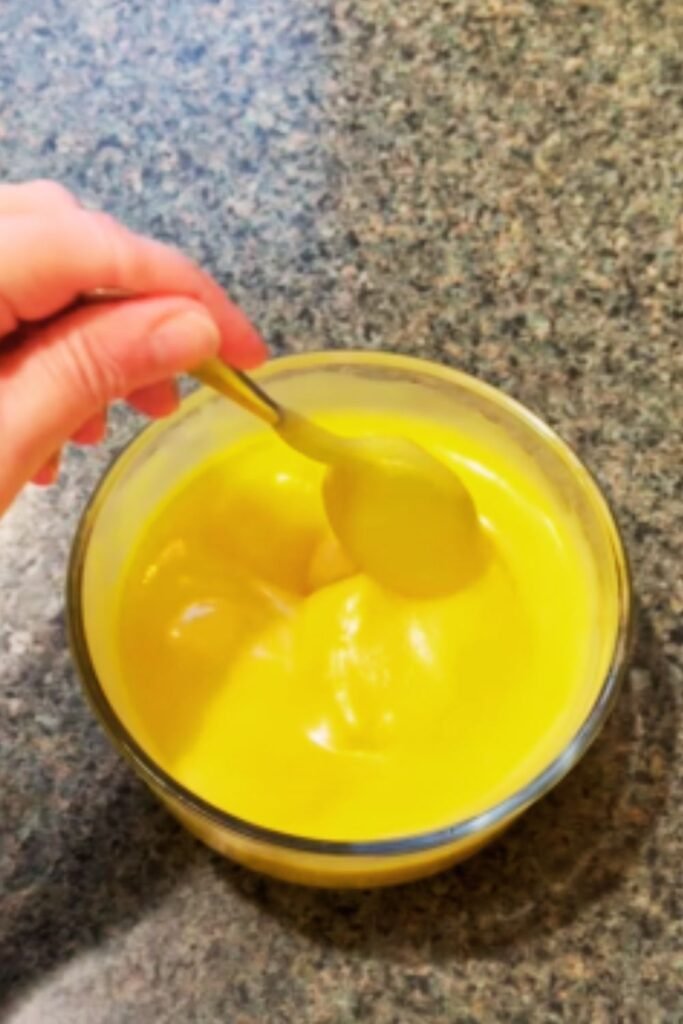
5. Strain and Cool
- Place a fine-mesh strainer over a heat-resistant bowl.
- Pour the hot lemon curd through the strainer to remove any zest and potential egg bits.
- For rapid cooling, place the bowl with strained curd into a larger bowl filled with ice water. Stir occasionally until the curd reaches room temperature.
6. Store Properly
- Transfer the cooled lemon curd to clean glass jars.
- Cover the surface directly with plastic wrap (this prevents a skin from forming) before adding the lid.
- Refrigerate for at least 2 hours before using to allow it to set completely.
Troubleshooting Common Issues
Even experienced bakers encounter problems sometimes. Here’s how to fix common lemon curd mishaps:
| Issue | Possible Cause | Solution |
|---|---|---|
| Curd is too thin | Undercooked | Return to low heat and continue cooking while whisking until thickened |
| Curd has egg lumps | Cooked too quickly or at too high heat | Strain thoroughly and reduce heat next time |
| Grainy texture | Sugar not fully dissolved | Cook more slowly next time, ensuring sugar dissolves completely |
| Metallic taste | Reaction between acidic lemon and metal pan | Use non-reactive cookware (stainless steel, ceramic, or enamel) |
| Curd separated | Overheated or butter added too quickly | Whisk vigorously to recombine or blend briefly |
| Not setting properly | Insufficient egg proteins | Ensure you’re using the correct egg quantity and cooking to proper temperature |
Creative Ways to Use Lemon Curd
My lemon curd never lasts long in our house because there are so many delicious ways to use it:
Breakfast Applications
- Spread on toast, English muffins, or scones
- Swirled into yogurt with fresh berries
- Layered in parfaits with granola
- Dolloped on pancakes or waffles
- Filled into crepes with a dusting of powdered sugar
Dessert Possibilities
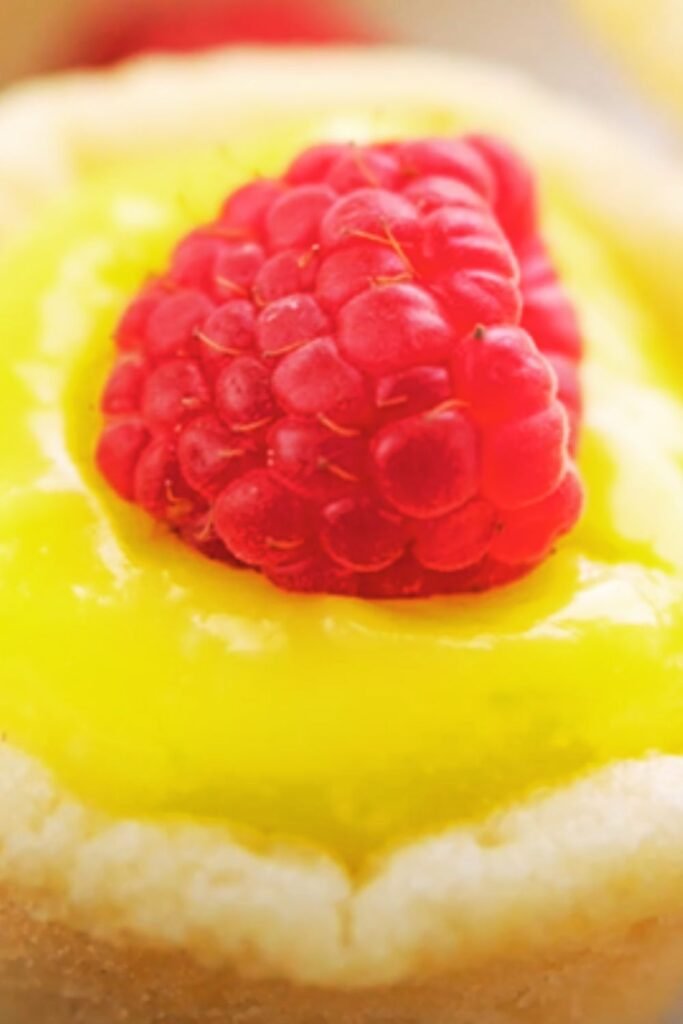
- Filling for tarts, pies, or cake layers
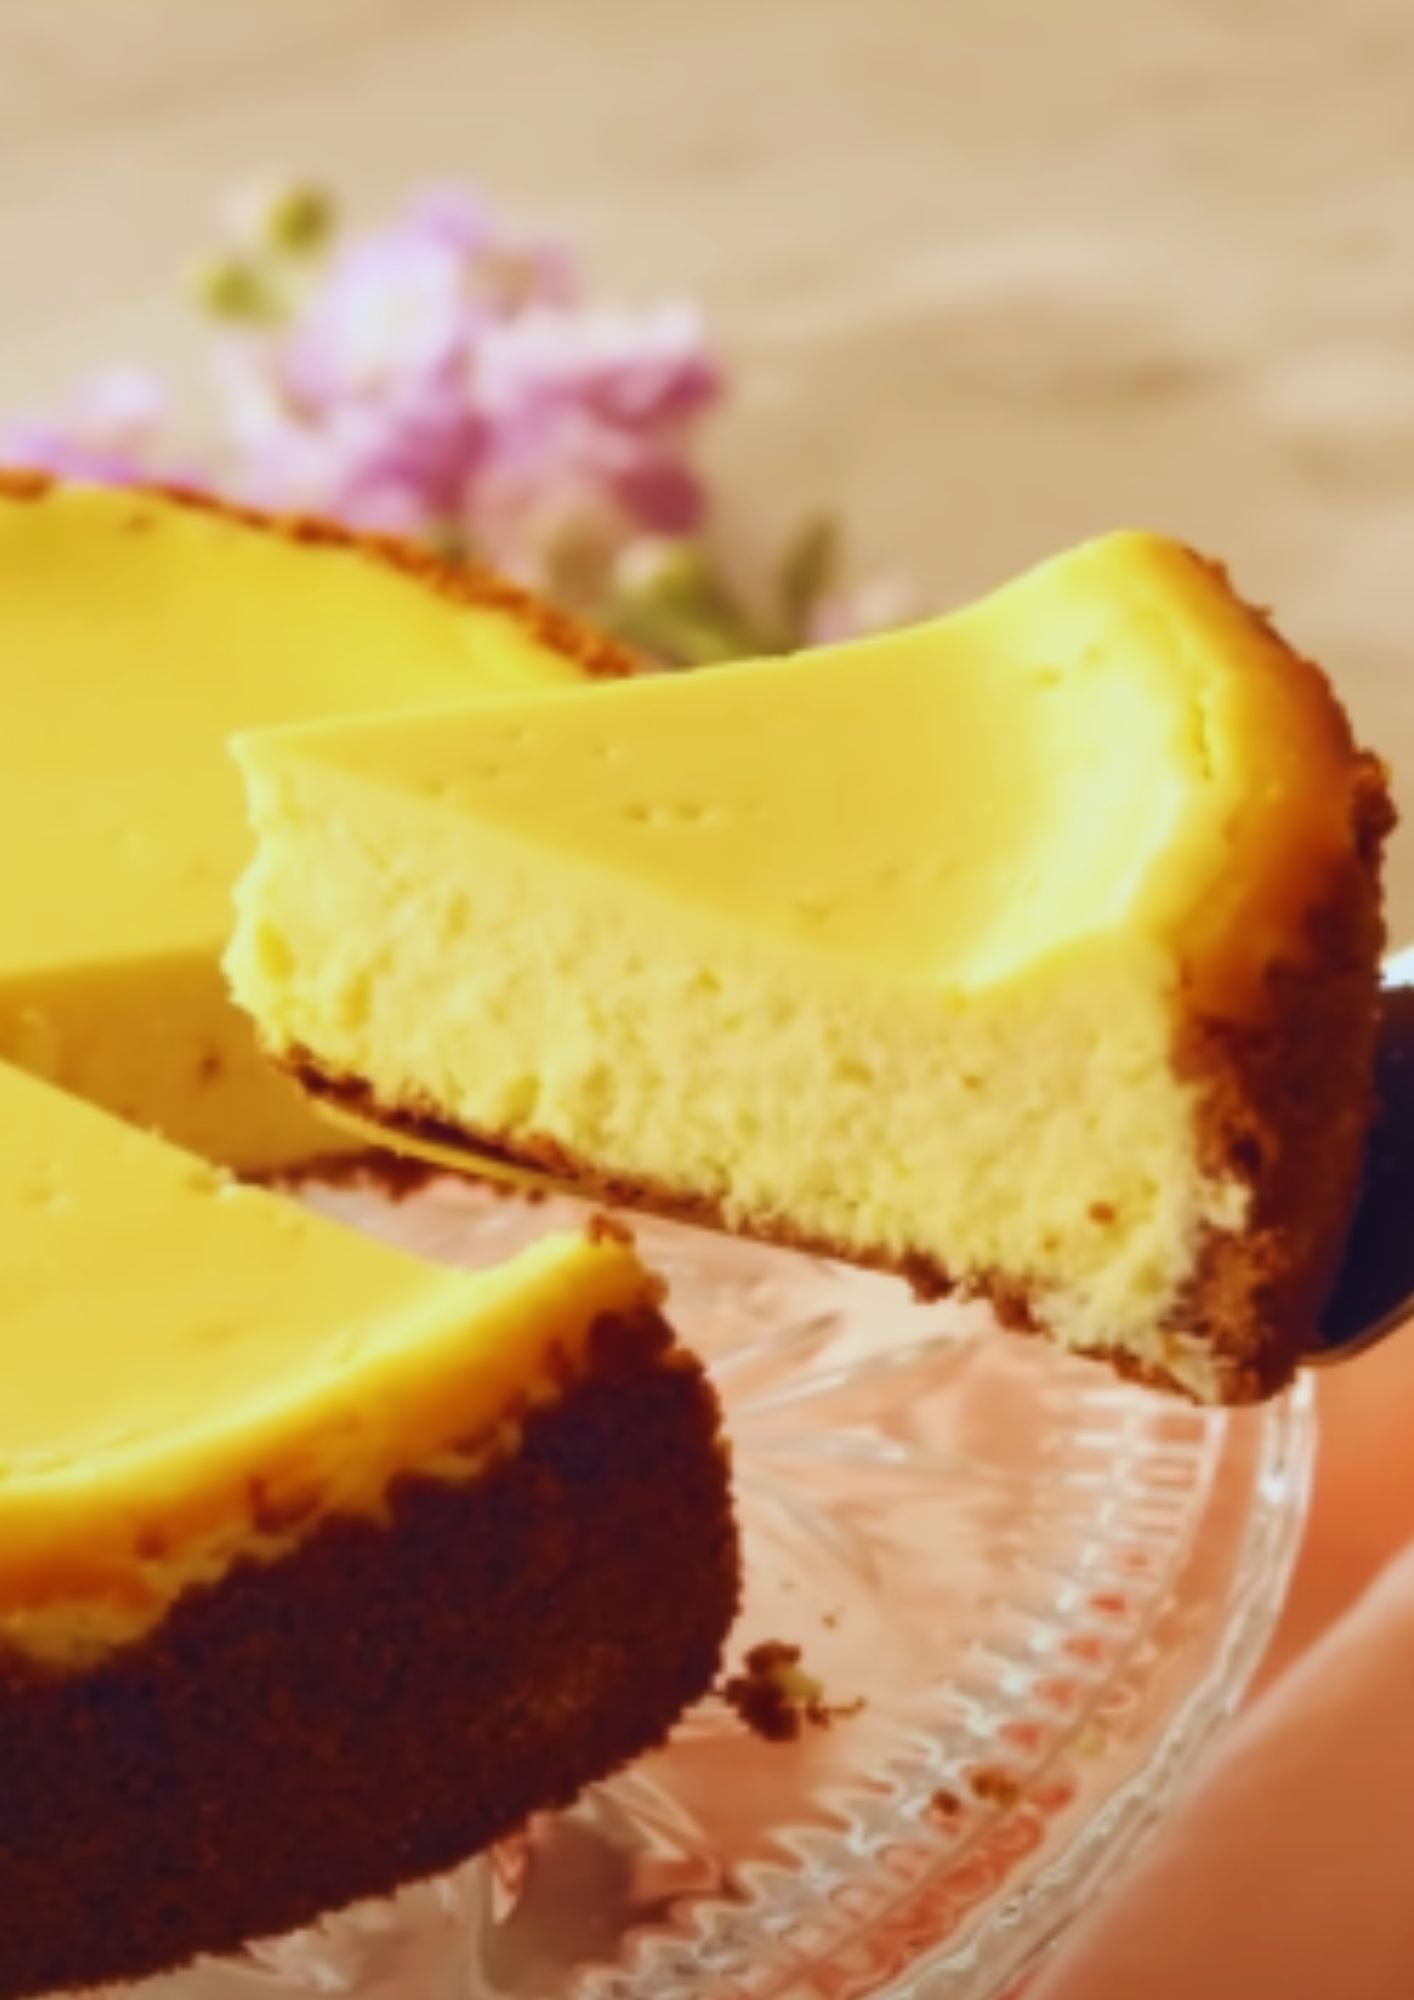
- Topping for cheesecake or pavlova
- Swirled into ice cream base before freezing
- Filling for macarons or sandwich cookies
- Mixed with whipped cream for a quick mousse
- Layered in trifles with pound cake and fresh fruit
Serving Suggestions
- Pair with fresh berries for a beautiful color contrast
- Add a mint leaf garnish for an elegant presentation
- Serve with shortbread cookies for dipping
- Create a dessert board with lemon curd, fresh fruit, and various cookies
Storage and Shelf Life
Proper storage is crucial for maintaining the quality and safety of your homemade lemon curd:
| Storage Method | Temperature | Shelf Life | Notes |
|---|---|---|---|
| Refrigerator | 35-40°F | 1-2 weeks | Store in airtight container with plastic wrap touching surface |
| Freezer | 0°F or below | Up to 3 months | Freeze in small portions for easier thawing |
| Canning | Room temp (then refrigerate after opening) | Up to 3 months unopened | Requires proper water bath canning technique |
When freezing lemon curd, leave about 1/2 inch headspace in containers as it will expand slightly. Thaw overnight in the refrigerator before using.
Variations to Try
Once you’ve mastered this basic recipe, try these delicious variations:
Herb-Infused Lemon Curd
Add 1-2 sprigs of fresh thyme, rosemary, or lavender to the lemon juice and let steep for 30 minutes before straining and proceeding with the recipe.
Extra-Zingy Lemon Curd
Double the lemon zest for an even more intense lemon flavor.
Honey Lemon Curd
Replace half the sugar with high-quality honey for a more complex sweetness (note: this may slightly alter the texture).
Meyer Lemon Curd
When in season, substitute Meyer lemons for regular lemons for a softer, slightly sweeter and more floral flavor profile.
Citrus Blend Curd
Create a mixed citrus curd by using a combination of lemon, lime, and orange juices (maintaining the same total volume).
Nutritional Information
For those tracking dietary information, here’s the approximate nutritional content per 2-tablespoon serving:
| Nutrient | Amount |
|---|---|
| Calories | 90 |
| Total Fat | 6g |
| Saturated Fat | 3.5g |
| Cholesterol | 55mg |
| Sodium | 20mg |
| Total Carbohydrate | 9g |
| Sugar | 8g |
| Protein | 1g |
This lemon curd is naturally gluten-free and vegetarian.
Questions & Answers
How do I know when my lemon curd is done cooking?
The lemon curd is done when it’s thick enough to coat the back of a spoon and when you draw your finger across, it leaves a clear path. If you’re using a thermometer, it should reach 170°F. Remember that the curd will continue to thicken as it cools.
Can I use bottled lemon juice instead of fresh?
I strongly recommend against using bottled lemon juice. Fresh lemons provide both juice and essential oils from the zest, giving that vibrant, authentic flavor that makes homemade lemon curd special. Bottled juice often has preservatives and a flat, less complex flavor.
Why did my lemon curd curdle?
Curdling typically happens when eggs are cooked too quickly or at too high a temperature. Always use medium-low heat and whisk constantly. If you notice any signs of curdling, immediately remove from heat and strain through a fine-mesh sieve.
Is it possible to make lemon curd without eggs?
Traditional lemon curd requires eggs for thickening and richness. There are vegan alternatives using cornstarch or agar-agar, but they produce a different texture and flavor profile. If you need an egg-free version, I’d recommend searching specifically for vegan lemon curd recipes.
Can I reduce the sugar in this recipe?
While you can reduce the sugar somewhat (by about 25% max), sugar plays a crucial role in both the flavor balance and the setting properties of lemon curd. Too little sugar will result in an overly tart curd that may not set properly.
Why strain the lemon curd?
Straining removes the lemon zest (which has done its flavor job) and any small bits of cooked egg that might have formed during cooking. This ensures your lemon curd has that signature silky smooth texture.
My lemon curd is too thin. Can I fix it?
If your curd is too thin after cooling, you can return it to a saucepan and gently reheat while whisking. Mix 1 teaspoon of cornstarch with 1 tablespoon of water, then whisk this slurry into the warm curd and cook until thickened.
How can I tell if my lemon curd has gone bad?
Discard lemon curd if you notice any mold, off odors, or significant darkening in color. A slight separation is normal and can be fixed by stirring, but if the texture becomes very watery or grainy, it’s best to make a fresh batch.
Final Thoughts
Making lemon curd from scratch is one of those simple kitchen pleasures that delivers tremendous reward for relatively little effort. The process takes less than 30 minutes, but the bright, tangy flavor will elevate countless dishes.
I encourage you to make this recipe your own – adjust the sweetness, try different citrus variations, or experiment with adding herbs. Once you master homemade lemon curd, you’ll find yourself reaching for lemons whenever you spot them on sale!
Remember, the key to perfect lemon curd is patience – low heat and constant whisking will reward you with the silkiest, most delicious results. Happy cooking!