I’ve been baking tartlets for over a decade, and I’m thrilled to share everything I’ve learned about creating these delightful mini pastry shells. Whether you’re preparing for a dinner party or simply want to elevate your baking skills, mastering tartlet shells opens up endless possibilities for sweet and savory creations.
What Are Tartlet Shells?
Tartlet shells are miniature versions of tart crusts, typically 2-4 inches in diameter. These versatile pastry bases can be filled with sweet or savory ingredients, making them perfect for appetizers, main courses, or desserts.
Before we dive into the recipes, let me share some key terminology:
Blind baking
: The process of pre-baking a pastry shell without filling to ensure a crisp base
Docking
: Pricking the pastry dough with a fork to prevent it from puffing up during baking
Tartlet pan
: A small, shallow pan with fluted edges and a removable bottom for easy extraction
Essential Equipment for Tartlet Making
To create perfect tartlet shells, you’ll need some specialized equipment, though I’ll also share alternatives for those without these tools.
| Equipment | Purpose | Alternatives |
|---|---|---|
| Tartlet pans | Creates perfectly shaped shells with fluted edges | Muffin tins or foil tart molds |
| Rolling pin | Evenly rolls out dough to desired thickness | Wine bottle (clean and dry) |
| Pastry brush | Applies egg wash or butter to shells | Small, clean paintbrush |
| Food processor | Quickly cuts butter into flour for dough | Pastry cutter or two knives |
| Pie weights | Prevents crust from bubbling during blind baking | Dried beans or uncooked rice |
| Kitchen scale | Ensures accurate measurements for consistent results | Measuring cups (less precise) |
| Pastry wheel | Creates decorative edges | Pizza cutter or sharp knife |
The Science Behind Perfect Tartlet Shells
Creating the perfect tartlet shell involves understanding the delicate balance between ingredients. The key is achieving the right proportion of fat to flour, which affects both texture and structure.
In my experience, the ideal fat-to-flour ratio is approximately 1:2 by weight. Too much fat creates a greasy, crumbly shell that falls apart, while too little results in a tough, cardboard-like texture.
Temperature control is equally crucial. I always chill my dough twice – once after mixing and again after shaping – to prevent the butter from melting too quickly during baking, which would result in a dense, tough crust rather than a flaky one.
Classic Pâte Brisée (Shortcrust Pastry) Recipe
Let’s start with the most versatile tartlet shell recipe – a classic French pâte brisée that works beautifully for both sweet and savory applications.
Ingredients:
- 250g (2 cups) all-purpose flour
- 125g (½ cup + 1 tablespoon) cold unsalted butter, cubed
- ¼ teaspoon salt
- 1 tablespoon granulated sugar (omit for savory tartlets)
- 60-80ml (4-6 tablespoons) ice-cold water
- 1 egg yolk (for egg wash)
Step-by-Step Instructions:
- Prepare the Dough
- Combine flour, salt, and sugar (if using) in a food processor and pulse briefly to mix.
- Add cold butter cubes and pulse until mixture resembles coarse breadcrumbs.
- Gradually add ice water, 1 tablespoon at a time, pulsing briefly between additions, until dough just begins to come together.
- Turn dough onto a lightly floured surface and gently form into a disk without overworking.
- Wrap in plastic and refrigerate for at least 1 hour.
- Roll and Shape the Shells
- Remove dough from refrigerator and let rest for 5-10 minutes.
- Roll dough on a lightly floured surface to approximately 3mm (⅛ inch) thickness.
- Cut circles about 1 inch larger than your tartlet pans.
- Gently press dough into pans, ensuring it fits snugly against sides.
- Trim excess dough by rolling the rolling pin over the top of each pan.
- Dock the bottoms with a fork.
- Return shaped shells to refrigerator for 30 minutes.
- Blind Bake the Shells
- Preheat oven to 190°C (375°F).
- Line each tartlet shell with parchment paper and fill with pie weights.
- Bake for 15 minutes, then remove weights and parchment.
- Brush shells with egg wash for a glossy finish (optional).
- Return to oven and bake for an additional 5-7 minutes until golden brown.
- Cool completely before filling.
Sweet Shortcrust Pastry (Pâte Sucrée)
For dessert tartlets, I prefer using pâte sucrée, which has a slightly sweeter, more cookie-like texture. The additional egg yolk creates a more delicate, tender crust that pairs beautifully with fruit fillings or custards.
Ingredients:
- 250g (2 cups) all-purpose flour
- 125g (½ cup + 1 tablespoon) cold unsalted butter, cubed
- 85g (⅓ cup) granulated sugar
- 2 egg yolks
- ¼ teaspoon salt
- 1 teaspoon vanilla extract
- 2-3 tablespoons ice water (if needed)
Method:
- In a food processor, combine flour, sugar, and salt. Pulse to mix.
- Add cold butter and pulse until mixture resembles coarse sand.
- Add egg yolks and vanilla extract. Pulse until dough begins to clump together. If needed, add ice water 1 tablespoon at a time.
- Form dough into a disk, wrap in plastic, and refrigerate for at least 2 hours, preferably overnight.
- Follow the rolling, shaping, and blind baking instructions from the classic recipe above.
No-Roll Press-In Tartlet Shells
When I’m short on time but still want homemade tartlet shells, this press-in method has saved me countless times. It’s perfect for those who find rolling dough intimidating.
Ingredients:
- 180g (1½ cups) all-purpose flour
- 60g (½ cup) powdered sugar (for sweet shells) or 1 teaspoon salt (for savory)
- 150g (⅔ cup) unsalted butter, melted and slightly cooled
- ½ teaspoon vanilla extract (for sweet shells) or 1 teaspoon herbs (for savory)
Method:
- Preheat oven to 180°C (350°F).
- In a medium bowl, whisk together flour and sugar/salt.
- Pour in melted butter and flavoring. Stir with a fork until combined into a soft dough.
- Divide dough equally among tartlet pans.
- Using your fingers, press dough evenly into the bottom and up the sides of each pan.
- Refrigerate for 15 minutes.
- Dock the shells with a fork.
- Bake for 15-18 minutes until edges are golden brown.
- Cool completely before filling.
Gluten-Free Tartlet Shells
I developed this recipe for my gluten-sensitive friends, and they swear it’s indistinguishable from traditional wheat-based shells.
Ingredients:
- 120g (1 cup) almond flour
- 120g (1 cup) gluten-free all-purpose flour blend
- 50g (¼ cup) granulated sugar (reduce to 1 tablespoon for savory shells)
- ¼ teaspoon xanthan gum (omit if your GF flour blend already contains it)
- ¼ teaspoon salt
- 115g (½ cup) cold unsalted butter, cubed
- 1 large egg
- ½ teaspoon vanilla extract (omit for savory shells)
- 1-2 tablespoons ice water, if needed
Method:
Follow the same procedure as the classic pâte brisée, noting that gluten-free dough can be more delicate to work with. For best results, chill the shaped shells for 45 minutes before blind baking.
Troubleshooting Common Tartlet Shell Problems
| Issue | Possible Cause | Solution |
|---|---|---|
| Shells shrink during baking | Dough not properly chilled | Refrigerate shaped shells for at least 30 minutes before baking |
| Tough, chewy texture | Overworked dough | Handle dough minimally; stop processing as soon as it comes together |
| Soggy bottom | Underbaked or filled too soon | Ensure complete blind baking; cool shells fully before filling |
| Cracked shells | Dough rolled too thin or oven too hot | Aim for 3mm thickness; check oven temperature with thermometer |
| Difficult to remove from pans | Pans not properly greased | Lightly butter pans before pressing in dough |
| Uneven browning | Oven hot spots | Rotate pans halfway through baking time |

Creative Variations to Elevate Your Tartlet Shells
Herb-Infused Savory Shells
For savory tartlets, I love incorporating herbs directly into the dough. Add 1-2 tablespoons of finely chopped fresh herbs (rosemary, thyme, or sage work beautifully) to the flour before incorporating the butter.
Spiced Sweet Shells
For holiday tartlets, add ½ teaspoon cinnamon, ¼ teaspoon nutmeg, and a pinch of cloves to your sweet dough. These warm spices pair wonderfully with apple or pumpkin fillings.
Chocolate Tartlet Shells
Replace 30g (¼ cup) of flour with unsweetened cocoa powder in the sweet shortcrust recipe for a chocolate shell that pairs perfectly with raspberry or caramel fillings.
Nut-Enhanced Crusts
Add 60g (½ cup) of finely ground nuts (almonds, hazelnuts, or pecans) to your dough for added flavor and texture. Reduce flour by the same amount to maintain the proper ratio.
Cheese Savory Shells
Incorporate 60g (½ cup) of finely grated hard cheese (Parmesan, aged cheddar) into savory dough for a delicious umami boost.
Make-Ahead and Storage Tips
One of the greatest advantages of tartlet shells is their make-ahead potential. I often prepare batches on weekends to use throughout the week.
Refrigerating Unbaked Dough:
- Wrapped tightly in plastic, dough disks will keep for up to 3 days.
- Shaped, unbaked shells in their pans can be refrigerated for 24 hours.
Freezing Options:
- Dough disks: Wrap in plastic, then foil. Freeze for up to 3 months. Thaw overnight in refrigerator before using.
- Unbaked shaped shells: Freeze in their pans until solid, then transfer to airtight containers. Freeze for up to 1 month. Bake directly from frozen, adding 3-5 minutes to baking time.
- Baked unfilled shells: Cool completely, wrap carefully, and freeze for up to 2 months. Refresh in a 160°C (325°F) oven for 5 minutes before filling.
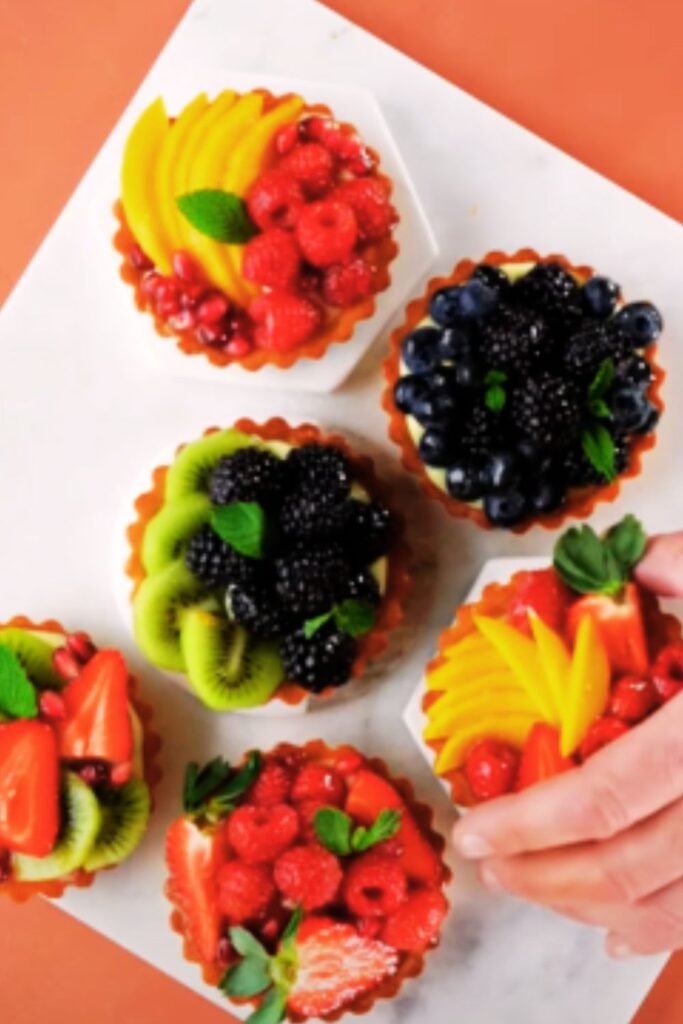
Filling Ideas for Your Perfect Tartlet Shells
Now that you’ve mastered the art of tartlet shells, let’s explore some filling inspiration:
Sweet Fillings:
- Classic lemon curd topped with fresh berries
- Chocolate ganache with sea salt
- Vanilla bean custard with seasonal fruits
- Maple-sweetened mascarpone with toasted nuts
- Coconut cream with passion fruit coulis
Savory Fillings:
- Caramelized onion and goat cheese
- Roasted vegetables with herbed ricotta
- Mushroom duxelles with thyme and crème fraîche
- Smoked salmon with dill cream cheese
- Spinach and feta with pine nuts
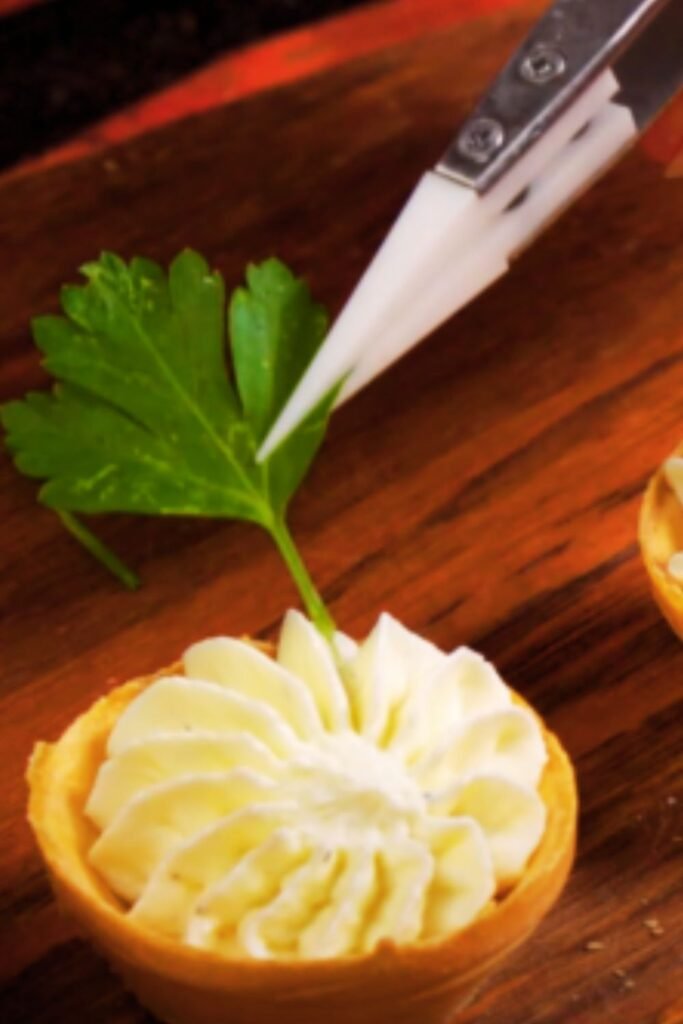
Serving Suggestions
For an elegant presentation, I recommend:
- Arranging various flavored tartlets on a slate or wooden serving board
- Garnishing sweet tartlets with a light dusting of powdered sugar or small edible flowers
- Finishing savory tartlets with microgreens or a small sprig of fresh herbs
- Serving alongside a fresh fruit compote or herb-infused olive oil for dipping
- For special occasions, creating a tartlet tower by arranging them on a tiered stand
Frequently Asked Questions
Can I make tartlet shells without special pans?
Yes! While traditional tartlet pans create the most professional look, you can use mini muffin tins lined with strips of parchment paper for easy removal. Alternatively, create free-form tartlets by shaping dough over inverted small ramekins.
Why did my tartlet shells puff up despite docking them?
This usually happens when the fork doesn’t penetrate deeply enough. For stubborn doughs, dock more aggressively and consider using more pie weights that extend up the sides.
How can I prevent my tart shells from becoming soggy after filling?
For custard or liquid fillings, brush the inside of the fully baked and cooled shell with a thin layer of melted white chocolate or beaten egg white, then bake for 2-3 minutes more. This creates a moisture barrier.
My tartlet shells cracked during baking. What went wrong?
Cracks typically occur when the dough is stretched too thin or when the oven temperature is too high. Ensure even thickness when rolling and verify your oven temperature with an oven thermometer.
Can I use store-bought pie dough for tartlet shells?
While not ideal, store-bought pie dough can work in a pinch. Roll it slightly thinner than it comes, as tartlet shells should be more delicate than pie crusts.
How long can filled tartlets sit at room temperature?
This depends entirely on the filling. Custard-based fillings should not remain at room temperature for more than 2 hours. Fruit fillings with stable preserves can last longer. When in doubt, refrigerate filled tartlets.
Final Tips from My Kitchen to Yours
After years of tartlet-making, I’ve gathered some final wisdom that makes all the difference:
- Temperature is everything – cold ingredients, cool hands, and proper chilling create flaky perfection.
- Invest in quality butter with high fat content (European-style if possible) for superior flavor and texture.
- Don’t rush the process. The resting periods for the dough are just as important as the active preparation steps.
- Practice makes perfect. If your first batch isn’t ideal, note what went wrong and adjust next time.
- Have fun with it! Tartlets are incredibly versatile and forgiving once you understand the basics.
With these techniques and recipes, you’re well-equipped to create bakery-quality tartlet shells at home. I’d love to hear about your tartlet adventures and any creative variations you discover along the way.
Happy baking!