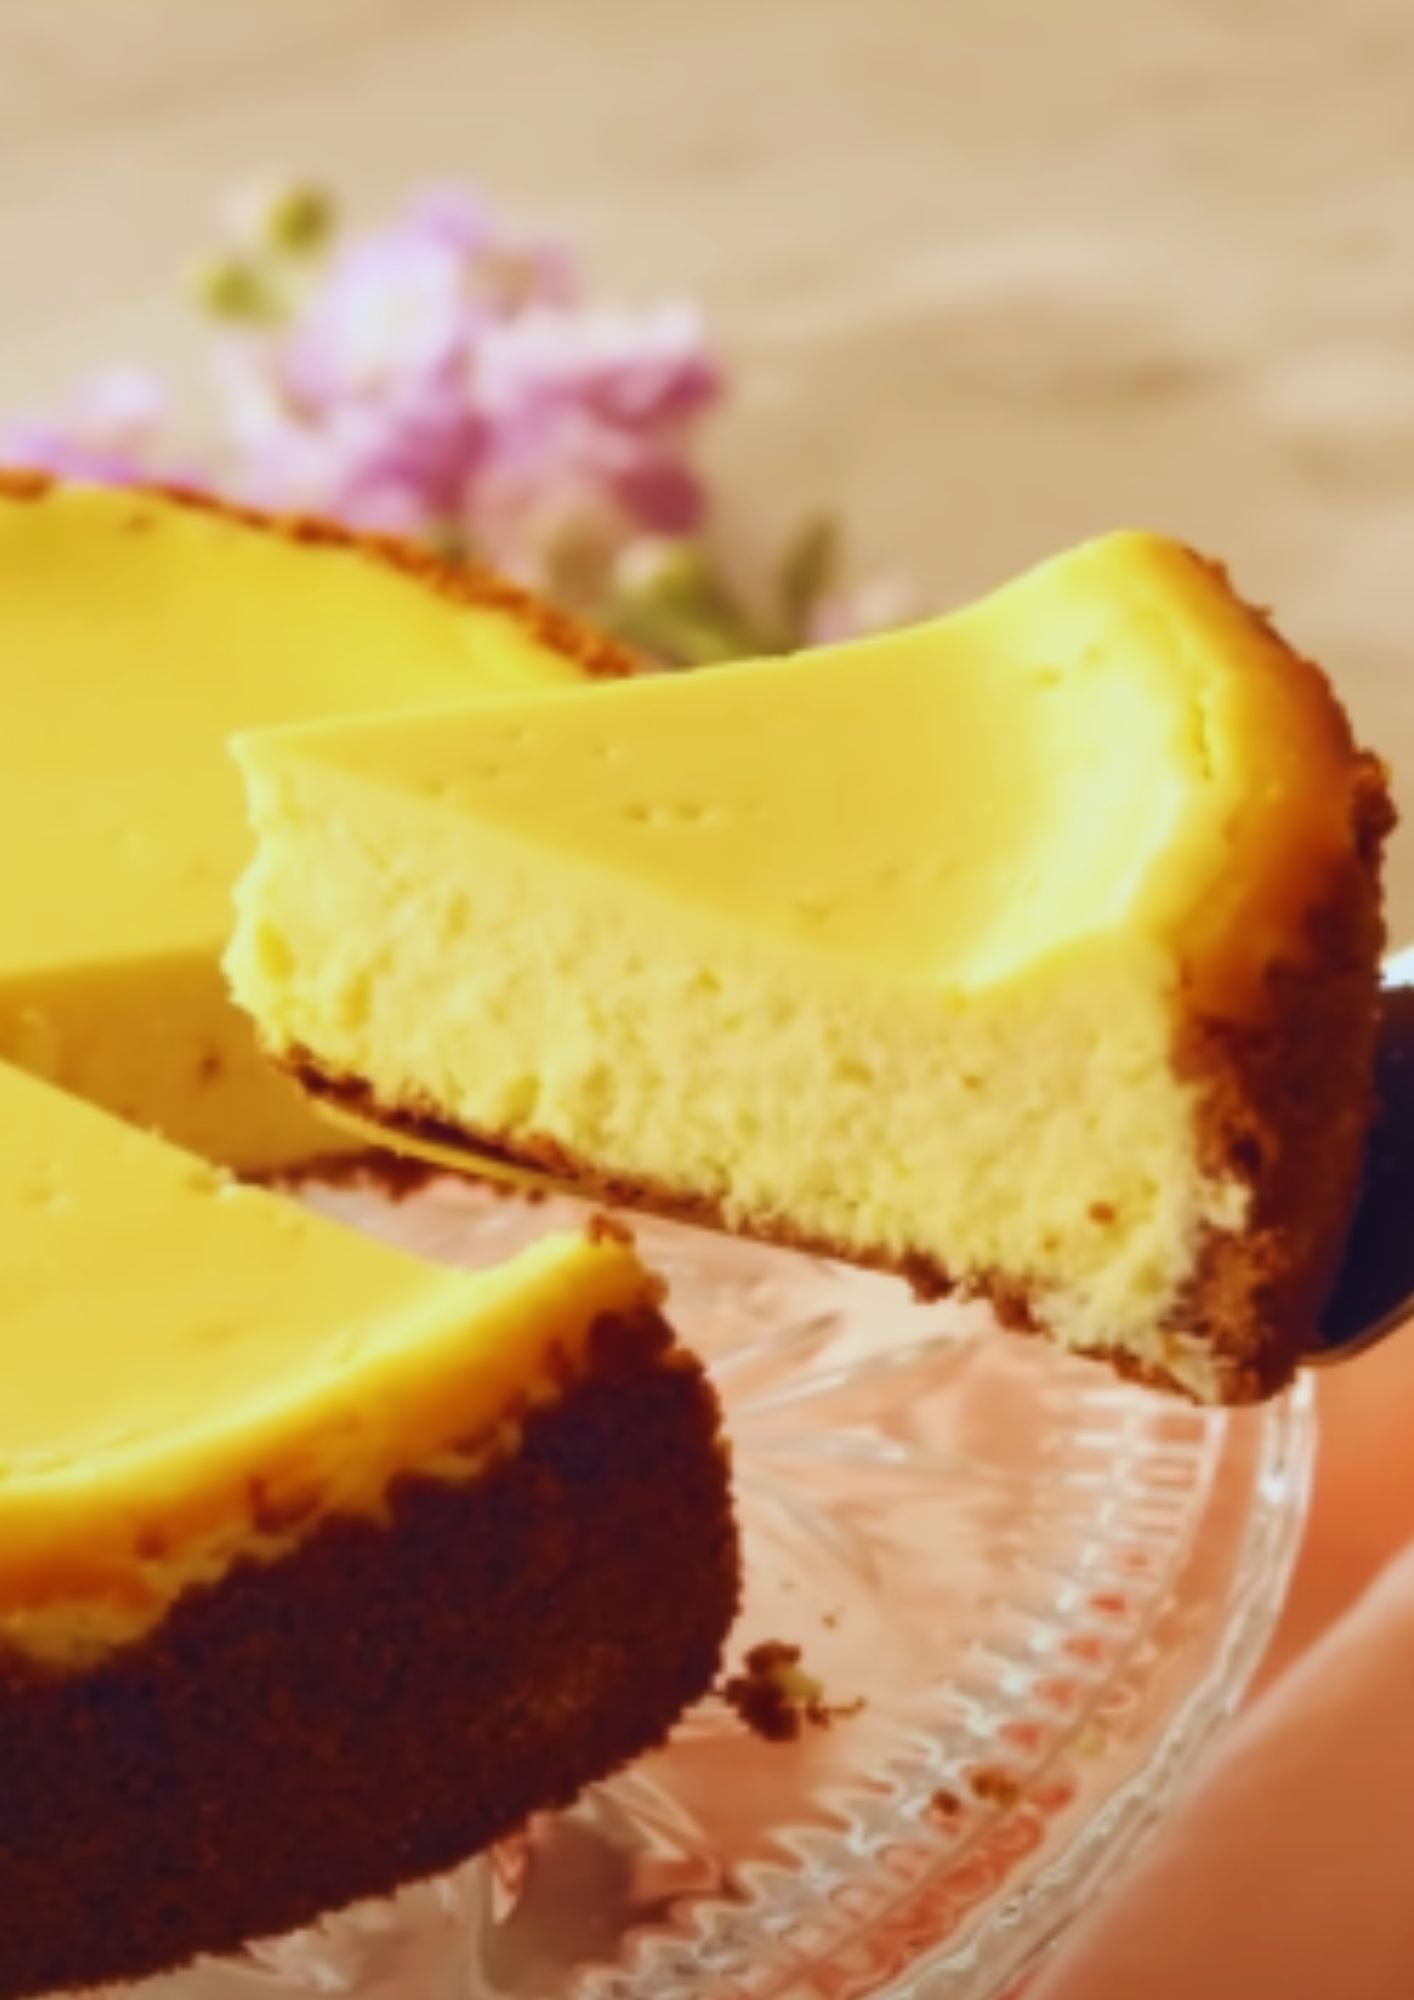
There’s something magical about mini cheesecakes that makes them irresistible. As someone who has been baking these delightful treats for over a decade, I’ve discovered that these bite-sized desserts aren’t just easier to make than their full-sized counterparts – they’re also perfect for portion control and entertaining. Today, I’m sharing my foolproof recipe that consistently produces creamy, smooth, and perfectly portioned mini cheesecakes.
Why You’ll Love These Mini Cheesecakes
I’ve found that mini cheesecakes are incredibly versatile and forgiving, making them ideal for both novice bakers and seasoned professionals. What I love most about this recipe is how easily it can be customized to suit different tastes and occasions. The individual portions make serving a breeze, and they’re perfect for freezing – though I rarely have any leftovers!

Essential Equipment
Before we dive into the recipe, let’s make sure you have all the necessary tools. Here’s what I use to achieve perfect results every time:
- 24-cup mini cheesecake pan (or 2 12-cup muffin tins)
- Electric mixer (stand or hand-held)
- Measuring cups and spoons
- Mixing bowls (various sizes)
- Food processor (for graham cracker crust)
- Cooling rack
- Piping bags and tips (for decoration)
Ingredient Breakdown
I’ve tested countless variations, and these measurements yield the perfect balance of flavors and textures:
For the Crust:
- 1½ cups graham cracker crumbs (about 12 full sheets)
- ¼ cup granulated sugar
- 6 tablespoons unsalted butter, melted
- ¼ teaspoon salt
For the Filling:
- 24 ounces cream cheese, softened (3 blocks)
- ¾ cup granulated sugar
- 3 large eggs, room temperature
- 1½ teaspoons pure vanilla extract
- ¼ cup heavy cream
- ⅛ teaspoon salt
For the Topping Options:
- Fresh berries
- Homemade whipped cream
- Caramel sauce
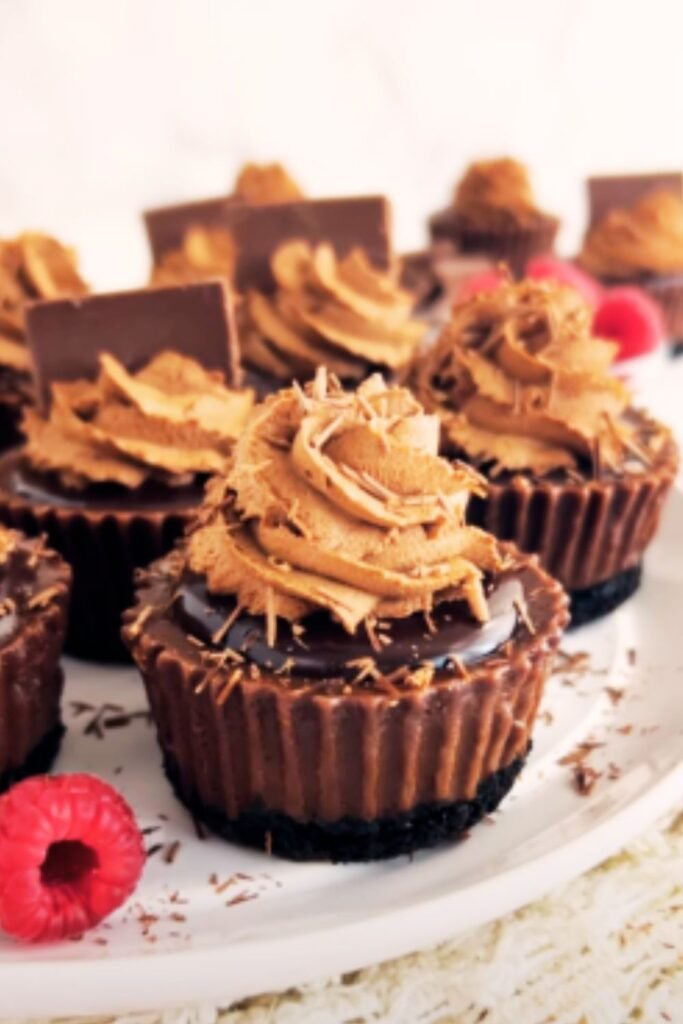
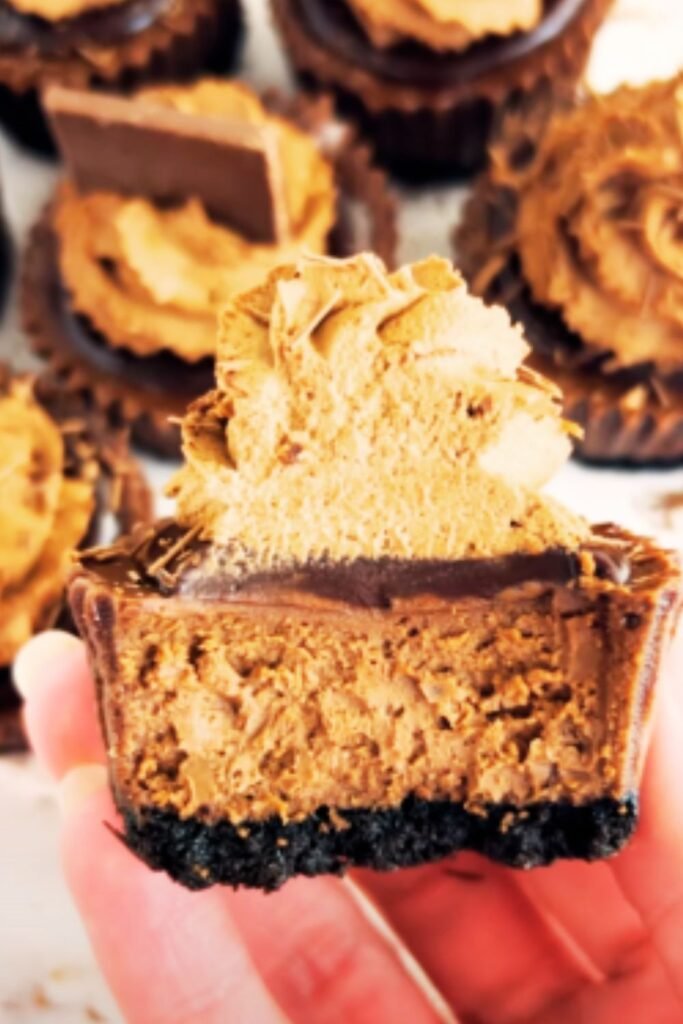
- Chocolate ganache
- Fruit preserves
Nutritional Information Per Mini Cheesecake
| Nutrient | Amount |
|---|---|
| Calories | 275 |
| Total Fat | 19g |
| Saturated Fat | 11g |
| Cholesterol | 89mg |
| Sodium | 200mg |
| Total Carbohydrates | 22g |
| Dietary Fiber | 0.5g |
| Sugar | 17g |
| Protein | 4g |
| Calcium | 55mg |
| Iron | 0.5mg |
Step-by-Step Instructions
Preparing the Crust
- Preheat your oven to 325°F (165°C). I always start with this step to ensure proper temperature when ready to bake.
- Line your mini cheesecake pan with paper liners. I’ve learned that this makes removal much easier.
- In your food processor, combine:
- Graham cracker crumbs
- Sugar
- Salt
Pulse until well combined.
- Add melted butter and pulse until the mixture resembles wet sand.
- Divide the crust mixture evenly among the cups (about 1½ tablespoons each).
- Press down firmly using a shot glass or measuring spoon. I’ve found this creates the most even base.
Making the Filling
- In a large bowl, beat the softened cream cheese until completely smooth. I typically spend about 3 minutes on this step to ensure no lumps remain.
- Add sugar gradually while continuing to beat on medium speed.
- Add eggs one at a time, mixing on low speed just until each is incorporated. I’ve learned that overbeating at this stage can cause cracks.
- Mix in vanilla extract, heavy cream, and salt until just combined.
Baking and Cooling
- Fill each cup almost to the top (about 3 tablespoons of filling).
- Bake for 20-22 minutes, or until the centers are slightly jiggly but edges are set.
- Allow to cool in the pan for 1 hour at room temperature.
- Refrigerate for at least 2 hours before serving.
Troubleshooting Common Issues
Here are solutions to problems I’ve encountered and overcome:
| Problem | Cause | Solution |
|---|---|---|
| Cracked tops | Overmixing or high temperature | Mix ingredients on low speed, avoid opening oven while baking |
| Sunken centers | Opening oven door too soon | Keep oven closed until minimum bake time is reached |
| Uneven texture | Ingredients not at room temperature | Set ingredients out 2 hours before baking |
| Sticky crust | Too much butter | Measure butter precisely, don’t overpress crust |
| Lumpy filling | Cold cream cheese | Ensure cream cheese is completely softened |
Storage and Make-Ahead Tips
I’ve perfected these storage methods through trial and error:
- Refrigerator: Up to 5 days in an airtight container
- Freezer: Up to 3 months when properly wrapped
- Room temperature: Maximum 2 hours for food safety
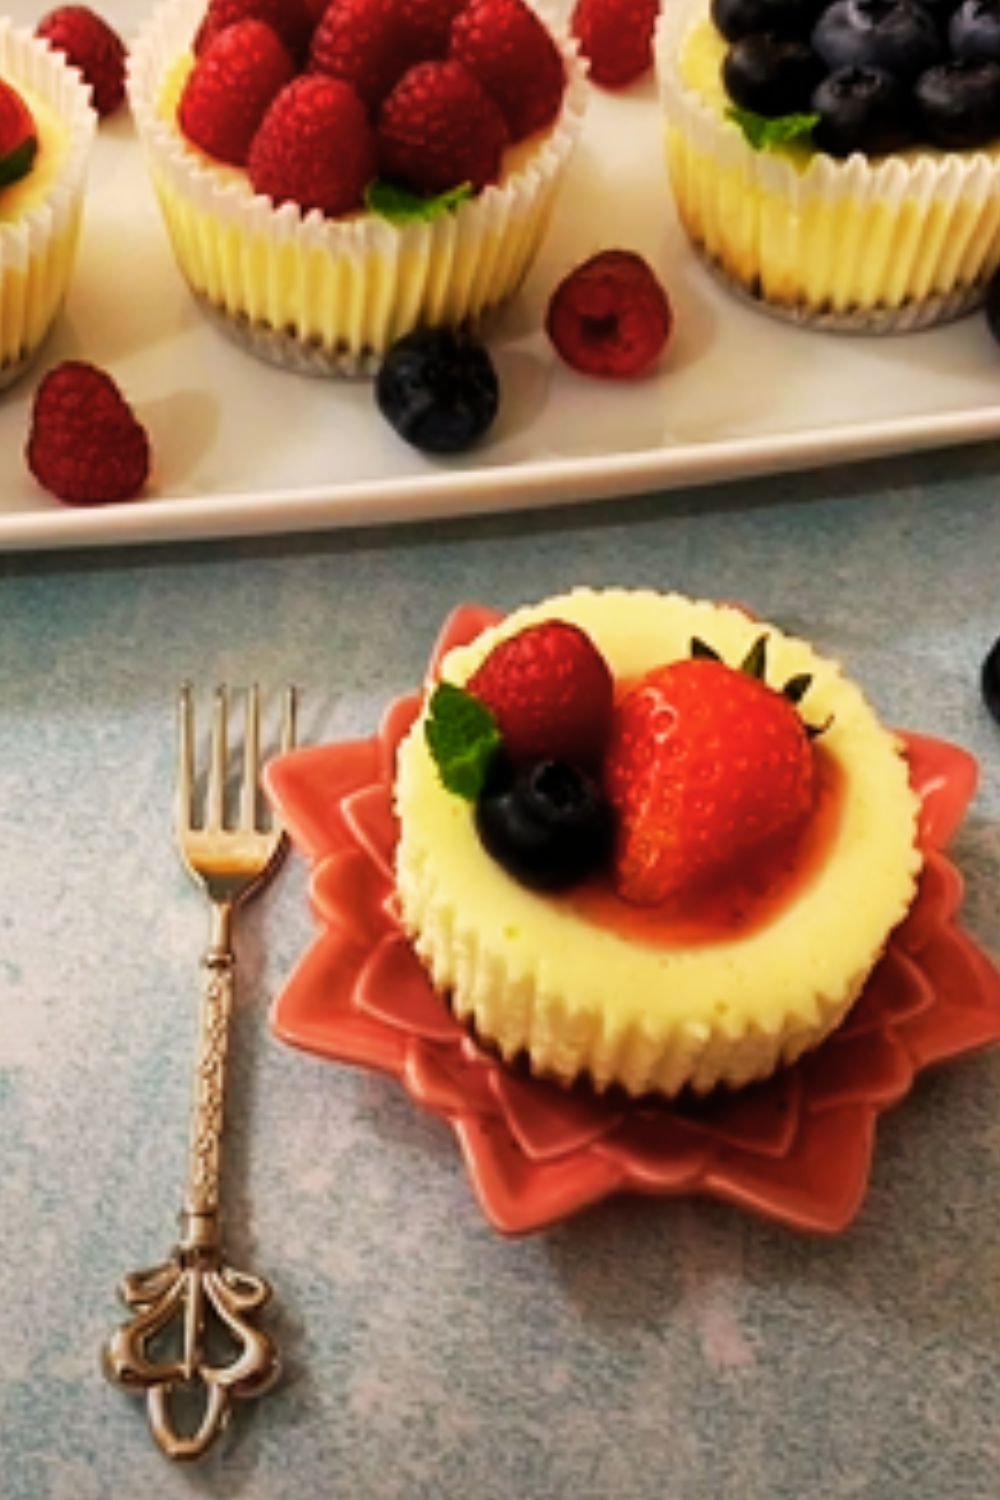
Serving Suggestions
I love to create a mini cheesecake bar with various toppings. Here are my favorite combinations:
- Fresh berry medley with mint leaves
- Homemade lemon curd with whipped cream
- Dark chocolate ganache with raspberries
- Caramel sauce with crushed pecans
- Fresh fruit compote
Frequently Asked Questions
Q: Can I make these without a special mini cheesecake pan?
A: Yes! A regular muffin tin works well, though you’ll need to line it with paper liners.
Q: Why did my cheesecakes crack?
A: In my experience, cracks usually occur from overmixing the batter or baking at too high a temperature. Mix just until ingredients are combined and always use an oven thermometer.
Q: Can I make these ahead for a party?
A: Absolutely! I often make them up to three days in advance. Store them in the refrigerator and add toppings just before serving.
Q: How do I know when they’re done baking?
A: The edges should be set, but the centers should still have a slight jiggle – like Jell-O.
Q: Can I use low-fat cream cheese?
A: While possible, I don’t recommend it. Full-fat cream cheese provides the best texture and flavor.
Recipe Variations
I love experimenting with flavors. Here are some successful variations I’ve developed:
Chocolate Marble
Add 1/4 cup melted dark chocolate to half the batter and swirl together.
Lemon Burst
Add 2 tablespoons lemon zest and 3 tablespoons lemon juice to the filling.
Pumpkin Spice
Replace 1/2 cup of cream cheese with pumpkin puree and add 1 teaspoon pumpkin pie spice.
Oreo Base
Replace graham crackers with crushed Oreo cookies (cream included) for the crust.
These mini cheesecakes have become my signature dessert at gatherings, and I’m confident they’ll become yours too. Remember, practice makes perfect, and even if they don’t look picture-perfect the first time, they’ll still taste amazing. Happy baking!