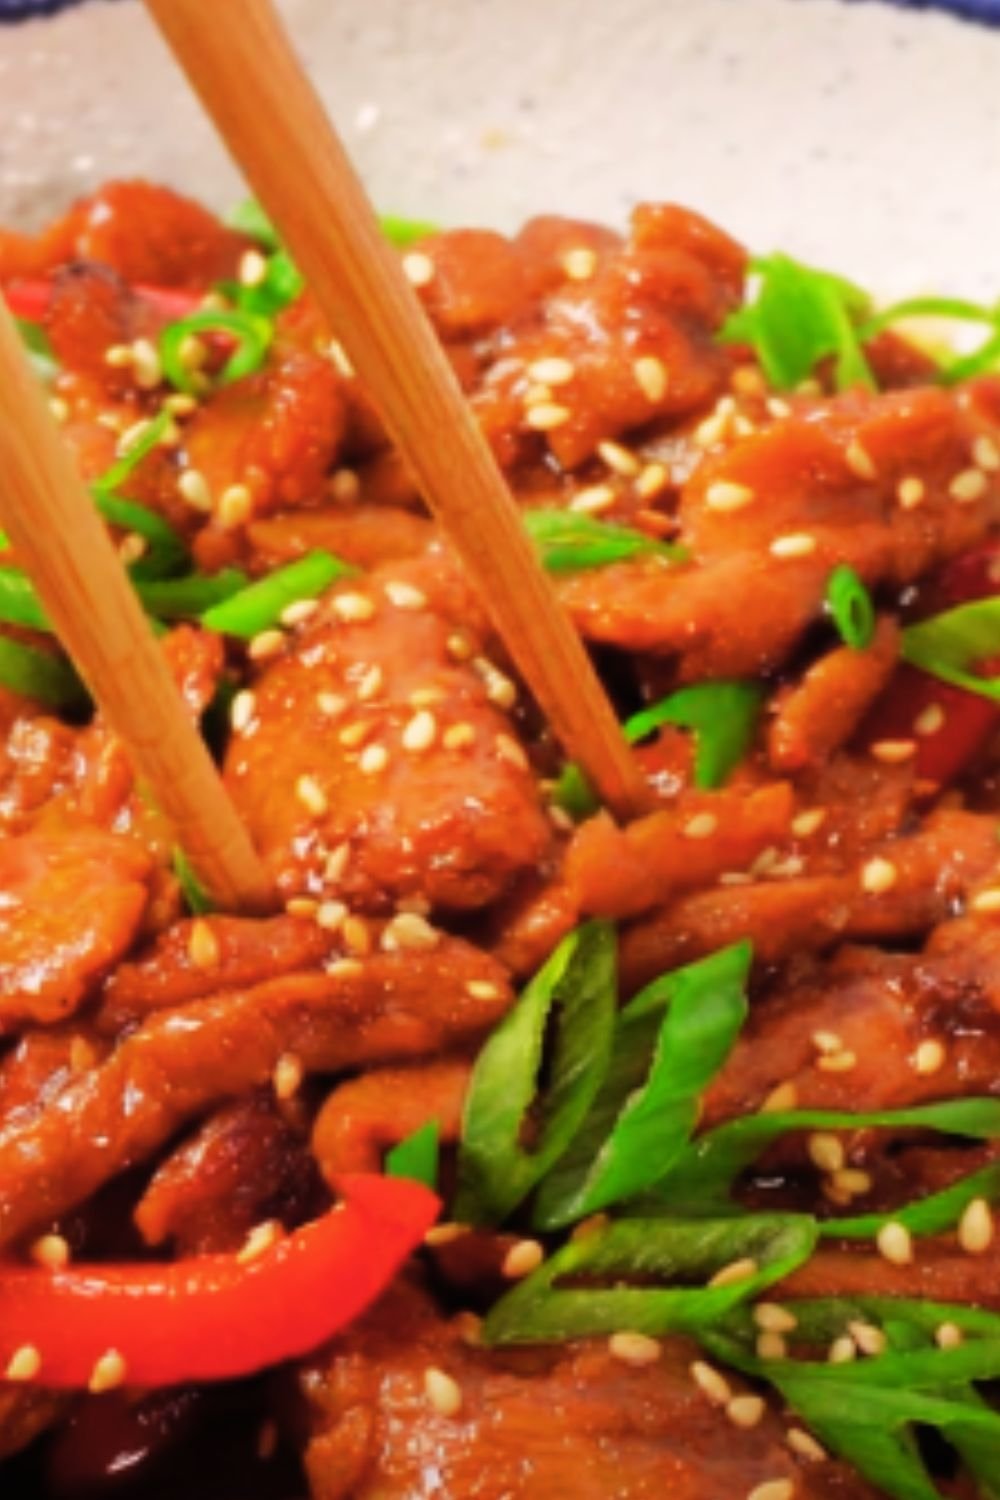
There’s something magical about the sizzling sound of chicken hitting a hot kadai, followed by the intoxicating aroma of roasted spices filling my kitchen. I’ve been perfecting my kadai chicken recipe for over a decade, and I can confidently say that once you master this dish, you’ll never order it from a restaurant again.
Kadai chicken represents the heart of North Indian cuisine – bold, aromatic, and incredibly satisfying. This dish gets its name from the traditional Indian wok called a “kadai,” which imparts a unique smoky flavor that’s impossible to replicate with regular cookware. The beauty of kadai chicken lies in its perfect balance of tender chicken pieces, vibrant bell peppers, and a rich, tomato-based gravy infused with freshly ground spices.
What sets my version apart is the careful attention to spice roasting and the secret technique I learned from my grandmother – cooking the chicken in stages to achieve that perfect texture. Whether you’re a beginner cook or someone looking to refine your Indian cooking skills, this comprehensive guide will walk you through every step of creating restaurant-quality kadai chicken in your own kitchen.
Understanding Kadai Chicken: Origins and Characteristics
Kadai: A traditional Indian wok made of heavy-bottomed metal, typically iron or carbon steel, designed for high-heat cooking and imparting a distinctive smoky flavor to dishes.
Bhuna: The cooking technique of slow-frying spices and ingredients until they release their oils and develop deep flavors, essential for authentic kadai chicken.
Garam Masala: A warming spice blend typically containing cardamom, cinnamon, cloves, and black pepper, crucial for the dish’s aromatic profile.
Capsicum: The Indian term for bell peppers, which provide the characteristic crunch and sweetness that balances the rich spices in kadai chicken.
Kadai chicken originated in the bustling kitchens of North India, particularly in Punjab and Delhi, where street vendors and restaurant chefs perfected this technique of cooking chicken with bell peppers in a heavy-bottomed kadai. The dish gained popularity because it showcased the art of dry-roasting spices and achieving that perfect balance between wet and dry curry consistency.
The key characteristic that distinguishes kadai chicken from other Indian chicken dishes is its semi-dry gravy consistency and the prominent use of julienned bell peppers and onions. Unlike butter chicken or chicken curry, kadai chicken has a more intense, concentrated flavor profile with visible pieces of tomatoes and peppers creating a colorful, appetizing presentation.
Essential Ingredients and Their Roles
The success of kadai chicken depends heavily on using the right ingredients in proper proportions. I’ve learned through years of experimentation that each component plays a crucial role in building the dish’s complex flavor profile.
| Ingredient | Quantity | Purpose | Substitution Options |
|---|---|---|---|
| Chicken (bone-in pieces) | 1 kg | Main protein, bone-in adds flavor | Boneless chicken (reduce cooking time) |
| Red Bell Peppers | 2 medium | Sweetness and crunch | Green or yellow peppers |
| Onions | 3 large | Base flavor and texture | Shallots (use more quantity) |
| Tomatoes | 4 medium | Acidity and body for gravy | Canned tomatoes (400g) |
| Ginger-Garlic Paste | 2 tablespoons | Aromatic foundation | Fresh minced (1:1 ratio) |
| Green Chilies | 4-5 pieces | Heat level control | Red chilies or chili powder |
| Coriander Seeds | 2 tablespoons | Earthy, citrusy notes | Ground coriander (1 tablespoon) |
| Cumin Seeds | 1 tablespoon | Warm, nutty flavor | Ground cumin (1 teaspoon) |
| Fennel Seeds | 1 teaspoon | Sweet, licorice notes | Anise seeds (smaller quantity) |
| Dried Red Chilies | 4-5 pieces | Heat and color | Cayenne pepper (1 teaspoon) |
| Turmeric Powder | 1 teaspoon | Color and earthiness | No direct substitute |
| Red Chili Powder | 2 teaspoons | Heat and vibrant color | Paprika + cayenne mix |
| Yogurt | 1/2 cup | Tenderizing and tanginess | Buttermilk or lemon juice |
The quality of spices makes an enormous difference in the final dish. I always recommend buying whole spices and grinding them fresh rather than using pre-ground versions. The volatile oils in freshly ground spices create that authentic restaurant-style aroma that’s impossible to achieve otherwise.
Preparation Techniques and Pro Tips
My approach to kadai chicken involves several preparation stages that build layers of flavor. The most crucial step is creating the kadai masala – a freshly ground spice blend that forms the backbone of this dish.
Creating the Perfect Kadai Masala
The heart of authentic kadai chicken lies in the freshly ground kadai masala. I dry roast coriander seeds, cumin seeds, fennel seeds, and dried red chilies in a heavy-bottomed pan until they release their aroma – usually about 3-4 minutes on medium heat. The key is to roast them until they become fragrant but not burnt, as burnt spices will make the entire dish bitter.
After cooling completely, I grind these roasted spices in a coffee grinder dedicated to spices. The resulting powder should be fine but not completely smooth – a slight coarseness adds texture to the final dish. This fresh kadai masala can be stored in an airtight container for up to a month, but I prefer making it fresh for each batch.
Chicken Preparation and Marination
I cut the chicken into medium-sized pieces, ensuring each piece has some bone for maximum flavor. The marination process is crucial – I combine the chicken with yogurt, half of the ginger-garlic paste, turmeric, and salt. This mixture needs at least 30 minutes to work its magic, but I prefer marinating for 2-3 hours when possible.
The yogurt serves a dual purpose: it tenderizes the chicken through its natural enzymes and adds a subtle tanginess that balances the rich spices. Room temperature yogurt works best as it doesn’t shock the chicken fibers.
Vegetable Preparation Strategy
The way I cut the vegetables significantly impacts the final presentation and texture. I slice the onions into thick strips rather than thin slices – this ensures they maintain some bite and don’t completely dissolve into the gravy. The bell peppers get cut into similar-sized strips, and I keep them slightly thicker than the onions since they cook faster.
For tomatoes, I use a technique I learned from professional chefs: I score an ‘X’ on the bottom, blanch them in boiling water for 2 minutes, then transfer to ice water. This makes peeling effortless and results in a smoother gravy texture.
| Preparation Step | Time Required | Key Points |
|---|---|---|
| Spice Roasting | 5 minutes | Medium heat, constant stirring |
| Spice Grinding | 2 minutes | Cool completely before grinding |
| Chicken Marination | 30 minutes – 3 hours | Room temperature yogurt preferred |
| Vegetable Prep | 15 minutes | Uniform sizing for even cooking |
| Tomato Blanching | 5 minutes | Ice bath stops cooking process |
Step-by-Step Cooking Process
The cooking process for kadai chicken follows a specific sequence that builds flavors progressively. I’ve refined this method through countless attempts, and each step serves a specific purpose in creating the perfect dish.
Stage 1: Building the Base
I heat my kadai or heavy-bottomed wok over high heat until it’s smoking hot – this is crucial for that authentic smoky flavor. Adding 3 tablespoons of oil (I prefer mustard oil for its pungent flavor, but vegetable oil works too), I wait until it shimmers before adding the marinated chicken.
The chicken goes in without crowding – I cook in batches if necessary. The key is to achieve a good sear on all sides, which takes about 8-10 minutes total. I’m not looking to cook the chicken completely at this stage, just to develop color and lock in juices. Once seared, I remove the chicken and set it aside.
Stage 2: Creating the Aromatic Foundation
In the same kadai with the remaining oil and chicken drippings, I add the sliced onions. The high heat and residual flavors from the chicken create an incredible base. I cook the onions until they’re golden brown and slightly caramelized – this takes about 6-8 minutes with frequent stirring.
Next comes the remaining ginger-garlic paste and green chilies. I cook this mixture for 2 minutes until the raw smell disappears and the paste turns golden. The aroma at this stage should be intoxicating – garlicky, pungent, and deeply appetizing.
Stage 3: Tomato Integration and Spice Blooming
The blanched and chopped tomatoes go in next, along with the freshly ground kadai masala, turmeric, and red chili powder. This is where patience pays off – I cook this mixture on medium heat for 12-15 minutes, stirring frequently, until the tomatoes break down completely and the oil starts separating from the mixture.
The transformation is remarkable: the mixture goes from wet and chunky to a thick, glossy paste with visible oil droplets. This is called “bhuna” in Indian cooking terminology, and it’s essential for achieving restaurant-quality results.
Stage 4: Bringing It All Together
I return the seared chicken to the kadai and mix thoroughly with the bhuna masala. Adding about 1/2 cup of hot water (never cold water, as it can toughen the chicken), I bring the mixture to a boil, then reduce to a simmer.
The chicken needs to cook covered for about 15-20 minutes, depending on the size of the pieces. I check doneness by piercing the thickest piece – the juices should run clear, and the internal temperature should reach 165°F (74°C).
Stage 5: Final Flavor Enhancement
In the last 5 minutes of cooking, I add the bell pepper strips and adjust the seasoning. The peppers should retain some crunch, so I don’t overcook them. A final sprinkle of the kadai masala and fresh coriander leaves completes the dish.
The consistency should be semi-dry – not too wet like a curry, but not completely dry either. If it’s too wet, I increase the heat and cook uncovered for a few minutes. If too dry, a splash of hot water helps achieve the right texture.
Mastering the Perfect Texture and Consistency
Achieving the ideal texture in kadai chicken requires understanding the balance between wet and dry cooking methods. The dish should have enough gravy to coat the chicken and vegetables generously, but it shouldn’t be soupy like a traditional curry.
Troubleshooting Common Texture Issues
Too Watery: If your kadai chicken turns out too liquid, increase the heat and cook uncovered, stirring frequently. The excess moisture will evaporate, concentrating the flavors. Alternatively, mix a tablespoon of tomato paste with a little water and add it to thicken the gravy naturally.
Too Dry: When the dish becomes overly dry, resist the urge to add cold water directly. Instead, heat some water or chicken stock and add it gradually while stirring. This prevents the chicken from seizing up and maintains the flavor integrity.
Uneven Cooking: If some chicken pieces are overcooked while others remain undercooked, it usually indicates uneven sizing during preparation. I always aim for uniform pieces and arrange them in a single layer when possible during the searing stage.
Achieving Restaurant-Style Presentation
Professional kitchens achieve that glossy, appetizing look through proper oil management and timing. The oil separation during the bhuna stage is crucial – it indicates that the spices are properly cooked and will coat the chicken beautifully.
I finish my kadai chicken with a technique called “tarka” – heating a small amount of oil or ghee in a separate pan with a few whole spices (like cumin seeds or dried red chilies) until they splutter, then pouring this aromatic oil over the finished dish. This adds an extra layer of flavor and that professional shine.
Nutritional Profile and Health Benefits
Kadai chicken offers a balanced nutritional profile when prepared thoughtfully. The combination of lean protein from chicken, antioxidants from bell peppers and tomatoes, and beneficial compounds from spices creates a dish that’s both satisfying and nutritious.
| Nutritional Component | Per Serving (4 servings total) | Health Benefits |
|---|---|---|
| Calories | 285-320 | Moderate calorie density |
| Protein | 28-32g | Complete amino acid profile |
| Carbohydrates | 8-12g | Primarily from vegetables |
| Fat | 15-18g | Healthy fats from oil and chicken |
| Fiber | 2-3g | From vegetables and spices |
| Iron | 2.5mg | From chicken and spices |
| Vitamin C | 45mg | High content from bell peppers |
| Vitamin A | 1200 IU | From tomatoes and peppers |
The spices used in kadai chicken offer remarkable health benefits. Turmeric contains curcumin, a powerful anti-inflammatory compound. Coriander seeds aid digestion and have antimicrobial properties. Ginger and garlic support immune function and cardiovascular health.
Bell peppers are nutritional powerhouses, providing more vitamin C than citrus fruits and significant amounts of vitamin A and antioxidants. The lycopene in tomatoes supports heart health and may have protective effects against certain cancers.
Serving Suggestions and Accompaniments
Kadai chicken shines when paired with the right accompaniments that complement its bold flavors without overwhelming them. My preferred serving style balances the dish’s intensity with neutral, cooling elements.
Traditional Bread Pairings
Naan: The classic choice, particularly butter naan or garlic naan, provides the perfect vehicle for soaking up the flavorful gravy. I prefer making fresh naan, but store-bought versions work well when warmed properly.
Roti/Chapati: These whole wheat flatbreads offer a healthier alternative and their slightly nutty flavor complements the spices beautifully. The thinner texture allows the kadai chicken flavors to dominate.
Kulcha: Stuffed kulchas, particularly onion or potato varieties, create an interesting flavor contrast and make the meal more substantial.
Rice Combinations
Basmati Rice: Plain basmati rice is my go-to choice. Its delicate aroma and fluffy texture don’t compete with the kadai chicken’s bold flavors. I cook it with whole spices like bay leaves and green cardamom for subtle enhancement.
Jeera Rice: Cumin-flavored rice adds an extra layer of warmth and aroma that pairs beautifully with the dish’s spice profile.
Saffron Rice: For special occasions, saffron rice elevates the entire meal with its luxurious aroma and golden color.
Cooling Accompaniments
The intensity of kadai chicken benefits from cooling sides that provide textural and flavor contrast:
Raita: Cucumber raita or mixed vegetable raita with yogurt, mint, and chaat masala offers cooling relief and aids digestion.
Kachumber Salad: A simple salad of diced cucumber, tomatoes, onions, and green chilies with lemon juice and salt provides freshness and crunch.
Pickled Onions: Quick-pickled red onions with vinegar and salt cut through the richness and cleanse the palate between bites.
Storage and Reheating Guidelines
Proper storage significantly impacts the quality of leftover kadai chicken. I’ve found that this dish actually improves in flavor after resting overnight, as the spices continue to meld and develop complexity.
Refrigeration Best Practices
I allow the kadai chicken to cool completely before transferring it to airtight containers. Properly stored, it maintains quality for 3-4 days in the refrigerator. I prefer glass containers over plastic ones, as they don’t absorb odors and are easier to clean.
When storing, I leave some space at the top of the container, as the dish may expand slightly when frozen. If I plan to freeze portions, I divide them into meal-sized containers for convenient thawing.
Freezing and Long-term Storage
Kadai chicken freezes exceptionally well for up to 3 months. I use freezer-safe containers or heavy-duty freezer bags, removing as much air as possible to prevent freezer burn. Labeling with the date and contents helps with inventory management.
For best results, I slightly undercook the dish if I know it will be frozen, as the reheating process will complete the cooking without overdoing the chicken.
Reheating Techniques
Stovetop Method: My preferred reheating method involves using a heavy-bottomed pan over low heat, adding a splash of water or stock if needed. This method maintains the dish’s texture and allows for seasoning adjustments.
Microwave Method: When time is limited, I use medium power (50-70%) and reheat in 30-second intervals, stirring between each interval. Adding a tablespoon of water helps prevent drying out.
Oven Method: For larger quantities, I cover the dish with foil and reheat at 325°F (165°C) for 15-20 minutes, stirring halfway through.
Variations and Regional Adaptations
My travels across India have exposed me to numerous regional variations of kadai chicken, each with unique characteristics that reflect local preferences and available ingredients.
Punjabi Style Variations
In Punjab, where the dish originated, I’ve encountered versions that use significantly more butter and cream, creating a richer, more indulgent experience. Some restaurants add kasuri methi (dried fenugreek leaves) for an additional layer of flavor complexity.
The Punjabi version often includes more onions and sometimes incorporates cashew paste for extra richness. The spice level tends to be more moderate, focusing on aromatic spices rather than heat.
Delhi Street Style
Delhi’s street vendors have created their own interpretation, often cooking the dish in small, individual kadais over high heat. This method creates more caramelization and a slightly charred flavor that’s incredibly appealing.
Street-style kadai chicken typically uses more tomatoes and less yogurt, resulting in a tangier profile. The addition of julienned ginger as a garnish is common in Delhi preparations.
South Indian Influences
In southern regions, I’ve seen adaptations that incorporate curry leaves, mustard seeds, and coconut, creating an interesting fusion that maintains the dish’s essence while adding regional character.
Some South Indian versions use tamarind for acidity instead of tomatoes, creating a completely different flavor profile that’s equally delicious.
Modern Restaurant Adaptations
Contemporary restaurants have created numerous variations, including:
Kadai Chicken Dry: A completely dry version served as an appetizer with minimal gravy Kadai Chicken Biryani: Incorporating the flavors into a layered rice dish Kadai Chicken Pizza: Fusion versions using the spice blend as a pizza topping
Troubleshooting Common Issues
Through years of teaching this recipe to friends and family, I’ve encountered numerous common issues that can derail an otherwise perfect kadai chicken. Here are the most frequent problems and their solutions:
Spice-Related Problems
Bitter Taste: Usually results from burning the spices during roasting or cooking the bhuna mixture too aggressively. If caught early, adding a pinch of sugar can balance the bitterness. Prevention involves maintaining proper heat levels and constant stirring.
Lack of Depth: Often indicates insufficient spice roasting or using pre-ground spices that have lost their potency. The solution involves starting over with fresh, properly roasted spices or enhancing with a small amount of garam masala.
Overpowering Heat: When the dish becomes too spicy, dairy products help. I add a dollop of yogurt or cream, but cooling ingredients like coconut milk can also work. For future batches, I reduce the chili content and taste-test the spice blend before adding it to the dish.
Texture and Consistency Issues
Tough Chicken: Results from high heat cooking or insufficient marination time. The solution involves longer, slower cooking with adequate moisture. Prevention includes proper marination and controlled cooking temperatures.
Mushy Vegetables: Overcooking the bell peppers destroys their texture. I add them in the final minutes of cooking and prefer them slightly undercooked rather than mushy.
Greasy Appearance: Excessive oil or insufficient bhuna time causes this issue. I remove excess oil with a spoon or cook longer to allow proper oil integration.
Flavor Balance Problems
Too Salty: Dilution with additional tomatoes, vegetables, or a small amount of cream helps. Prevention involves seasoning gradually and tasting frequently.
Lack of Umami: Adding a small amount of tomato paste or a pinch of asafoetida (hing) enhances the savory depth. Some cooks add a small amount of soy sauce, though this isn’t traditional.
Missing Freshness: Fresh herbs like cilantro or mint added at the end brighten the dish. A squeeze of fresh lemon juice also helps balance rich flavors.
Professional Tips for Authentic Results
My experience cooking in both home and commercial kitchens has taught me several professional techniques that dramatically improve the final result:
Heat Management
Professional kadai chicken relies heavily on proper heat control throughout the cooking process. I start with high heat for searing, reduce to medium-high for the bhuna stage, and finish with gentle simmering. Each stage requires different heat levels for optimal results.
Ingredient Timing
The sequence and timing of ingredient additions significantly impact the final flavor. Aromatics like ginger-garlic paste need sufficient cooking time to lose their raw edge, while vegetables like bell peppers require minimal cooking to maintain texture.
Mise en Place Importance
Having all ingredients prepared and measured before starting cooking is crucial for kadai chicken success. The cooking process moves quickly once started, and having everything ready prevents overcooking or burning.
Quality Ingredient Selection
I source chicken from reliable suppliers, ensuring it’s fresh and properly handled. For spices, I prefer buying from specialty stores that have high turnover, ensuring freshness and potency.
The tomatoes should be ripe but firm, and bell peppers should be crisp and brightly colored. Quality ingredients make a noticeable difference in the final dish.
Q&A Section
Q: Can I make kadai chicken without a traditional kadai? A heavy-bottomed wok, cast iron skillet, or even a large sauté pan can substitute for a traditional kadai. The key is using cookware that retains and distributes heat evenly. While you might miss some of the smoky flavor that comes from a well-seasoned kadai, the dish will still be delicious.
Q: How spicy is kadai chicken, and can I adjust the heat level? The spice level is moderate to medium-hot in my recipe, but it’s easily adjustable. For milder versions, reduce the dried red chilies in the kadai masala and use less chili powder. For more heat, add extra green chilies or include some chopped fresh jalapeños with the bell peppers.
Q: Can I use boneless chicken for this recipe? Absolutely! Boneless chicken works well and actually cooks faster. I recommend using thigh meat over breast meat for better flavor and texture, as it stays more tender during the cooking process. Reduce the cooking time by about 5-7 minutes when using boneless pieces.
Q: What’s the difference between kadai chicken and other Indian chicken dishes? Kadai chicken is characterized by its semi-dry consistency, prominent use of bell peppers, and the specific kadai masala spice blend. Unlike butter chicken or chicken tikka masala, it doesn’t contain cream or dairy (except for marination). It’s also less saucy than traditional chicken curry.
Q: Can I prepare parts of this dish in advance? Yes! The kadai masala can be made weeks ahead and stored in an airtight container. The chicken can be marinated up to 24 hours in advance. I often prepare the bhuna base (onion-tomato-spice mixture) earlier in the day and finish the dish when ready to serve.
Q: Why is my kadai chicken not as flavorful as restaurant versions? Restaurant flavor often comes from using higher heat, more oil, and sometimes additional flavor enhancers like MSG or artificial colors. At home, focus on proper spice roasting, achieving good bhuna, and using fresh ingredients. Don’t skip the marination time, and consider finishing with a tarka for extra aroma.
Q: Can I make a vegetarian version of this dish? Certainly! Paneer, cauliflower, mushrooms, or mixed vegetables work beautifully with this spice blend and cooking method. Adjust cooking times based on your chosen vegetables, and consider adding some cashews or almonds for extra richness.
Q: How do I know when the bhuna stage is complete? The bhuna is ready when the oil separates from the mixture and you can see it pooling around the edges. The mixture should be thick, glossy, and aromatic, with no raw tomato smell. This usually takes 12-15 minutes of cooking and stirring.
Q: Can I use canned tomatoes instead of fresh ones? Yes, canned tomatoes work well and sometimes produce more consistent results. Use about 400g of good-quality canned tomatoes, crushing them slightly. You might need to cook them a bit longer to achieve the proper consistency since canned tomatoes often contain more liquid.
Q: What should I do if my chicken turns out too dry? If the chicken becomes dry, it’s usually from overcooking or cooking at too high heat. Try adding some hot chicken stock or water along with a dollop of yogurt. Simmer gently until the chicken reabsorbs some moisture. For future batches, monitor the cooking closely and don’t skip the marination step.
This comprehensive guide to homemade kadai chicken represents years of experimentation, learning, and refinement. The beauty of this dish lies not just in its bold flavors, but in the satisfaction of creating something truly special in your own kitchen. Each time I make kadai chicken, I’m reminded of the incredible depth and complexity that can be achieved through simple ingredients, proper technique, and a little patience. Whether you’re cooking for family dinner or entertaining guests, this recipe will deliver consistently delicious results that rival any restaurant preparation.