
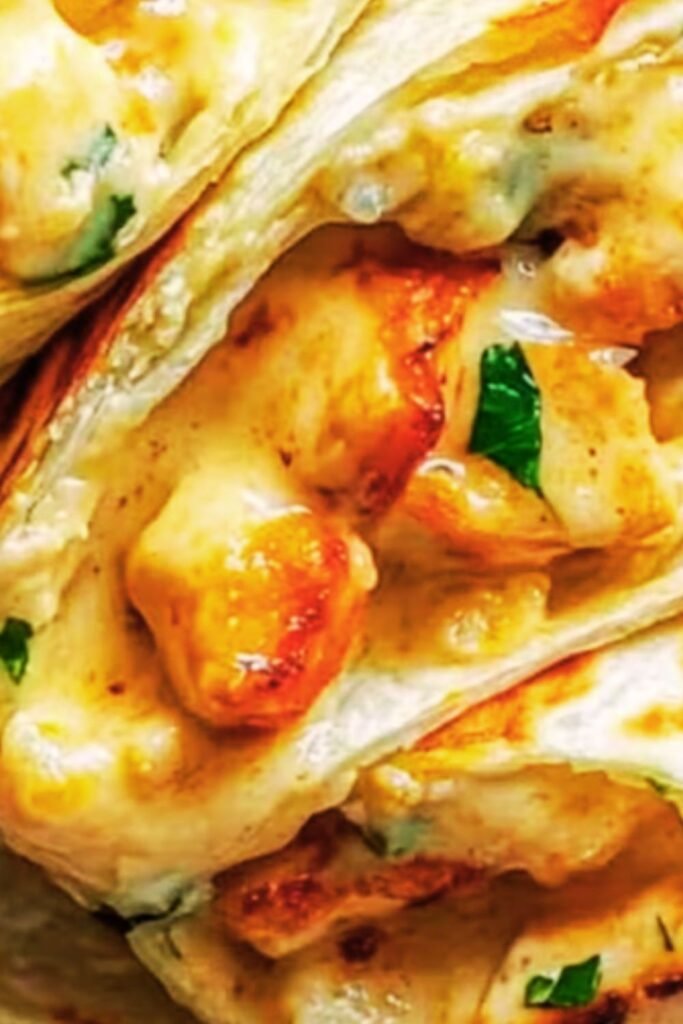
There’s something magical about the combination of tender chicken, melted cheese, and aromatic garlic all wrapped up in a warm tortilla. I’ve been perfecting this cheesy garlic chicken wrap recipe for years, and I can confidently say it’s become one of my go-to comfort foods. Whether you’re looking for a quick weeknight dinner, a satisfying lunch, or something to impress guests, these wraps deliver on all fronts.
The beauty of this recipe lies in its simplicity and versatility. I’ve served these wraps to picky eaters, food enthusiasts, and everyone in between – they never fail to please. The combination of perfectly seasoned chicken, gooey melted cheese, and that irresistible garlic flavor creates a harmony that’s hard to resist.
What Makes These Wraps Special
When I first started making these wraps, I was amazed by how the flavors complement each other. The garlic doesn’t overpower the dish; instead, it enhances the natural flavors of the chicken and cheese. I’ve experimented with different cooking methods and ingredient combinations, and this version consistently produces the best results.
The secret lies in the preparation technique. By marinating the chicken and using a specific cooking method, you achieve incredibly tender meat that stays juicy even after wrapping. The cheese selection also plays a crucial role – I use a combination that melts beautifully while maintaining distinct flavors.
Essential Ingredients Breakdown
Understanding your ingredients is key to success. Here’s what you’ll need and why each component matters:
Primary Ingredients:
- Boneless, skinless chicken breasts (2 lbs)
- Large flour tortillas (6-8 pieces)
- Shredded mozzarella cheese (2 cups)
- Sharp cheddar cheese (1 cup)
- Fresh garlic (6-8 cloves)
Seasoning Blend:
- Salt and black pepper
- Paprika (2 teaspoons)
- Italian seasoning (1 tablespoon)
- Garlic powder (1 teaspoon)
- Onion powder (1 teaspoon)
Additional Components:
- Olive oil (3 tablespoons)
- Butter (2 tablespoons)
- Fresh parsley (for garnish)
- Optional vegetables (bell peppers, onions)
Detailed Nutritional Information
Understanding the nutritional value helps you make informed decisions about portions and modifications:
| Nutrient | Per Wrap | Daily Value % |
|---|---|---|
| Calories | 485 | 24% |
| Protein | 38g | 76% |
| Total Fat | 22g | 28% |
| Saturated Fat | 12g | 60% |
| Carbohydrates | 35g | 13% |
| Dietary Fiber | 3g | 11% |
| Sodium | 890mg | 39% |
| Calcium | 420mg | 32% |
| Iron | 3.2mg | 18% |
| Vitamin A | 850 IU | 17% |
Cooking Equipment and Tools
Having the right tools makes the process smoother and more enjoyable:
Essential Equipment:
- Large skillet or grill pan
- Mixing bowls (medium and large)
- Sharp knife and cutting board
- Measuring cups and spoons
- Tongs for flipping
- Clean kitchen towels
Optional but Helpful:
- Meat thermometer
- Garlic press
- Cheese grater (if using block cheese)
- Aluminum foil for wrapping
Step-by-Step Preparation Guide
Preparing the Chicken
I always start with the chicken preparation because it’s the foundation of the entire dish. Begin by trimming any excess fat from the chicken breasts. Then, slice them horizontally to create thinner cutlets – this ensures even cooking and better flavor absorption.
Create your marinade by combining olive oil, minced garlic, salt, pepper, paprika, and Italian seasoning. Place the chicken in this mixture and let it marinate for at least 30 minutes. If you have time, marinating for 2-4 hours produces even better results.
Cooking the Perfect Chicken
Heat your skillet over medium-high heat and add a tablespoon of olive oil. Once hot, add the marinated chicken pieces. Cook for 6-7 minutes on the first side without moving them – this creates a beautiful golden crust.
Flip the chicken and cook for another 5-6 minutes until the internal temperature reaches 165°F (74°C). Remove from heat and let rest for 5 minutes before slicing. This resting period allows the juices to redistribute, keeping the meat moist.
Assembly Process
Warm your tortillas slightly – this makes them more pliable and less likely to tear. I prefer using a dry skillet for about 30 seconds per side, but you can also use a microwave with a damp paper towel.
Place about 4-5 ounces of sliced chicken in the center of each tortilla. Add a generous amount of the cheese mixture, ensuring even distribution. If you’re using vegetables, add them at this stage.
Cheese Selection and Combinations
The cheese component is crucial for achieving that perfect melt and flavor balance:
| Cheese Type | Melting Quality | Flavor Profile | Best Use |
|---|---|---|---|
| Mozzarella | Excellent | Mild, creamy | Base cheese |
| Sharp Cheddar | Good | Bold, tangy | Flavor enhancement |
| Monterey Jack | Excellent | Mild, buttery | Smooth texture |
| Provolone | Good | Mild, slightly sharp | Italian flair |
| Pepper Jack | Excellent | Spicy, creamy | Heat lovers |
I recommend using a combination of mozzarella as your base (60%) with sharp cheddar (40%) for the perfect balance of meltability and flavor.
Wrapping Techniques for Success
Proper wrapping technique prevents messy eating and ensures even heating:
- Fold the bottom edge up about 2 inches to create a seal
- Fold in the sides tightly, overlapping slightly
- Roll from bottom to top, keeping tension consistent
- Seal with a toothpick if needed during cooking
The key is maintaining consistent pressure while rolling – too loose and the filling falls out, too tight and the tortilla may tear.
Cooking Methods Comparison
Different cooking methods produce varying results:
| Method | Time | Texture | Crispiness | Difficulty |
|---|---|---|---|---|
| Skillet | 6-8 min | Tender interior, crispy exterior | High | Easy |
| Oven | 12-15 min | Evenly heated | Medium | Very Easy |
| Grill | 8-10 min | Smoky flavor | High | Medium |
| Air Fryer | 8-10 min | Crispy all around | Very High | Easy |
My preferred method is the skillet because it gives you the most control over the cooking process and creates the perfect texture contrast.
Flavor Variations and Customizations
One of the things I love most about this recipe is its adaptability. Here are some variations I’ve developed:
Mediterranean Style:
- Add sun-dried tomatoes and feta cheese
- Include fresh basil and oregano
- Use olive tapenade as a spread
Mexican Fusion:
- Add jalapeños and pepper jack cheese
- Include cilantro and lime juice
- Serve with salsa and guacamole
Buffalo Style:
- Toss chicken in buffalo sauce
- Add blue cheese crumbles
- Include celery pieces for crunch
BBQ Variation:
- Use BBQ sauce in the marinade
- Add caramelized onions
- Include smoked cheddar cheese
Storage and Meal Prep Tips
These wraps are excellent for meal preparation:
Short-term Storage:
- Refrigerate assembled wraps for up to 3 days
- Wrap individually in plastic wrap
- Reheat in skillet or microwave
Freezing Instructions:
- Freeze assembled wraps for up to 3 months
- Wrap tightly in plastic wrap, then aluminum foil
- Thaw overnight in refrigerator before reheating
Reheating Methods:
- Skillet: 3-4 minutes per side over medium heat
- Oven: 10-12 minutes at 350°F (175°C)
- Microwave: 1-2 minutes, checking frequently
Serving Suggestions and Pairings
These wraps pair beautifully with various sides and accompaniments:
Light Sides:
- Mixed green salad with vinaigrette
- Coleslaw with tangy dressing
- Fresh fruit salad
- Roasted vegetables
Heartier Options:
- Sweet potato fries
- Garlic mashed potatoes
- Rice pilaf
- Quinoa salad
Sauce Pairings:
- Ranch dressing
- Marinara sauce for dipping
- Tzatziki sauce
- Chipotle mayo
Troubleshooting Common Issues
Through years of making these wraps, I’ve encountered and solved various problems:
Problem: Tortilla tears during wrapping
- Solution: Warm tortillas before assembly and don’t overfill
Problem: Chicken is dry
- Solution: Don’t overcook and let rest after cooking
Problem: Cheese doesn’t melt properly
- Solution: Use room temperature cheese and proper heat distribution
Problem: Wraps fall apart
- Solution: Secure with toothpicks and use proper wrapping technique
Advanced Tips for Perfect Results
After making hundreds of these wraps, here are my insider tips:
- Room temperature ingredients melt and combine better
- Score the chicken lightly for better marinade penetration
- Pre-cook vegetables to remove excess moisture
- Use parchment paper when baking for easy cleanup
- Let wraps rest for 2-3 minutes after cooking before cutting
Seasonal Ingredient Substitutions
Adapting this recipe to seasonal ingredients keeps it fresh and interesting:
Spring Additions:
- Fresh asparagus tips
- Baby spinach
- Fresh herbs (chives, dill)
Summer Modifications:
- Grilled zucchini
- Fresh tomatoes
- Basil leaves
Fall Variations:
- Roasted butternut squash
- Caramelized apples
- Sage seasoning
Winter Adaptations:
- Roasted root vegetables
- Hearty greens (kale, collards)
- Warming spices (cumin, coriander)
Nutritional Modifications
For different dietary needs, consider these modifications:
Lower Calorie Version:
- Use low-fat cheese (reduces calories by 25%)
- Whole wheat tortillas
- Increase vegetables, decrease cheese
Higher Protein Option:
- Add Greek yogurt-based sauce
- Include extra lean chicken
- Use protein-enriched tortillas
Gluten-Free Alternative:
- Use corn tortillas or gluten-free wraps
- Verify all seasonings are gluten-free
- Check cheese labels for additives
Cost Analysis and Budget Tips
Understanding the cost breakdown helps with meal planning:
| Ingredient | Cost per Wrap | Percentage of Total |
|---|---|---|
| Chicken breast | $1.85 | 45% |
| Cheese | $0.95 | 23% |
| Tortilla | $0.35 | 9% |
| Seasonings/Oil | $0.25 | 6% |
| Vegetables | $0.45 | 11% |
| Other ingredients | $0.25 | 6% |
| Total per wrap | $4.10 | 100% |
Money-Saving Tips:
- Buy chicken in bulk when on sale
- Use block cheese instead of pre-shredded
- Make your own seasoning blends
- Buy tortillas in larger packages
Questions and Answers
Q: Can I prepare these wraps ahead of time? A: Absolutely! I often prepare them the night before. Assemble the wraps completely, wrap individually in plastic wrap, and refrigerate. They’ll stay fresh for up to 3 days and can be reheated quickly.
Q: What’s the best way to reheat leftover wraps? A: My preferred method is using a skillet over medium heat for 3-4 minutes per side. This re-crisps the exterior while heating the interior evenly. You can also use the oven at 350°F for 10-12 minutes.
Q: Can I make these wraps gluten-free? A: Yes! Simply substitute the flour tortillas with corn tortillas or gluten-free wraps. Make sure all your seasonings are certified gluten-free, and double-check that your cheese doesn’t contain any gluten-containing additives.
Q: How do I prevent the tortillas from getting soggy? A: The key is managing moisture. Make sure your chicken isn’t too wet when you add it to the wrap, and if using vegetables, pat them dry or pre-cook them to remove excess moisture. Also, don’t overfill the wraps.
Q: Can I freeze these wraps? A: Yes, they freeze beautifully! Wrap each one individually in plastic wrap, then place in a freezer bag. They’ll keep for up to 3 months. Thaw overnight in the refrigerator before reheating.
Q: What cheese combinations work best? A: I find that a 60/40 ratio of mozzarella to sharp cheddar gives the best balance of meltability and flavor. However, feel free to experiment with Monterey Jack, provolone, or even pepper jack for a spicy kick.
Q: Can I use rotisserie chicken instead of cooking my own? A: Definitely! Rotisserie chicken is a great time-saver. Just remove the skin, shred the meat, and season it with garlic powder, salt, and pepper to maintain the flavor profile.
Q: How do I know when the chicken is properly cooked? A: The internal temperature should reach 165°F (74°C). If you don’t have a thermometer, the chicken should be golden brown on the outside and the juices should run clear when cut. There should be no pink color in the center.
Q: Can I add vegetables to these wraps? A: Absolutely! Bell peppers, onions, mushrooms, and spinach all work wonderfully. Just remember to cook them first to remove excess moisture, or your wraps might become soggy.
Q: What’s the best way to warm the tortillas? A: I prefer using a dry skillet over medium heat for about 30 seconds per side. This makes them more pliable and adds a slight toasted flavor. You can also wrap them in a damp paper towel and microwave for 30 seconds.
This recipe has become a staple in my kitchen, and I’m confident it will become one in yours too. The combination of tender, garlicky chicken and melted cheese wrapped in a warm tortilla is simply irresistible. Whether you’re cooking for family, friends, or meal prepping for the week, these cheesy garlic chicken wraps deliver satisfaction every time.
Remember, cooking is about experimentation and finding what works best for your taste preferences. Don’t be afraid to adjust the seasonings, try different cheese combinations, or add your favorite vegetables. The foundation of this recipe is solid, but the possibilities for customization are endless.

