
When I first discovered the art of making grilled chicken wraps, I never imagined how this simple combination of ingredients would become my go-to meal for busy weekdays, weekend picnics, and everything in between. There’s something magical about the way perfectly seasoned grilled chicken mingles with fresh vegetables and creamy sauces, all wrapped up in a soft tortilla that makes every bite a delightful experience.
The grilled chicken wrap has evolved from a simple fast-food staple to a versatile, healthy meal option that can satisfy virtually any craving. Whether you’re looking for a protein-packed lunch, a light dinner, or meal prep options for the week ahead, mastering the grilled chicken wrap opens up endless possibilities for delicious, nutritious eating.
Understanding the Perfect Grilled Chicken Wrap
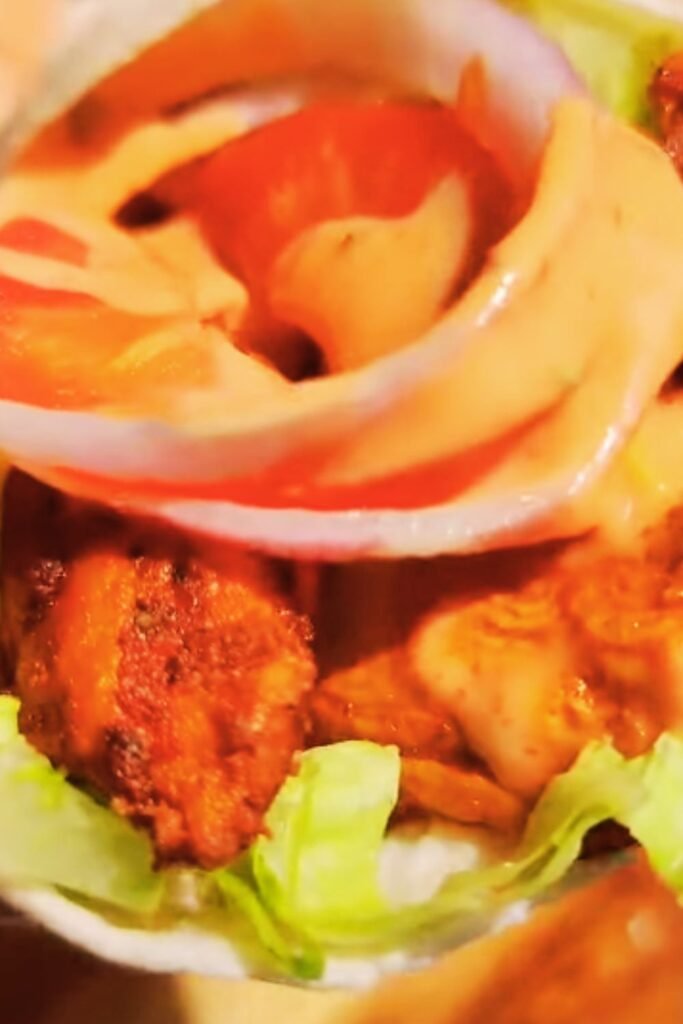
Grilled Chicken Wrap: A versatile meal consisting of seasoned and grilled chicken breast, fresh vegetables, sauce, and optional cheese, all wrapped in a flour tortilla or alternative wrap.
Marinade: A seasoned liquid mixture used to infuse flavor and tenderness into chicken before grilling.
Wrap Assembly: The methodical process of layering ingredients in a tortilla to create a cohesive, easy-to-eat meal.
Protein Balance: The optimal ratio of chicken to other ingredients that ensures satisfying nutrition and flavor.
The beauty of a grilled chicken wrap lies in its adaptability. I’ve discovered that the foundation remains consistent—perfectly grilled chicken—while the supporting cast of vegetables, sauces, and seasonings can change dramatically based on your mood, dietary preferences, or what’s available in your refrigerator.
Essential Ingredients and Preparation
Core Ingredients Table
| Ingredient Category | Primary Options | Quantity (Serves 4) | Preparation Time |
|---|---|---|---|
| Protein | Boneless chicken breast | 1.5 lbs | 20 min marinade + 12 min cooking |
| Wrap Base | Large flour tortillas | 4 pieces | Ready to use |
| Fresh Vegetables | Lettuce, tomatoes, onions | 2 cups mixed | 10 min prep |
| Sauce/Spread | Ranch, mayo, hummus | 1/2 cup total | Ready to use |
| Optional Cheese | Cheddar, mozzarella | 1 cup shredded | Ready to use |
Chicken Marinade Components
The secret to exceptional grilled chicken wraps starts with a well-crafted marinade. I’ve experimented with countless combinations over the years, and I’ve found that the most successful marinades balance acid, oil, and seasonings in perfect harmony.
| Marinade Ingredient | Amount | Purpose | Substitution Options |
|---|---|---|---|
| Olive Oil | 3 tablespoons | Moisture and cooking medium | Avocado oil, vegetable oil |
| Lemon Juice | 2 tablespoons | Tenderizing acid | Lime juice, white wine vinegar |
| Garlic | 3 cloves, minced | Flavor base | Garlic powder (1 tsp) |
| Italian Seasoning | 1 tablespoon | Herb complexity | Mixed herbs, oregano + basil |
| Salt | 1 teaspoon | Flavor enhancement | Sea salt, kosher salt |
| Black Pepper | 1/2 teaspoon | Heat and depth | White pepper, cayenne |
Vegetable Preparation Guide
Fresh vegetables provide the crucial textural contrast and nutritional boost that transforms a simple chicken wrap into a complete meal. I always prepare my vegetables just before assembly to maintain maximum crispness and flavor.
Lettuce Preparation: I prefer romaine lettuce for its sturdy leaves and satisfying crunch. Wash thoroughly, dry completely, and chop into bite-sized pieces. Iceberg lettuce works as a substitute, though it provides less nutritional value.
Tomato Selection: Choose firm, ripe tomatoes and slice them into 1/4-inch thick rounds. Remove excess seeds to prevent the wrap from becoming soggy. Cherry tomatoes, halved, make an excellent alternative.
Onion Options: Red onions provide a sharp bite that complements the grilled chicken beautifully. Slice thinly and consider soaking in cold water for 10 minutes to mellow the flavor if desired.
Step-by-Step Grilled Chicken Preparation
Marinating Process
The marinating process is where patience pays dividends. I combine all marinade ingredients in a large zip-lock bag or shallow dish, ensuring the chicken is completely coated. The minimum marinating time is 30 minutes, but I prefer to let the chicken absorb flavors for 2-4 hours in the refrigerator.
Quick Marinade Technique: When time is limited, I score the chicken breast lightly with a knife in a crosshatch pattern. This increases surface area and allows the marinade to penetrate more quickly.
Overnight Marinating: For meal prep purposes, marinating overnight produces incredibly flavorful results. The extended time allows the acid to break down tough fibers while the seasonings penetrate deeply.
Grilling Technique
Proper grilling technique separates amateur cooks from those who create restaurant-quality results at home. I preheat my grill to medium-high heat, approximately 375-400°F, ensuring the grates are clean and lightly oiled.
Cooking Timeline: Place marinated chicken on the grill and cook for 6-7 minutes on the first side without moving. This creates beautiful grill marks and prevents sticking. Flip once and cook an additional 5-6 minutes until the internal temperature reaches 165°F.
Resting Period: After grilling, I always let the chicken rest for 5 minutes before slicing. This allows juices to redistribute throughout the meat, ensuring every bite remains moist and flavorful.
Slicing and Storage
Once rested, I slice the chicken against the grain into thin strips, approximately 1/4-inch thick. This technique ensures tender bites and makes the wrap easier to eat. Properly grilled and sliced chicken can be stored in the refrigerator for up to four days, making it perfect for meal prep.
Wrap Assembly Masterclass
Foundation Layer Strategy
The order of assembly significantly impacts the final product’s structural integrity and eating experience. I start with the tortilla laid flat on a clean surface, then spread my chosen sauce in a thin, even layer, leaving about an inch border around the edges.
Sauce Application: Less is more when it comes to sauces. Too much creates a messy eating experience, while too little fails to bind the ingredients together. I aim for approximately 2 tablespoons per wrap.
Temperature Considerations: All components should be at room temperature or slightly cool. Hot chicken can wilt lettuce and make the tortilla soggy.
Ingredient Layering Technique
| Layer Order | Ingredient | Placement Strategy | Quantity Guide |
|---|---|---|---|
| 1st | Sauce/Spread | Center strip, 4 inches wide | 2 tablespoons |
| 2nd | Lettuce | Over sauce, creating base | 1/2 cup |
| 3rd | Grilled Chicken | Center of lettuce bed | 4-6 oz |
| 4th | Vegetables | Distributed evenly | 1/4 cup each |
| 5th | Cheese (optional) | Sprinkled over top | 2 tablespoons |
Rolling Technique
The rolling technique I’ve perfected over years of practice ensures a tight, secure wrap that won’t fall apart during eating. I fold the bottom edge up over the filling, then fold in the sides, creating an envelope. Finally, I roll tightly from bottom to top, maintaining pressure throughout the process.
Professional Tip: Slightly dampen the final edge of the tortilla with water to help it seal against itself. This creates a more secure closure that withstand handling.
Flavor Variations and Customizations
International Inspirations
The basic grilled chicken wrap serves as a canvas for global flavor profiles. I love experimenting with different marinade combinations and accompaniments that transport my taste buds around the world.
Mediterranean Style: Marinate chicken with lemon, oregano, and olive oil. Add cucumber, red onion, tomatoes, and tzatziki sauce. Crumbled feta cheese provides an authentic finishing touch.
Mexican-Inspired: Use lime juice, cumin, and chili powder in the marinade. Include black beans, corn, peppers, and salsa verde. Fresh cilantro and avocado complete this southwestern variation.
Asian Fusion: Soy sauce, ginger, and sesame oil create an Asian-inspired marinade. Pair with shredded cabbage, carrots, cucumber, and peanut sauce for a fresh, vibrant wrap.
Dietary Adaptations
Low-Carb Options: Replace traditional tortillas with large lettuce leaves, collard greens, or low-carb wraps made from almond flour or coconut.
Gluten-Free Alternatives: Many brands now offer delicious gluten-free tortillas made from rice flour, corn, or alternative grains that work beautifully with grilled chicken.
Dairy-Free Versions: Replace cheese with avocado slices and use dairy-free spreads like hummus, tahini, or cashew-based sauces.
Nutritional Benefits and Health Considerations
Macronutrient Breakdown
| Nutrient | Amount per Wrap | Daily Value % | Health Benefits |
|---|---|---|---|
| Protein | 35-40g | 70-80% | Muscle maintenance, satiety |
| Carbohydrates | 25-30g | 8-10% | Energy, fiber from vegetables |
| Fat | 8-12g | 12-18% | Essential fatty acids, vitamin absorption |
| Fiber | 4-6g | 16-24% | Digestive health, blood sugar control |
| Calories | 350-450 | 17-22% | Moderate calorie meal option |
Micronutrient Benefits
Grilled chicken wraps provide an excellent source of several essential vitamins and minerals. The chicken contributes high-quality protein along with B vitamins, particularly niacin and vitamin B6, which support energy metabolism and brain function.
The fresh vegetables add vitamin C, folate, and various antioxidants that support immune function and cellular health. When I include colorful vegetables like bell peppers, tomatoes, and leafy greens, I’m creating a nutrient-dense meal that supports overall wellness.
Portion Control Benefits: The wrap format naturally encourages appropriate portion sizes while providing satisfaction through the combination of protein, fiber, and healthy fats.
Meal Prep and Storage Solutions
Batch Cooking Strategy
I’ve found that dedicating one day per week to grilling multiple chicken breasts creates the foundation for quick, healthy meals throughout the week. Properly stored grilled chicken maintains its quality for up to four days in the refrigerator.
Preparation Components: I prepare all non-perishable components in advance, storing them in separate containers. Sauces, shredded cheese, and diced onions can be prepped ahead without quality loss.
Assembly Timeline: For best results, I assemble wraps no more than 24 hours before consumption. Earlier assembly can result in soggy tortillas and wilted vegetables.
Storage Best Practices
| Component | Storage Method | Duration | Quality Notes |
|---|---|---|---|
| Grilled Chicken | Refrigerator, airtight container | 4 days | Slice just before use |
| Prepped Vegetables | Refrigerator, separate containers | 2-3 days | Keep dry with paper towels |
| Assembled Wraps | Refrigerator, wrapped individually | 24 hours | Wrap tightly in plastic wrap |
| Sauces | Refrigerator, small containers | 1 week | Apply just before eating |
Serving Suggestions and Pairings
Complementary Side Dishes
While grilled chicken wraps are satisfying on their own, thoughtful side dishes can transform a simple lunch into a more substantial meal. I particularly enjoy pairing wraps with fresh fruit, which provides natural sweetness that complements the savory flavors.
Fresh Options: Apple slices, grapes, or berries add refreshing contrast. For something more substantial, a small side salad with vinaigrette provides additional vegetables and fiber.
Warm Accompaniments: Baked sweet potato wedges or roasted vegetables create a more hearty meal perfect for dinner. These sides add complex carbohydrates and additional nutrients.
Beverage Pairings
The versatility of grilled chicken wraps makes them compatible with various beverages. I find that sparkling water with a splash of citrus cleanses the palate between bites, while iced tea provides a refreshing complement to the savory flavors.
Hot Options: During cooler months, I enjoy pairing wraps with herbal teas or light broths that warm without overwhelming the meal’s fresh flavors.
Troubleshooting Common Issues
Preventing Soggy Wraps
The most common complaint I hear about homemade wraps is sogginess. This issue stems from excessive moisture in ingredients or improper assembly technique.
Moisture Control: Always pat vegetables dry before assembly, and avoid overloading with sauce. If using tomatoes, remove excess seeds and let sliced pieces drain on paper towels for a few minutes.
Barrier Techniques: Creating a lettuce barrier between wet ingredients and the tortilla helps maintain structural integrity. The lettuce acts as a protective layer that absorbs excess moisture.
Achieving Proper Tightness
A properly rolled wrap should hold together without being so tight that it tears the tortilla. I’ve learned that slightly warming the tortilla makes it more pliable and easier to roll without cracking.
Warming Methods: A quick 15-20 seconds in the microwave or 30 seconds in a dry skillet makes tortillas more flexible. Avoid overheating, which can make them tough and chewy.
Questions and Answers
Q: How can I prevent my grilled chicken from drying out during cooking? The key to juicy grilled chicken lies in proper marinating and temperature control. I always use a marinade containing oil and acid, which helps retain moisture during cooking. Additionally, I never cook beyond 165°F internal temperature and always let the chicken rest after grilling to allow juices to redistribute.
Q: What’s the best way to transport wraps for lunch without them falling apart? I wrap each completed wrap tightly in aluminum foil or plastic wrap, which helps maintain their shape during transport. Cutting the wrap in half diagonally and re-wrapping each piece separately makes them easier to handle and eat. For extra security, I sometimes use a toothpick through the center before wrapping.
Q: Can I make these wraps ahead of time for meal prep? While you can prepare components ahead of time, I recommend assembling wraps no more than 24 hours before eating for best quality. Store grilled chicken, prepped vegetables, and sauces separately, then assemble just before eating when possible. If you must assemble ahead, wrap tightly and store in the refrigerator.
Q: What are some good alternatives to flour tortillas for a lighter option? Large lettuce leaves, particularly romaine or butter lettuce, make excellent low-carb wraps. Collard green leaves, lightly steamed to soften, also work well. For those avoiding carbs entirely, you can serve all the wrap components as a composed salad with the grilled chicken on top.
Q: How do I know when my grilled chicken is properly cooked? The safest method is using an instant-read thermometer inserted into the thickest part of the breast. The internal temperature should reach 165°F. Visually, the juices should run clear when the chicken is pierced, and the meat should no longer be pink inside. The exterior should have nice grill marks and a golden-brown color.
Q: What’s the best way to slice grilled chicken for wraps? After letting the chicken rest for 5 minutes post-grilling, I slice it against the grain into strips about 1/4-inch thick. Cutting against the grain breaks up the muscle fibers, making each bite more tender. Slicing too thick makes the wrap difficult to bite through, while slicing too thin can result in shredded-looking pieces.
Q: How can I add more vegetables to my wraps without making them bulky? I focus on vegetables that provide maximum nutrition with minimal bulk. Shredded carrots, thinly sliced bell peppers, and cucumber ribbons (made with a vegetable peeler) add nutrition and crunch without overwhelming the wrap. I also sometimes finely dice vegetables and mix them with the sauce for distribution throughout the wrap.
Q: What’s the secret to rolling a wrap that doesn’t fall apart? The secret lies in proper filling distribution and rolling technique. I keep ingredients in a neat line down the center of the tortilla, leaving space at the edges. I fold the bottom edge up and over the filling, then fold in the sides to create an envelope before rolling tightly from bottom to top. Slightly dampening the final edge helps it stick to itself.
These grilled chicken wraps have become a cornerstone of my weekly meal planning, offering endless variety while maintaining consistent nutrition and satisfaction. The combination of perfectly seasoned grilled chicken, fresh vegetables, and thoughtful assembly creates a meal that’s both nourishing and delicious. Whether you’re feeding a family, meal prepping for the week, or simply looking for a satisfying lunch option, mastering the grilled chicken wrap opens up a world of healthy, flavorful possibilities that will keep you coming back for more.

