There’s something absolutely magical about the combination of bright, zesty lemon and fresh, juicy berries that makes my heart sing every time I walk into my kitchen. After years of perfecting this recipe, I can confidently say that this lemon layer cake with fresh berries is not just a dessert—it’s an experience that transforms any ordinary day into something special.
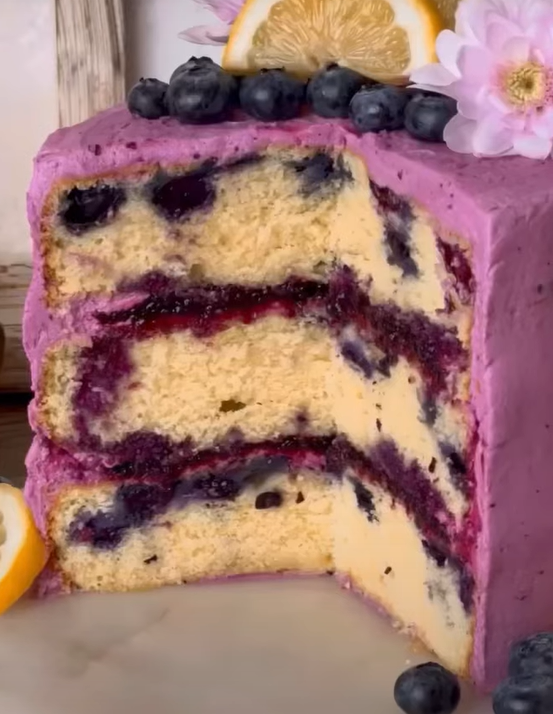
I still remember the first time I attempted this cake. It was for my daughter’s birthday, and I wanted something that would capture the essence of summer while being elegant enough for celebration. What emerged from my oven that day was more than I could have hoped for: three tender, citrus-infused layers crowned with clouds of silky cream and a rainbow of fresh berries. The look of pure joy on her face told me I had created something truly wonderful.
Understanding the Foundation: Essential Ingredients
When crafting the perfect lemon layer cake, every ingredient plays a crucial role in creating that harmonious balance of flavors and textures. Let me walk you through each component and why it matters so much in achieving bakery-quality results.
Lemons: Fresh lemons are absolutely non-negotiable in my kitchen. I use both the zest and juice, which provides that bright, authentic citrus flavor that bottled lemon juice simply cannot match. The oils in fresh lemon zest contain compounds that create depth and complexity in every bite.
Eggs: Room temperature eggs incorporate more easily into the batter, creating a smoother texture. I always take mine out at least an hour before baking, though if I forget, I place them in warm water for ten minutes.
Butter: High-quality unsalted butter is my go-to choice. It should be at room temperature—soft enough that you can easily press your finger into it, but not melted or greasy.
Flour: I prefer all-purpose flour for its reliable protein content, which gives the cake structure without making it tough. Always measure flour by spooning it into the measuring cup and leveling it off.
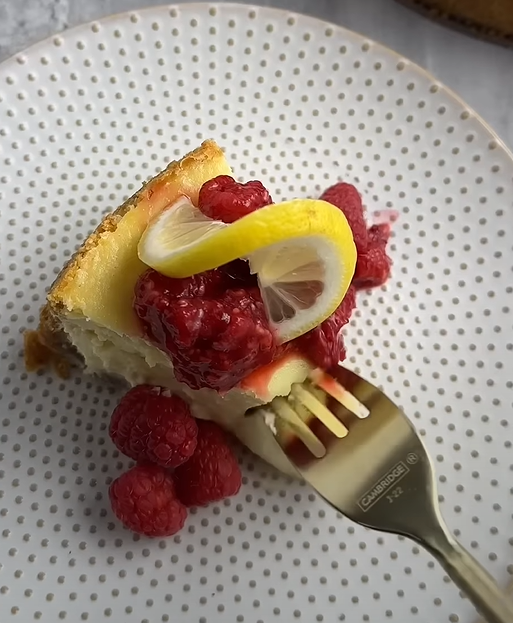
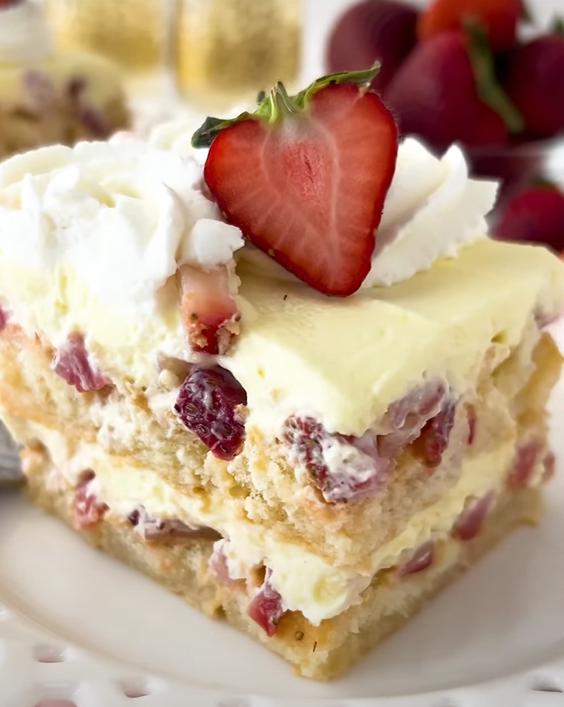
Fresh Berries: The star performers alongside our lemon base. I typically use a combination of strawberries, blueberries, and raspberries for both visual appeal and varied flavor profiles.
Essential Equipment and Preparation
| Equipment | Purpose | Alternative Options |
|---|---|---|
| 3 x 9-inch round cake pans | Even baking layers | 2 pans (bake in batches) |
| Electric mixer | Proper creaming | Hand mixer with patience |
| Fine mesh strainer | Smooth curd texture | Small sieve |
| Offset spatula | Professional frosting | Large knife or straight spatula |
| Digital scale | Precise measurements | Measuring cups (less accurate) |
| Zester or microplane | Fresh lemon zest | Fine grater |
Before I begin any baking project, I make sure my workspace is completely organized. This means preheating the oven to 350°F (175°C), greasing and flouring my cake pans, and having all ingredients measured and at room temperature. Trust me, this preparation step makes the difference between a stressful baking experience and an enjoyable one.
The Perfect Lemon Cake Layers: Step-by-Step Process
Creating consistently perfect cake layers requires attention to detail and understanding the science behind each step. Here’s my tried-and-true method that delivers moist, tender results every single time.
Creaming Method Mastery
I begin by creaming 1 cup of room temperature unsalted butter with 1¾ cups of granulated sugar. This process takes patience—I beat them together for a full 5 minutes until the mixture becomes pale yellow and noticeably fluffy. This extended creaming time incorporates air into the batter, which translates directly to a lighter cake texture.
Next, I add 4 large eggs one at a time, beating well after each addition. The mixture might look slightly curdled at first, but this is completely normal. I then incorporate 2 tablespoons of fresh lemon zest and ¼ cup of fresh lemon juice, which gives that bright, authentic citrus flavor.
Flour Integration Technique
The secret to tender cake layers lies in how you handle the flour. I always sift together 3 cups of all-purpose flour, 2½ teaspoons of baking powder, and 1 teaspoon of salt. Then I alternate adding the dry ingredients with 1¼ cups of buttermilk, beginning and ending with the flour mixture.
Here’s the crucial part: I mix just until the ingredients are combined. Overmixing develops the gluten in flour, resulting in a tough, dense cake. The batter should look slightly lumpy, and that’s exactly what we want.
Baking Precision
I divide the batter evenly among my three prepared pans and bake for 22-25 minutes. The cakes are done when they spring back lightly when touched in the center and begin to pull away slightly from the sides of the pans. I let them cool in the pans for 10 minutes before turning them out onto wire racks.
Luscious Lemon Curd: The Secret Weapon
While many recipes skip this step, I believe lemon curd is what elevates this cake from good to absolutely extraordinary. The silky, intense lemon flavor provides a beautiful contrast to the lighter cake layers and creamy frosting.
Lemon Curd Ingredients and Ratios
| Ingredient | Amount | Purpose |
|---|---|---|
| Fresh lemon juice | ½ cup | Primary flavor base |
| Lemon zest | 2 tablespoons | Aromatic oils and texture |
| Granulated sugar | ¾ cup | Sweetness and body |
| Large eggs | 3 whole + 2 yolks | Thickening agent |
| Unsalted butter | 6 tablespoons | Richness and smooth texture |
| Salt | Pinch | Flavor enhancement |
I combine all ingredients except butter in a heavy-bottomed saucepan and whisk constantly over medium-low heat. The key is patience—rushing this process results in scrambled eggs rather than silky curd. After about 8-10 minutes, the mixture thickens enough to coat the back of a spoon. I immediately strain it through a fine mesh sieve and whisk in the cold butter pieces until completely smooth.
Cream Cheese Frosting: Achieving Perfect Consistency
My cream cheese frosting strikes the perfect balance between tangy and sweet while maintaining enough structure to hold the cake layers beautifully. The secret lies in temperature control and proper ratios.
I start with 8 ounces of cream cheese and ½ cup of unsalted butter, both at room temperature. This is crucial—cold ingredients will create a lumpy frosting that no amount of beating can fix. I beat them together until completely smooth, then gradually add 4 cups of powdered sugar, 1 teaspoon of vanilla extract, and 2 tablespoons of heavy cream.
The consistency should be spreadable but hold its shape. If it’s too thick, I add cream one tablespoon at a time. If too thin, I chill it for 30 minutes before using.
Assembly Techniques for Professional Results
Assembling a layer cake might seem straightforward, but there are several techniques that separate amateur efforts from professional-looking results. Here’s my systematic approach that ensures stable, beautiful layers every time.
Layer Preparation and Trimming
First, I level each cake layer using a long serrated knife or cake leveler. Even perfectly baked cakes dome slightly, and leveling ensures even stacking and prevents sliding. I save the trimmed pieces for snacking—baker’s privilege!
Strategic Filling Distribution
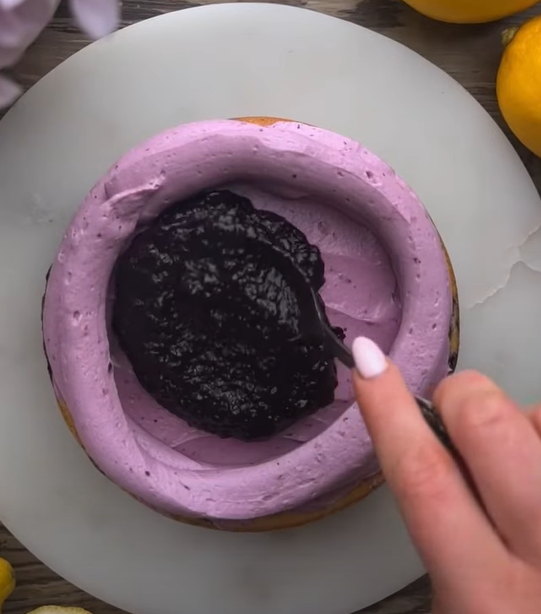
I place the first layer on my serving plate and spread about ⅓ cup of lemon curd evenly across the surface, leaving a ½-inch border around the edges. The curd will spread slightly under the weight of subsequent layers. Next, I pipe a ring of cream cheese frosting around the perimeter to create a dam, then fill the center with more frosting.
This technique prevents the filling from leaking out the sides and creates clean, defined layers when the cake is sliced. I repeat this process with the second layer, then place the final layer and apply a thin crumb coat of frosting over the entire cake.
The Crumb Coat Advantage
Many home bakers skip the crumb coat, but I consider it essential for achieving that smooth, professional finish. This thin layer of frosting seals in any loose crumbs and provides a smooth base for the final frosting layer. I chill the cake for 30 minutes after applying the crumb coat, which firms up the frosting and makes the final layer much easier to apply.
Fresh Berry Selection and Preparation
The berries crown this cake with both visual drama and burst of fresh flavor. Selecting and preparing them properly ensures they enhance rather than detract from the overall presentation.
Berry Quality Indicators
| Berry Type | Selection Criteria | Preparation Notes |
|---|---|---|
| Strawberries | Bright red, firm, green tops intact | Hull and slice larger berries |
| Blueberries | Deep blue color, no wrinkled skin | Gentle rinse, pat completely dry |
| Raspberries | Deep red, firm structure | Handle minimally, don’t wash until serving |
| Blackberries | Deep purple-black, plump | Check for hidden white cores |
I always purchase berries the day I plan to use them, as their flavor and appearance deteriorate quickly. Before arranging them on the cake, I gently wash and thoroughly dry strawberries and blueberries. Raspberries and blackberries are more delicate, so I handle them minimally and don’t wash them until just before serving.
Flavor Variations and Seasonal Adaptations
One of the aspects I love most about this recipe is its adaptability. Throughout the years, I’ve created numerous variations that celebrate different seasons and flavor preferences while maintaining the core structure that makes this cake so special.
Citrus Alternatives
While lemon remains my favorite, I’ve successfully adapted this recipe using other citrus fruits. Orange creates a sweeter, more mellow flavor profile, while lime provides an almost tropical brightness. For orange variations, I use the same amount of zest but reduce the juice slightly since orange juice is sweeter. Lime requires a more delicate touch—I use about 3 tablespoons of juice to avoid overwhelming tartness.
Seasonal Berry Combinations
Spring calls for strawberries and early raspberries, creating a classic combination that never fails to impress. Summer offers the full spectrum—I love combining strawberries, blueberries, raspberries, and blackberries for maximum visual impact. Fall brings different possibilities: I sometimes incorporate finely diced pears with cranberries for a sophisticated autumn twist.
Flavor Enhancement Options
For special occasions, I sometimes add a tablespoon of limoncello to the cake batter and frosting, which creates a more complex, adult-oriented flavor profile. A teaspoon of almond extract in the frosting provides subtle nuttiness that complements the lemon beautifully. Fresh herbs like thyme or rosemary, used sparingly, can add unexpected sophistication.
Storage and Make-Ahead Strategies
Planning ahead makes entertaining so much more enjoyable, and fortunately, this cake accommodates advance preparation beautifully. Understanding proper storage techniques ensures the cake maintains its quality and safety.
Component Preparation Timeline
The lemon curd can be prepared up to one week in advance and stored in the refrigerator. I always press plastic wrap directly onto the surface to prevent a skin from forming. The cake layers freeze exceptionally well—I wrap them individually in plastic wrap, then aluminum foil, and freeze for up to three months.
The cream cheese frosting can be made up to three days ahead and refrigerated. I bring it to room temperature and re-whip it briefly before using, which restores its smooth, spreadable consistency.
Assembled Cake Storage
Once assembled, the cake should be refrigerated due to the cream cheese frosting and fresh berries. I cover it loosely with plastic wrap or store it in a cake carrier. The cake actually improves after a day in the refrigerator, as the flavors meld and the layers settle perfectly.
For optimal presentation, I add the fresh berries no more than 4 hours before serving. This prevents the berries from releasing too much juice, which can make the frosting appear streaky.
Troubleshooting Common Issues
Even experienced bakers encounter challenges, and I’ve learned to identify and solve the most common problems that arise with this recipe.
Dense or Heavy Cake Layers
This usually results from overmixing the batter or using ingredients that aren’t at room temperature. Cold butter doesn’t cream properly, and cold eggs don’t incorporate smoothly. Overmixing develops gluten, creating a tough texture. The solution is patience with ingredient temperature and gentle mixing once flour is added.
Lumpy Lemon Curd
Temperature control is crucial for smooth curd. If the mixture gets too hot too quickly, the eggs scramble. I always use medium-low heat and whisk constantly. If lumps do form, immediately strain the mixture through a fine mesh sieve while whisking vigorously.
Frosting Consistency Problems
Cream cheese frosting can be finicky. If it’s too soft, the cream cheese or butter was likely too warm, or the kitchen temperature is high. Chilling for 30 minutes usually solves this. If it’s too stiff, a tablespoon of cream or milk helps achieve the right consistency.
Nutritional Considerations and Dietary Adaptations
While this cake is undeniably indulgent, I’ve successfully adapted it for various dietary needs without significantly compromising flavor or texture.
Nutritional Breakdown (Per Serving)
| Component | Calories | Carbs (g) | Fat (g) | Protein (g) |
|---|---|---|---|---|
| Cake layer (1/12 slice) | 285 | 42 | 11 | 5 |
| Lemon curd (2 tbsp) | 95 | 18 | 3 | 2 |
| Cream cheese frosting (¼ cup) | 220 | 35 | 9 | 3 |
| Fresh berries (½ cup) | 40 | 10 | 0 | 1 |
| Total per serving | 640 | 105 | 23 | 11 |
Gluten-Free Adaptation
I’ve successfully made this cake using a 1:1 gluten-free flour blend. The key is ensuring the blend contains xanthan gum for proper structure. The texture is slightly denser than the traditional version, but the flavor remains excellent.
Reduced Sugar Options
For those monitoring sugar intake, I’ve reduced the sugar in the cake layers by ¼ cup without significant impact on texture. The lemon curd requires its full sugar content for proper thickening, but the frosting can accommodate a reduction of powdered sugar with the addition of extra cream cheese for body.
Serving Suggestions and Presentation Ideas
The presentation of this cake can be adapted for everything from casual family dinners to elegant celebrations. I’ve served variations of this recipe at intimate gatherings and large events, adjusting the presentation to match the occasion.
Casual Family Style
For everyday celebrations, I often serve this cake directly from the kitchen, allowing family members to see the beautiful layers as I slice it. I accompany it with simple vanilla ice cream or freshly whipped cream for those who want an extra indulgent touch.
Elegant Entertaining
When hosting dinner parties, I pre-slice the cake in the kitchen and plate individual portions with a small dollop of additional lemon curd and a sprig of fresh mint. This approach ensures clean presentation and allows me to control portion sizes.
Special Occasion Adaptations
For birthdays or anniversaries, I sometimes create a dramatic presentation by arranging the berries in concentric circles or creating patterns with different colored berries. Edible flowers like violas or pansies add an elegant touch for very special occasions.
Questions and Answers
Q. Can I make this cake without a stand mixer? Absolutely! While a stand mixer makes the process easier, I’ve successfully made this cake using a hand mixer. The creaming process takes a bit longer, and your arm might get tired, but the results are identical. Just be patient during the butter and sugar creaming stage.
Q. What’s the best way to get even cake layers? I use a kitchen scale to weigh the batter and divide it evenly among the pans. If you don’t have a scale, use a large spoon to distribute the batter, then tap the pans gently on the counter to level it. Each pan should have roughly the same amount of batter.
Q. Can I freeze the assembled cake? I don’t recommend freezing the assembled cake with berries, as they become mushy when thawed. However, you can freeze the assembled cake without berries for up to one month. Thaw it in the refrigerator overnight and add fresh berries before serving.
Q. How do I prevent the berries from bleeding into the frosting? Make sure berries are completely dry before placing them on the cake. I also avoid cutting strawberries too far in advance, as cut surfaces release more juice. Adding berries no more than 4 hours before serving helps maintain clean presentation.
Q. Can I substitute the buttermilk in the cake recipe? Yes, you can make buttermilk substitute by adding 1 tablespoon of lemon juice or white vinegar to 1¼ cups of regular milk. Let it sit for 5 minutes before using. The acidity helps create the tender texture we want in the cake.
Q. Why did my lemon curd turn out grainy? Grainy curd usually results from cooking the mixture too quickly or at too high a temperature. The eggs cook too fast and create lumps. Always use medium-low heat and whisk constantly. If it does become grainy, strain it immediately through a fine mesh sieve.
Q. How long can I store the finished cake? The assembled cake stays fresh in the refrigerator for up to 4 days. Cover it loosely to prevent it from drying out while allowing air circulation around the berries. The flavor actually improves after the first day as the components meld together.
Q. Can I make individual portions instead of a layer cake? Definitely! This recipe adapts beautifully to cupcakes or individual ramekins. Reduce the baking time to 18-22 minutes for cupcakes. You can also create individual trifles using crumbled cake, curd, frosting, and berries in glasses for an elegant presentation.
This lemon layer cake with fresh berries represents everything I love about baking—the perfect marriage of technique and creativity, the joy of sharing something beautiful and delicious with people I care about, and the satisfaction of mastering a recipe that never fails to impress. Whether you’re celebrating a special occasion or simply want to bring a little sunshine to an ordinary day, this cake delivers happiness in every single bite.