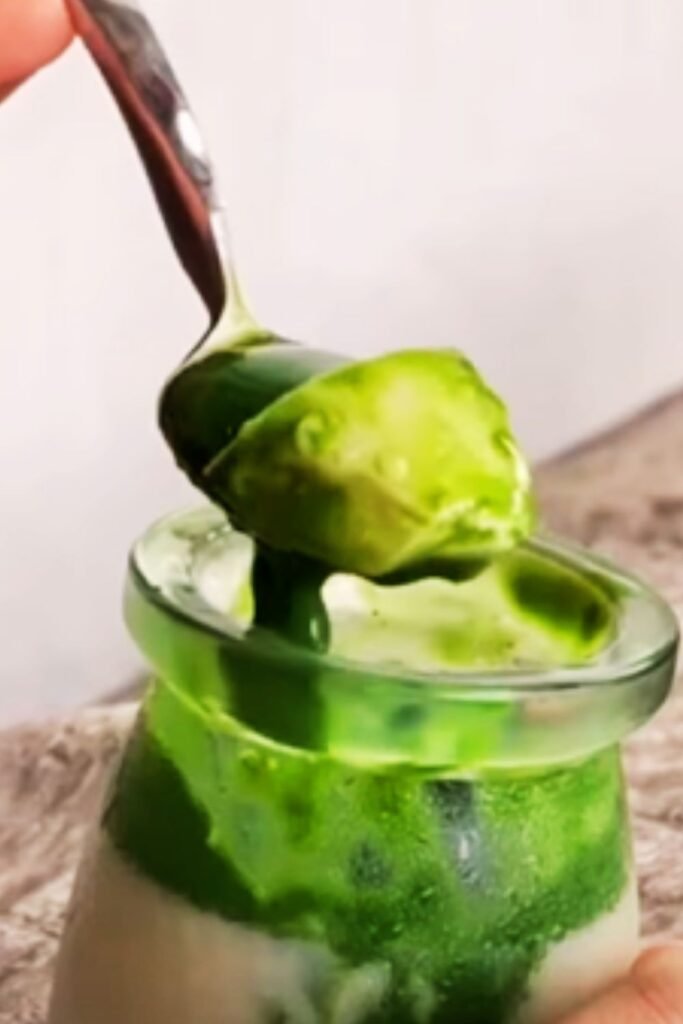
When I first discovered the magical combination of coconut and matcha in a pannacotta, my dessert world changed forever. This elegant fusion brings together the silky smoothness of Italian pannacotta with the earthy sophistication of Japanese matcha and the tropical richness of coconut. The result? A dessert that’s both exotic and comforting, perfect for impressing guests or treating yourself to something truly special.
The beauty of this coconut and matcha pannacotta lies in its perfect balance of flavors and textures. The creamy coconut provides a luxurious base that mellows the sometimes intense bitterness of matcha, while the matcha adds depth and complexity that elevates the dessert beyond ordinary coconut puddings. I’ve spent countless hours perfecting this recipe, and I’m thrilled to share my discoveries with you.
Understanding the Magic Behind Pannacotta
Pannacotta: An Italian dessert literally meaning “cooked cream,” pannacotta is a silky, custard-like dessert that’s set with gelatin rather than eggs.
Matcha: Premium green tea powder made from shade-grown tea leaves, offering a complex flavor profile ranging from sweet and creamy to vegetal and slightly bitter.
Coconut Cream: The thick, rich cream that separates from coconut milk, providing natural sweetness and luxurious texture.
The science behind pannacotta fascination me every time I make it. Unlike custards that rely on eggs for thickening, pannacotta achieves its signature wobble through gelatin activation. When I heat the cream mixture, the gelatin dissolves completely, then reforms its structure as it cools, creating that perfect jiggle we all love.
Selecting Your Ingredients: Quality Makes the Difference
My years of experimenting with this recipe have taught me that ingredient quality directly impacts the final result. Here’s what I’ve learned about choosing the best components:
Matcha Selection Guide
The matcha you choose will make or break this dessert. I always recommend ceremonial-grade matcha for desserts, though premium culinary-grade works beautifully too. Look for vibrant green color – dull, yellowish matcha indicates age or poor quality. The powder should smell fresh and grassy, not musty or stale.
I source my matcha from reputable Japanese suppliers, but many specialty tea shops and online retailers offer excellent options. Store your matcha in the refrigerator, tightly sealed, to maintain its vibrant color and fresh flavor.
Coconut Product Considerations
Full-fat canned coconut milk is my go-to choice for this recipe. I prefer brands that don’t contain stabilizers or emulsifiers, as these can sometimes interfere with the gelatin setting process. Before opening, I always shake the can well, then refrigerate it overnight to allow the cream to separate naturally.
Coconut cream provides richness, while the lighter coconut water adds subtle flavor without overwhelming heaviness. Some recipes call for coconut cream exclusively, but I find the combination creates better texture balance.
Essential Equipment and Preparation
Having the right tools makes this recipe significantly easier. Here’s what I consider essential:
- Fine-mesh sieve: Critical for removing any lumps from the matcha mixture
- Digital kitchen scale: Ensures precise measurements, especially for gelatin
- Individual serving glasses or ramekins: 4-6 ounce capacity works perfectly
- Small saucepan: For heating the cream mixture
- Whisk: Both balloon and flat whisks prove useful
- Measuring spoons and cups: For accurate ingredient portions
The preparation environment matters too. I always work in a cool kitchen when possible, as heat can affect gelatin activation. Having all ingredients measured and ready before starting – what professional chefs call “mise en place” – makes the process smooth and stress-free.
Step-by-Step Recipe Instructions
Ingredients for 6 Servings
| Ingredient | Quantity | Notes |
|---|---|---|
| Full-fat coconut milk | 400ml (1 can) | Refrigerated overnight |
| Heavy cream | 200ml | Room temperature |
| Granulated sugar | 90g | Can substitute with coconut sugar |
| Matcha powder | 2 tablespoons | Ceremonial or premium culinary grade |
| Unflavored gelatin | 2 packets (14g) | Or 2 teaspoons powder |
| Warm water | 60ml | For blooming gelatin |
| Vanilla extract | 1 teaspoon | Pure extract preferred |
| Pinch of salt | 1/8 teaspoon | Enhances flavors |
Nutritional Information Per Serving
| Nutrient | Amount | % Daily Value |
|---|---|---|
| Calories | 285 | 14% |
| Total Fat | 24g | 31% |
| Saturated Fat | 18g | 90% |
| Carbohydrates | 16g | 5% |
| Sugar | 15g | – |
| Protein | 4g | 8% |
| Fiber | 1g | 4% |
| Sodium | 45mg | 2% |
Detailed Preparation Method
Step 1: Gelatin Preparation I begin by sprinkling the gelatin over warm water in a small bowl, stirring briefly, then letting it sit for 5 minutes. This “blooming” process allows the gelatin to absorb water and swell, ensuring smooth incorporation later.
Step 2: Matcha Mixture In a separate bowl, I sift the matcha powder to eliminate any clumps. Adding 3 tablespoons of warm coconut milk, I whisk vigorously until completely smooth. This step is crucial – any lumps now will remain in the final dessert.
Step 3: Heating the Base I combine the remaining coconut milk, heavy cream, and sugar in my saucepan over medium-low heat. Stirring constantly, I heat until the sugar dissolves completely and the mixture is just steaming – not boiling. Overheating can affect the final texture.
Step 4: Combining Elements Removing the pan from heat, I whisk in the bloomed gelatin until fully dissolved. Next, I gradually add the matcha mixture, whisking constantly to prevent lumps. The vanilla and salt go in last.
Step 5: Straining and Portioning I strain the entire mixture through a fine-mesh sieve to catch any remaining lumps. Then I divide evenly among serving glasses, leaving room for potential toppings.
Step 6: Setting Process The glasses go into the refrigerator for at least 4 hours, though overnight is even better. The pannacotta should wobble gently when the glass is moved but hold its shape completely.
Flavor Variations and Creative Adaptations
Over the years, I’ve developed several delicious variations of this base recipe:
Tropical Twist
Adding diced mango, passion fruit pulp, or toasted coconut flakes creates a more pronounced tropical profile. I layer these additions between two pannacotta layers for visual interest.
Chocolate Fusion
A tablespoon of high-quality cocoa powder alongside the matcha creates an interesting chocolate-tea combination. White chocolate chips melted into the warm cream add richness without overwhelming the matcha.
Seasonal Adaptations
During autumn, I incorporate a hint of pumpkin spice or maple syrup. Spring versions might include elderflower or rose water for floral notes. Summer calls for fresh berry compotes or citrus zest.
Dairy-Free Version
Substituting the heavy cream with additional coconut cream creates a completely dairy-free dessert. I sometimes add a tablespoon of cashew butter for extra richness and subtle nutty flavor.
Troubleshooting Common Issues
Through my pannacotta-making journey, I’ve encountered and solved various challenges:
Texture Problems
Too Firm: Usually indicates too much gelatin. Next time, reduce by half a packet and check the setting after 3 hours.
Won’t Set: Insufficient gelatin or overheating can cause this. If caught early, you can reheat gently, add more bloomed gelatin, and reset.
Grainy Texture: Almost always from inadequately dissolved matcha or gelatin. Always sift matcha and strain the final mixture.
Flavor Issues
Bitter Matcha: High-quality matcha shouldn’t be overly bitter, but if yours is, increase the sugar slightly or add a tablespoon of white chocolate.
Weak Coconut Flavor: Use coconut cream instead of milk, or add a teaspoon of coconut extract.
Unbalanced Sweetness: Taste the mixture before adding gelatin – it should be slightly sweeter than desired, as chilling dulls sweetness perception.
Presentation and Serving Suggestions
The visual appeal of coconut and matcha pannacotta can be stunning with thoughtful presentation:
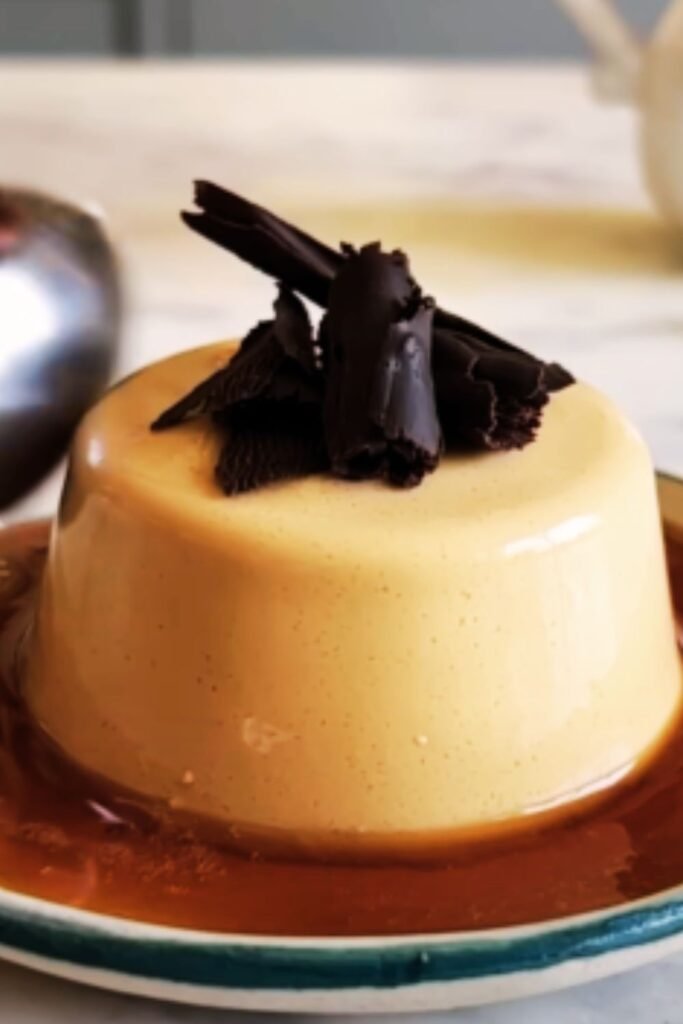
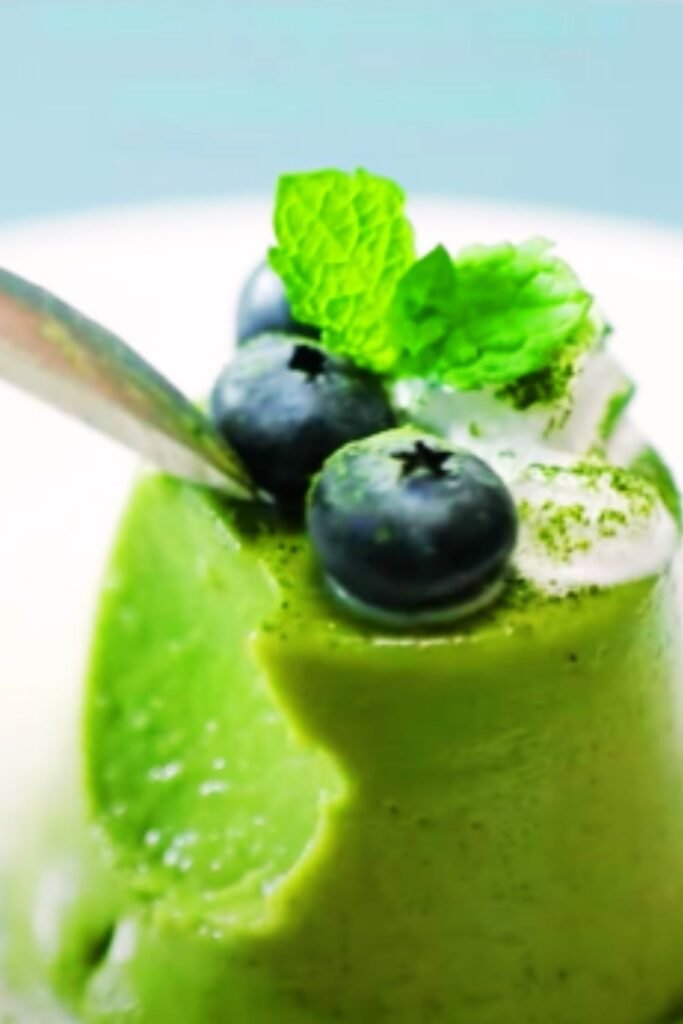
Garnish Ideas
I love topping these with lightly sweetened whipped coconut cream, a dusting of matcha powder, or finely chopped pistachios. Toasted coconut flakes add textural contrast, while fresh berries provide color pop and tartness balance.
Plating Techniques
For elegant dinner parties, I sometimes unmold the pannacottas onto chilled plates, surrounding them with fruit coulis or chocolate sauce dots. The key is ensuring the pannacotta is properly set – it should release cleanly when the mold is briefly dipped in warm water.
Temperature Considerations
I serve these desserts well-chilled but not frozen. Removing them from the refrigerator 10 minutes before serving allows the flavors to open up slightly while maintaining the perfect texture.
Storage and Make-Ahead Tips
One of my favorite aspects of pannacotta is its make-ahead friendly nature. These desserts actually improve after a day in the refrigerator, as flavors meld and develop complexity.
Short-Term Storage
Covered pannacottas keep beautifully in the refrigerator for up to 5 days. I cover each glass with plastic wrap, ensuring the wrap doesn’t touch the surface to prevent condensation marks.
Freezing Possibilities
While I don’t typically freeze pannacotta due to texture changes, it’s possible for up to one month. Thaw slowly in the refrigerator and expect slight texture variations.
Preparation Timeline
For dinner parties, I make these desserts 1-2 days ahead. This timeline allows for proper setting while ensuring peak flavor development. Last-minute garnishes can be added just before serving.
Pairing and Menu Integration
This coconut and matcha pannacotta pairs beautifully with various menu elements:
Complementary Flavors
The earthy matcha works wonderfully after rich or spicy meals, providing a cooling, cleansing finish. I often serve it following Asian-inspired dishes, where the flavors create natural harmony.
Beverage Pairings
Green tea, obviously, creates beautiful synergy, but I’ve found that jasmine tea or even quality coffee works surprisingly well. For non-caffeinated options, coconut water or lightly sparkling water with lime cleanses the palate perfectly.
Menu Positioning
As a dessert course, this pannacotta feels sophisticated enough for formal dinners yet approachable for casual gatherings. Its make-ahead nature makes it ideal for entertaining.
Nutritional Benefits and Considerations
Beyond its delicious taste, this dessert offers some nutritional benefits worth noting:
Matcha Benefits
Matcha provides antioxidants, particularly catechins like EGCG, which may support heart health and metabolism. Unlike coffee, matcha provides sustained energy without jitters, thanks to the amino acid L-theanine.
Coconut Nutrition
Coconut products offer medium-chain triglycerides (MCTs), which some research suggests may support brain function and provide quick energy. The natural sweetness also means less added sugar is needed.
Portion Control
The rich, satisfying nature of this dessert means smaller portions provide genuine satisfaction. I find that 4-6 ounce servings are perfectly adequate for most people.
Cultural Significance and Modern Applications
The fusion of Italian pannacotta techniques with Japanese matcha represents the beautiful evolution of modern dessert culture. Traditional Italian pannacotta, dating back to the Piedmont region, typically featured simple vanilla or berry flavors. Meanwhile, matcha has been central to Japanese tea ceremony for centuries, representing mindfulness and attention to detail.
My approach honors both traditions while creating something entirely new. The careful balance required in matcha preparation mirrors the precision needed for perfect pannacotta texture, making this fusion feel natural rather than forced.
In contemporary dessert menus, this type of fusion appeals to diners seeking familiar comfort with exotic sophistication. Restaurant pastry chefs increasingly embrace these cross-cultural combinations, recognizing that modern palates appreciate complexity and global inspiration.
Professional Tips for Perfect Results
After making hundreds of these desserts, I’ve developed several professional techniques that consistently produce superior results:
Temperature Control
I use an instant-read thermometer to ensure my cream mixture reaches exactly 170°F (77°C) – hot enough to dissolve gelatin completely but not so hot as to affect the final texture.
Timing Precision
The window between removing the mixture from heat and adding gelatin is crucial. I work quickly but calmly, as delayed gelatin addition can result in uneven setting.
Quality Testing
Before chilling, I always taste the mixture and adjust sweetness or matcha intensity as needed. Remember, flavors will be slightly muted when cold, so the warm mixture should taste just slightly more intense than desired.
Questions and Answers
Q: Can I make this recipe without gelatin for vegetarian guests?
I absolutely understand dietary restrictions, and yes, you can substitute agar-agar for gelatin. Use about 1 teaspoon of agar-agar powder per packet of gelatin called for in the recipe. Agar sets at room temperature and creates a slightly firmer texture than gelatin, but it works beautifully in this application.
Q: My matcha powder seems bitter – how can I balance this?
Bitterness in matcha usually indicates lower quality or improper storage, but you can definitely work with it. I recommend increasing the sugar by 1-2 tablespoons and adding a teaspoon of vanilla extract. You might also try mixing in a tablespoon of white chocolate chips while the cream is still warm – this adds sweetness and richness without overwhelming the matcha flavor.
Q: How do I know when my pannacotta has set properly?
The perfect pannacotta should have a gentle wobble when you lightly shake the container, similar to firm jello. It should hold its shape completely and not slosh like liquid. If you gently press the surface with your finger, it should spring back without leaving an indentation. This usually takes 4-6 hours minimum, but overnight is ideal.
Q: Can I unmold these desserts instead of serving them in glasses?
Absolutely! For unmolding, I lightly oil my molds or ramekins before adding the mixture. When ready to serve, briefly dip the bottom of the mold in warm water for 10-15 seconds, then run a thin knife around the edges and invert onto your serving plate. The key is having properly set pannacotta – if it’s too soft, it won’t unmold cleanly.
Q: What’s the best way to incorporate the matcha without lumps?
This is crucial for a smooth final texture. I always sift my matcha powder first, then create a paste with just a small amount of warm liquid before gradually adding more. Whisking vigorously and straining the final mixture through a fine-mesh sieve ensures any remaining lumps are caught. Some people use a small blender or immersion blender for this step, which works well too.
Q: How far in advance can I make these for a dinner party?
These desserts are actually better when made 1-2 days ahead, as the flavors have time to meld and develop complexity. I typically make them 2 days before serving, which gives me peace of mind and allows the pannacotta to reach perfect texture. Just cover tightly with plastic wrap and keep refrigerated until ready to serve.
Q: Why did my pannacotta separate into layers?
Separation usually happens when the mixture isn’t properly emulsified or if the temperature was too high when adding certain ingredients. Make sure your coconut milk is well-shaken before using, whisk constantly when combining ingredients, and never let the mixture boil. If you notice separation beginning, try whisking vigorously off the heat to re-emulsify before chilling.
Q: Can I reduce the sugar content without affecting the texture?
Yes, you can reduce sugar by up to 25% without significantly affecting the gelatin’s ability to set. However, keep in mind that sugar doesn’t just provide sweetness – it also affects mouthfeel and helps balance the matcha’s intensity. If reducing sugar substantially, consider adding a small amount of honey or maple syrup for complexity, or increase the vanilla extract slightly.
This coconut and matcha pannacotta represents everything I love about modern dessert making – it respects traditional techniques while embracing global flavors, creates stunning presentations with relatively simple methods, and provides the kind of sophisticated satisfaction that makes both cooking and eating feel special. Whether you’re planning an elegant dinner party or simply treating yourself to something extraordinary, this recipe delivers on every level.