There’s something deeply nostalgic about a pot of collard greens simmering away on the stove. The rich aroma filling the kitchen, the tender leaves soaking up all that flavor from the smoky ham hock, and that potent pot liquor (or “pot likker” as many Southern folks call it) that begs to be sopped up with a piece of cornbread. Growing up in the South, collard greens weren’t just a side dish—they were a cornerstone of our family gatherings and a symbol of resilience, nourishment, and tradition.
I’ve spent years perfecting my collard greens recipe, combining time-honored techniques passed down through generations with my own little tweaks. Today, I’m sharing my ultimate guide to creating authentic Southern collard greens that honor this cherished culinary tradition while providing all the nutrients your body craves.
What Makes Collard Greens Special?
Collard greens belong to the same family as kale, cabbage, and brussels sprouts—the mighty Brassica oleracea or cruciferous vegetables. These large, leafy greens have been a staple in Southern cuisine for centuries, with roots tracing back to Africa and further enhanced by European and Native American influences.
What sets collard greens apart is their remarkable resilience. They grow abundantly in the South’s climate, providing nourishment during lean times and celebrating abundance during prosperous ones. Unlike their more delicate cousins like spinach, collards have a hearty structure that allows them to withstand long, slow cooking while still maintaining their integrity.
The Nutritional Powerhouse
Before we dive into cooking, let’s appreciate the incredible nutritional profile of these humble greens:
| Nutrient | Amount (per cup, cooked) | % Daily Value |
|---|---|---|
| Vitamin K | 836 mcg | 697% |
| Vitamin A | 15,417 IU | 308% |
| Vitamin C | 34.6 mg | 58% |
| Folate | 177 mcg | 44% |
| Manganese | 0.8 mg | 41% |
| Calcium | 268 mg | 27% |
| Fiber | 5.3 g | 21% |
| Iron | 2.2 mg | 12% |
| Protein | 4 g | 8% |
This nutritional profile makes collard greens an exceptional choice for supporting bone health, immune function, heart health, and even cancer prevention. The high fiber content aids digestion, while the impressive vitamin content supports overall wellness.
Selecting the Perfect Collard Greens
When I’m shopping for collard greens, I look for specific characteristics to ensure I’m getting the freshest, most flavorful batch:
- Deep green color: The leaves should be vibrant and deep green without any yellowing.
- Firm leaves: They should feel crisp and sturdy, not wilted or slimy.
- Medium-sized leaves: Extremely large leaves can sometimes be tougher and more bitter.
- Fresh stems: The cut ends should look fresh, not dried out or browning.
- Minimal holes: A few small holes are natural, but numerous holes might indicate pest damage.
You can find collard greens year-round in most supermarkets, but they’re at their peak flavor during the winter months, especially after the first frost, which helps develop their sweetness by converting some of the starches to sugar.
Traditional vs. Modern Preparation
Southern collard greens traditionally involve a long, slow simmer with some form of smoked pork—usually ham hocks, bacon, or salt pork. This method breaks down the tough fibers in the greens while infusing them with a smoky, savory flavor that’s hard to resist.
While I respect and frequently use these traditional methods, I’ve also developed variations to accommodate different dietary preferences:
- Traditional: Slow-cooked with smoked pork for deep, rich flavor
- Vegetarian/Vegan: Using smoked paprika, liquid smoke, and vegetable broth to mimic the smoky essence
- Health-conscious: Reducing cooking time slightly to preserve more nutrients and using smoked turkey instead of pork
My detailed recipe below follows the traditional approach, but I’ll include notes for these variations as well.
The Ultimate Southern Collard Greens Recipe
Ingredients
- 3 pounds fresh collard greens (about 3-4 large bunches)
- 1 large smoked ham hock (about 12 oz)
- 1 large onion, diced
- 4 garlic cloves, minced
- 2 tablespoons apple cider vinegar
- 1 tablespoon granulated sugar
- 1 teaspoon red pepper flakes (adjust to taste)
- 1 teaspoon black pepper
- Salt to taste (start with 1 teaspoon)
- 8 cups chicken broth (or water)
- 2 tablespoons olive oil or bacon grease
Equipment
- Large cutting board
- Sharp knife
- Large pot or Dutch oven (6-8 quart capacity)
- Long-handled spoon
- Colander
Preparation Steps
- Clean the greens thoroughly: This is crucial and deserves special attention. Fill your clean kitchen sink with cold water and submerge the collard bunches. Swish them around gently, then let them soak for about 5 minutes. The dirt will sink to the bottom. Lift the greens out (don’t drain the sink, as that would pour the dirt back over them) and repeat this process 2-3 times until the water remains clear.
- Prepare the greens: With each leaf, fold it in half along the center stem. Using your knife, cut along the stem to remove it. Stack several de-stemmed leaves, roll them tightly like a cigar, and slice into 1-inch wide ribbons. Some folks leave their greens in larger pieces, but I find this size perfect for even cooking and easy eating.
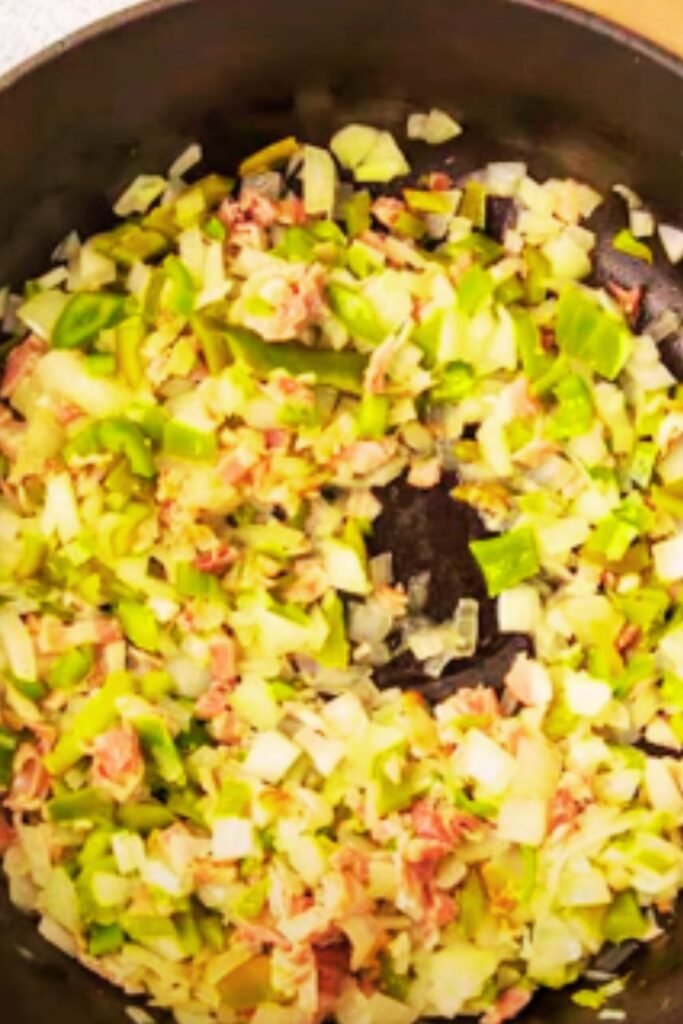
- Flavor foundation: In your large pot or Dutch oven, heat the olive oil or bacon grease over medium heat. Add the diced onion and sauté until translucent, about 5 minutes. Add the minced garlic and cook for another 1 minute, being careful not to burn it.
- Building the broth: Add the ham hock, chicken broth, apple cider vinegar, sugar, red pepper flakes, and black pepper. Bring this mixture to a simmer and let it cook for about 30 minutes to draw flavor from the ham hock.
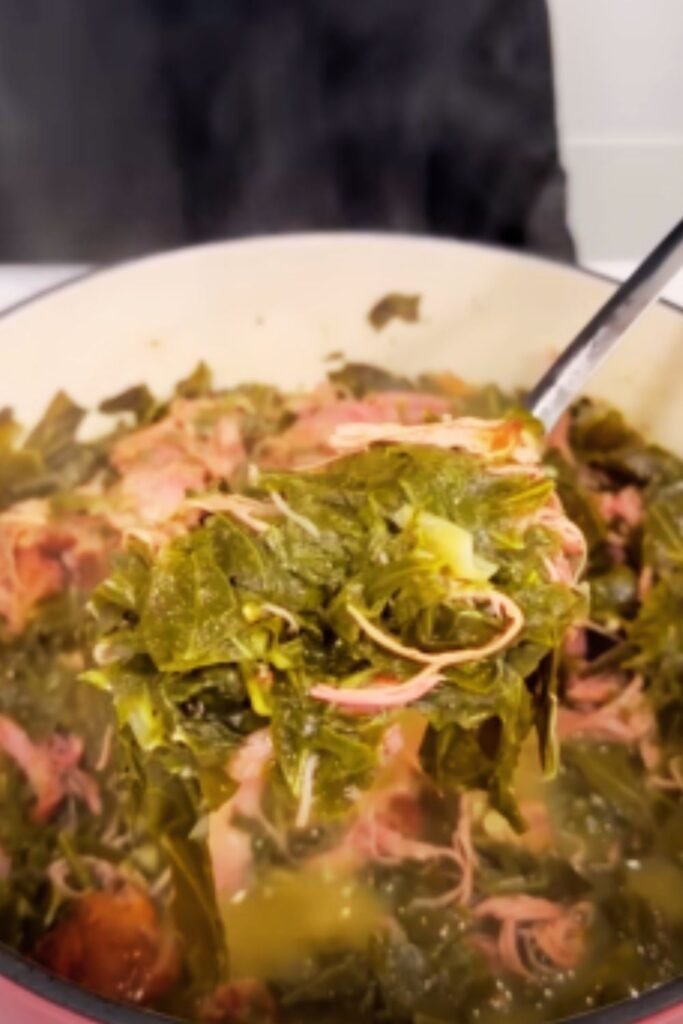
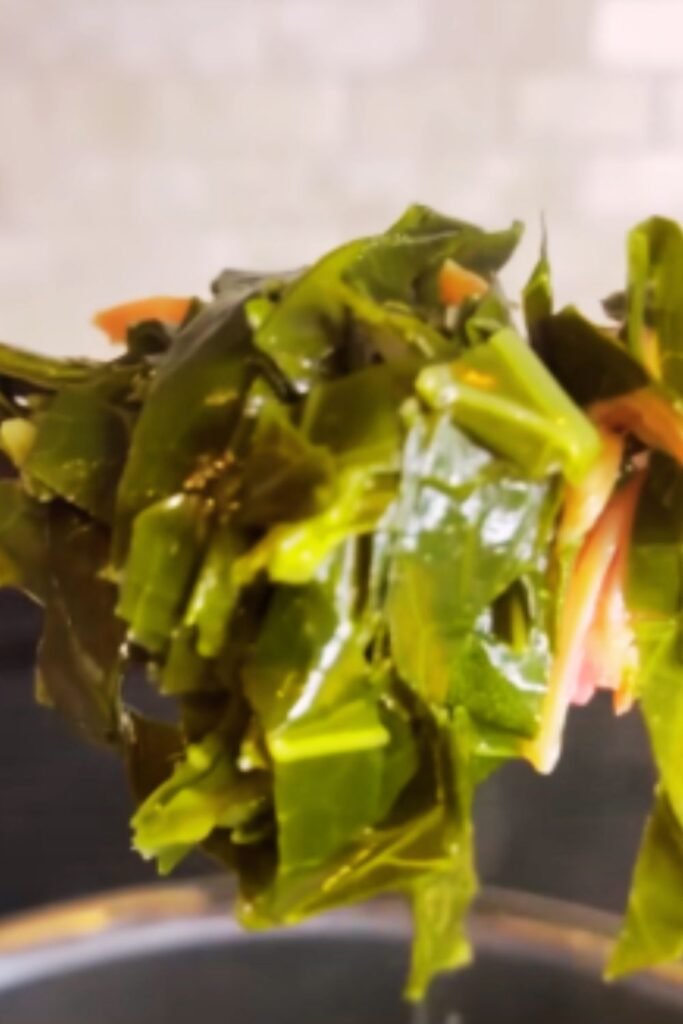
- Adding the greens: Begin adding your cut collard greens to the pot. They will look voluminous at first, but add them in batches, stirring to wilt each batch before adding more. Once all greens are added, bring the pot back to a simmer.
- The long, patient simmer: Reduce heat to low, cover partially (leaving a small gap for steam to escape), and simmer for 90 minutes to 2 hours. The greens should become very tender but not mushy. Stir occasionally to ensure even cooking.
- Final seasoning: About 15 minutes before serving, taste the “pot likker” (cooking liquid) and adjust seasonings as needed. This is when I add salt, being careful not to overdo it since the ham hock already contributes saltiness. A dash more vinegar can brighten the flavors if needed.
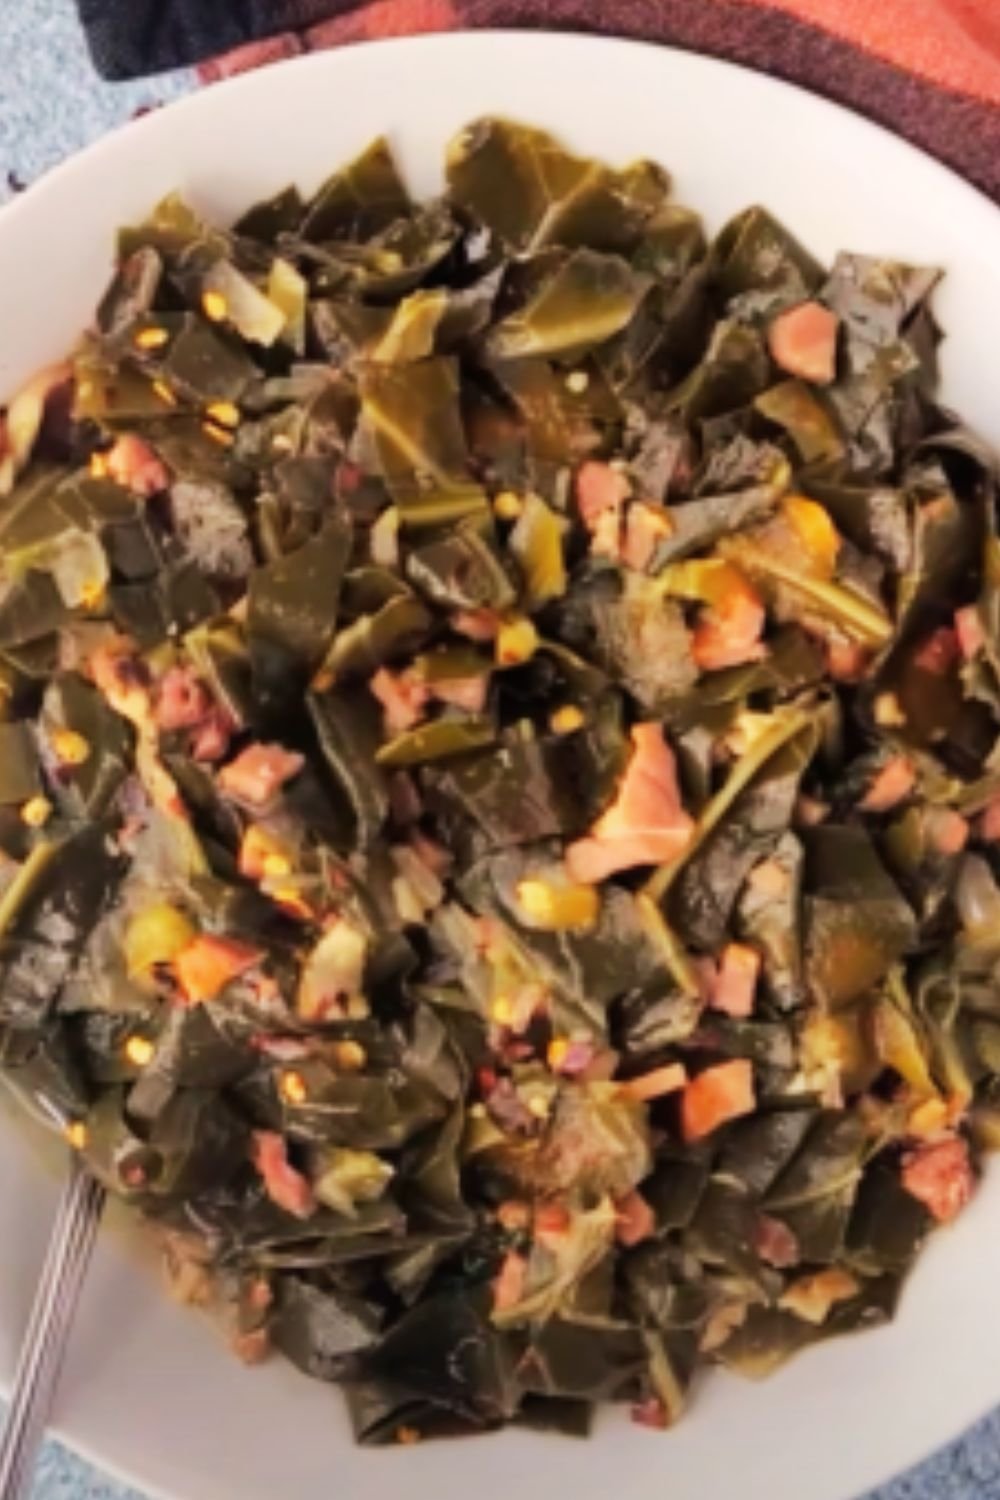
- Serving: Using tongs or a slotted spoon, transfer the greens to a serving dish. I like to drizzle some of the pot likker over them to keep them moist and flavorful. For a traditional presentation, serve the ham hock on the side—the meat should be falling off the bone by now.
Variation Notes
Vegetarian/Vegan Version
Replace the ham hock with:
- 1 tablespoon smoked paprika
- 1-2 teaspoons liquid smoke
- 2 tablespoons soy sauce or tamari
- 8 cups vegetable broth instead of chicken broth
- 2 tablespoons olive oil for sautéing
Follow the same cooking method, but you may want to add a tablespoon of nutritional yeast at the end for an extra umami boost.
Quicker Version
If you’re short on time:
- Cut the greens into smaller pieces (½-inch ribbons)
- Use pre-chopped collard greens from the produce section
- Simmer for only 45 minutes to 1 hour
- Add a teaspoon of baking soda to the cooking liquid to help tenderize the greens faster
Healthier Version
- Use smoked turkey wings or necks instead of ham hocks
- Reduce the cooking time to 60-75 minutes to preserve more nutrients
- Skip the sugar or use a teaspoon of honey instead
- Use all olive oil and no bacon grease
Serving Suggestions
No Southern meal featuring collard greens would be complete without these complementary dishes:
- Cornbread: The slightly sweet, crumbly texture is perfect for soaking up that precious pot likker. I prefer my cornbread on the less sweet side when serving with greens.
- Black-eyed peas: Combined with collards, this makes the traditional New Year’s Day meal symbolizing luck (peas) and money (greens) in the coming year.
- Fried chicken: The crispy, savory flavor contrasts beautifully with the earthy greens.
- Smoked turkey: A leaner protein option that pairs wonderfully with collards.
- Mac and cheese: The creamy, rich pasta provides a perfect contrast to the slightly bitter greens.
- Sweet tea: The sweetness helps balance the slight bitterness of the greens.
- Hot sauce: A few dashes of your favorite hot sauce added at the table can take your collard greens to new heights.
Storage and Reheating
One of the most wonderful things about collard greens is that they often taste even better the next day! After the flavors have had time to meld overnight in the refrigerator, they develop a deeper complexity that’s absolutely delicious.
To store properly:
- Cool the greens completely before refrigerating
- Store in an airtight container for up to 4 days
- Freeze for up to 3 months in freezer-safe containers
To reheat:
- Stovetop: Place in a pot over medium-low heat, adding a splash of water or broth if needed
- Microwave: Heat in a microwave-safe container, covered, in 1-minute intervals until heated through
Cultural Significance
Collard greens run deep in Southern culture, particularly in African American foodways. During slavery, enslaved people were often given the less desirable parts of food—the vegetables others didn’t want and the tough cuts of meat. Through ingenuity and necessity, these ingredients were transformed into soul-nourishing, flavorful dishes that have become beloved classics.
The practice of saving and using the nutrient-rich cooking liquid—pot likker—was born from the need to extract every bit of nutrition possible from available food. Today, this tradition continues not out of necessity but out of respect for the wisdom of those ancestors who found ways to create sustenance and joy even in the most difficult circumstances.
When I prepare collard greens, I’m not just making a side dish—I’m participating in a culinary tradition that has sustained communities through generations. The long, slow simmer represents patience and care; the tender result represents transformation and resilience.
FAQ About Southern Collard Greens
Q: Why are my collard greens bitter? A: Bitterness can come from several sources: older greens tend to be more bitter; overcooking can intensify bitterness; and skipping the addition of something sweet (like sugar) to balance the flavors can leave the natural bitterness more pronounced. Adding a little vinegar and sugar helps balance the bitterness. Some cooks also blanch their greens briefly in boiling water, then drain before the long simmer to reduce bitterness.
Q: Can I make collard greens in a slow cooker or pressure cooker? A: Absolutely! For a slow cooker, follow steps 1-4 of the recipe, then transfer everything to a slow cooker and cook on low for 6-8 hours. For a pressure cooker or Instant Pot, follow steps 1-4, then pressure cook for about 25-30 minutes with a natural release. The flavor won’t be quite as developed as the traditional stovetop method, but it’s still delicious.
Q: Are there any substitutes for ham hock? A: Yes! You can use smoked turkey wings or necks, bacon, salt pork, smoked sausage, or even smoked beef bones. For a vegetarian option, rely on smoked paprika and liquid smoke as mentioned in the variations.
Q: What can I do with leftover pot likker? A: Don’t throw it away! That liquid gold can be used as a base for soups, to cook rice or beans for extra flavor, or simply served in a cup alongside cornbread for dipping. It’s packed with nutrients that leached out of the greens during cooking.
Q: How do you deal with the strong smell when cooking collard greens? A: The sulfur compounds in collard greens (and all cruciferous vegetables) release a distinctive smell during cooking. To minimize this, you can add a tablespoon of vinegar to the cooking water, ensure good ventilation in your kitchen, or place a small dish of white vinegar nearby to absorb odors. The smell is actually a sign of the beneficial compounds being released, so I’ve come to appreciate it as the aroma of something healthy and delicious in the making!
Q: Can I use frozen collard greens instead of fresh? A: Yes, frozen collard greens work well and save prep time. Use about 2-3 pounds of frozen greens to replace the 3 pounds of fresh called for in the recipe. There’s no need to thaw them first; just add them directly to the simmering liquid. Reduce the cooking time to about 60-75 minutes since frozen greens are usually pre-blanched.
Final Thoughts
There’s a reason collard greens have remained a beloved staple in Southern cooking for centuries. They represent the beautiful marriage of necessity and creativity that defines so much of Southern cuisine—taking what’s available and transforming it through time, attention, and tradition into something truly special.
Whether you’re cooking collard greens to connect with your heritage, explore Southern cuisine, or simply enjoy their remarkable nutritional benefits, I hope this guide helps you create a pot of greens that nourishes both body and soul. There’s something deeply satisfying about carrying forward these culinary traditions while making them your own.
So the next time you’re at the market and spot those big, leafy bunches of collard greens, I hope you’ll think of this recipe, take them home, and enjoy the slow, mindful process of transforming them into a dish that has sustained and delighted generations of Southern families. And don’t forget the cornbread!