There’s something truly magical about a perfectly cooked pork chop – that golden-brown crust giving way to juicy, tender meat inside. But let’s be honest, we’ve all suffered through dry, tough pork chops at some point. I’m here to make sure that never happens again. After years of trial and error in my kitchen, I’ve perfected what I consider the absolute best skillet pork chop method, complete with a silky, flavorful pan gravy that will have everyone at your table scraping their plates clean.
This recipe transforms an ordinary weeknight dinner into something extraordinary, using simple ingredients and techniques that build maximum flavor. The beauty lies in the simplicity – we’re talking about a complete, restaurant-quality meal that comes together in just one pan in about 30 minutes. And that gravy? It’s worth the price of admission alone.
What Makes These Pork Chops Special
Before diving into the recipe, let’s talk about what makes these skillet pork chops truly exceptional:
- The Perfect Sear: We’ll create a gorgeous golden crust that seals in juices
- Proper Temperature Control: The secret to juicy, never-dry pork
- Pan Sauce Magic: Transforming simple pan drippings into a velvety gravy
- Balanced Flavors: Sweet, savory, and aromatic elements that dance on your palate
- One-Pan Wonder: Less cleanup, more flavor development
Let me walk you through creating what might become your new favorite dinner recipe. Trust me, your family will be requesting these pork chops on repeat!
Ingredients
For the Pork Chops:
- 4 bone-in pork chops (1-inch thick)
- 2 tablespoons olive oil
- 2 tablespoons unsalted butter
- 4 cloves garlic, smashed
- 2 sprigs fresh rosemary
- 4 sprigs fresh thyme
- 1 tablespoon kosher salt
- 1 teaspoon freshly ground black pepper
- 1 teaspoon smoked paprika
- ½ teaspoon garlic powder
- ½ teaspoon onion powder
For the Pan Gravy:
- 2 tablespoons unsalted butter
- 1 small shallot, finely diced (about 3 tablespoons)
- 2 cloves garlic, minced
- 2 tablespoons all-purpose flour
- 1½ cups chicken stock
- 1 tablespoon Dijon mustard
- ½ cup heavy cream
- 1 tablespoon fresh thyme leaves
- Salt and pepper to taste
Equipment Needed
- 12-inch cast iron skillet (preferred) or heavy-bottomed skillet
- Meat thermometer
- Tongs
- Whisk
- Measuring cups and spoons
- Cutting board and knife
Preparation
Step 1: Prepare the Pork Chops
The first step to perfect pork chops happens before they ever hit the pan:
- Remove pork chops from refrigerator 30 minutes before cooking to bring them to room temperature
- Pat the chops completely dry with paper towels (this is critical for a good sear!)
- In a small bowl, mix together salt, pepper, smoked paprika, garlic powder, and onion powder
- Season both sides of each pork chop generously with the spice mixture, pressing it in to adhere

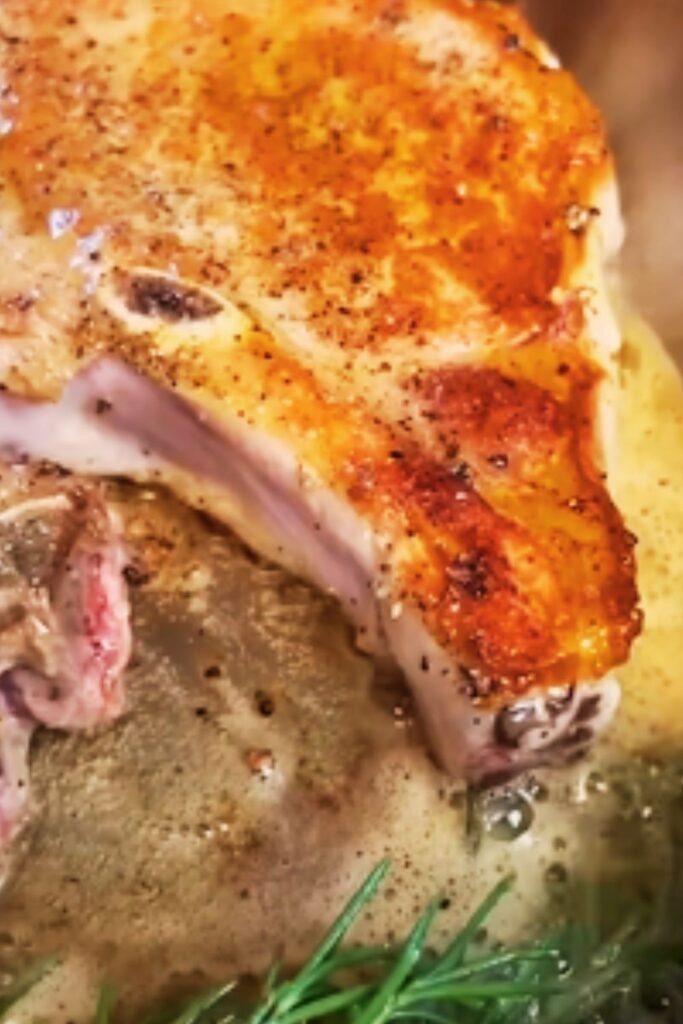
Step 2: Perfect the Sear
Now for the most important part – getting that beautiful golden crust:
- Heat a large cast-iron skillet over medium-high heat for 3-4 minutes until very hot
- Add olive oil and allow it to shimmer and just begin to smoke
- Carefully add pork chops to the skillet, making sure not to overcrowd (cook in batches if necessary)
- Let them sear undisturbed for 3-4 minutes until a deep golden crust forms
- Flip the chops and immediately add butter, garlic cloves, rosemary, and thyme to the pan
- As the butter melts, tilt the pan slightly and use a spoon to baste the pork chops with the herb-infused butter for 2-3 minutes
Step 3: Finish Cooking the Chops
The key to juicy pork chops is not overcooking them:
- Continue cooking for an additional 3-4 minutes on the second side, continuing to baste occasionally
- Check the internal temperature with a meat thermometer – we’re aiming for 140°F (60°C)
- Once they reach temperature, transfer the pork chops to a plate and tent loosely with foil to rest for 5-10 minutes (temperature will rise to 145°F)
- Do not discard the pan with its flavorful drippings – this is the foundation for our gravy!
Making the Pan Gravy
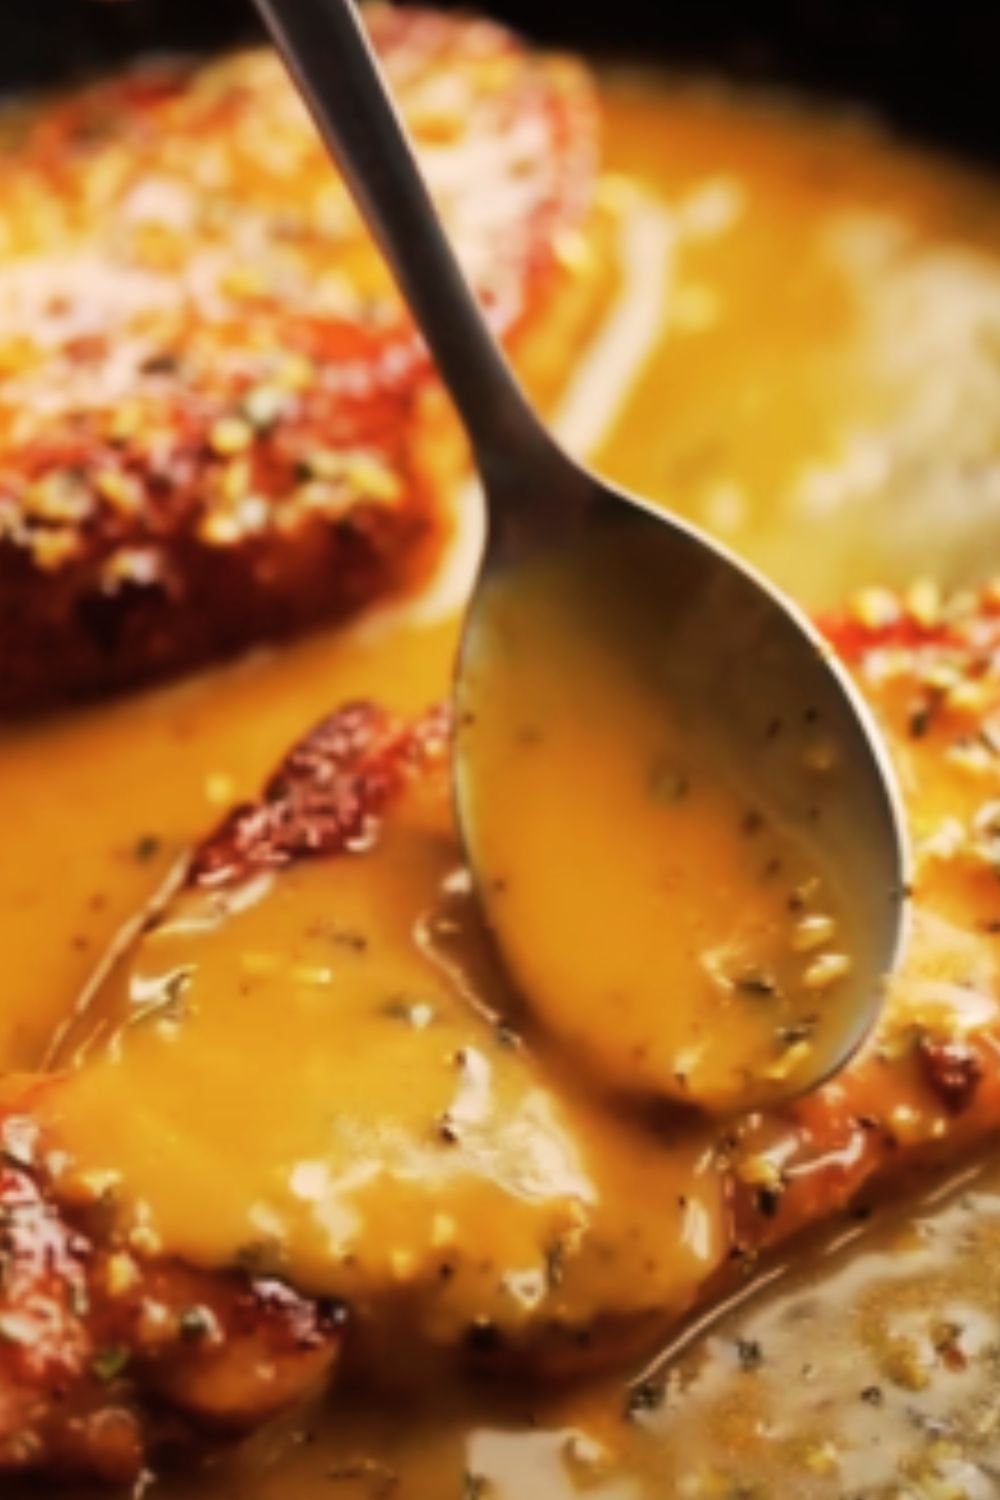
This is where the magic happens – transforming those browned bits and pan drippings into liquid gold:
- In the same skillet with all the drippings, reduce heat to medium
- Add 2 tablespoons butter and the diced shallot
- Sauté for 2-3 minutes until shallot becomes translucent
- Add minced garlic and cook for 30 seconds until fragrant
- Sprinkle flour over the mixture and whisk continuously for 1-2 minutes until it forms a light blonde roux
- Slowly pour in chicken stock while whisking constantly to prevent lumps
- Bring to a simmer and cook for 2-3 minutes until it begins to thicken
- Whisk in Dijon mustard
- Reduce heat to medium-low and stir in heavy cream
- Add fresh thyme leaves
- Simmer gently for 3-4 minutes until the gravy reaches desired consistency
- Taste and adjust seasoning with salt and pepper
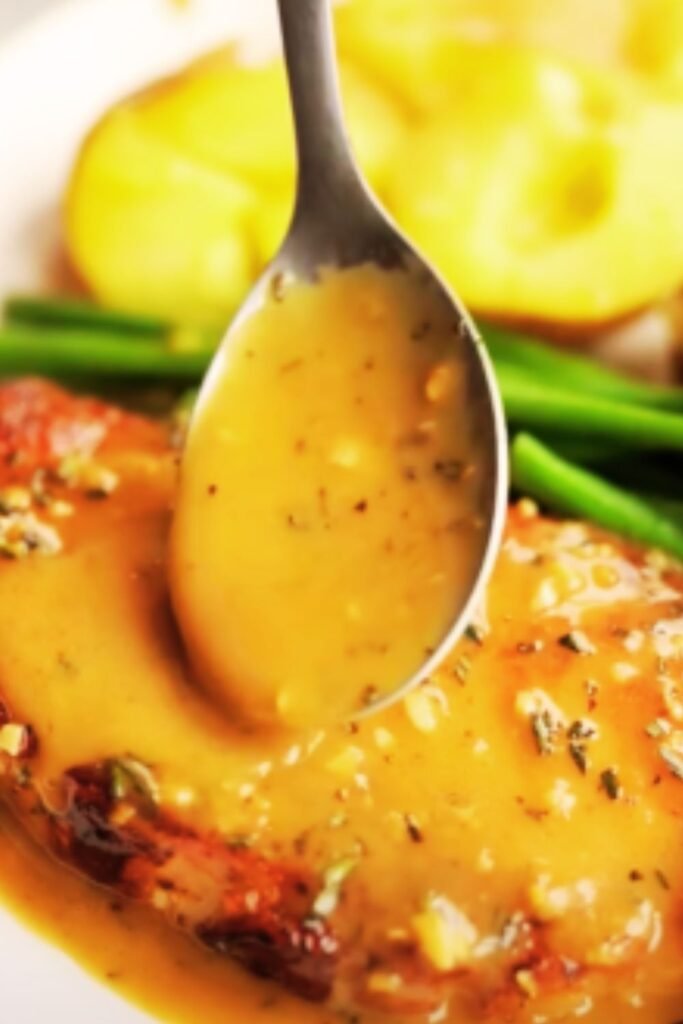
The gravy should coat the back of a spoon but still flow smoothly. If it’s too thick, add a splash more stock; if too thin, simmer a bit longer.
Serving Suggestions
Now comes the rewarding part – serving up these beautifully cooked pork chops:
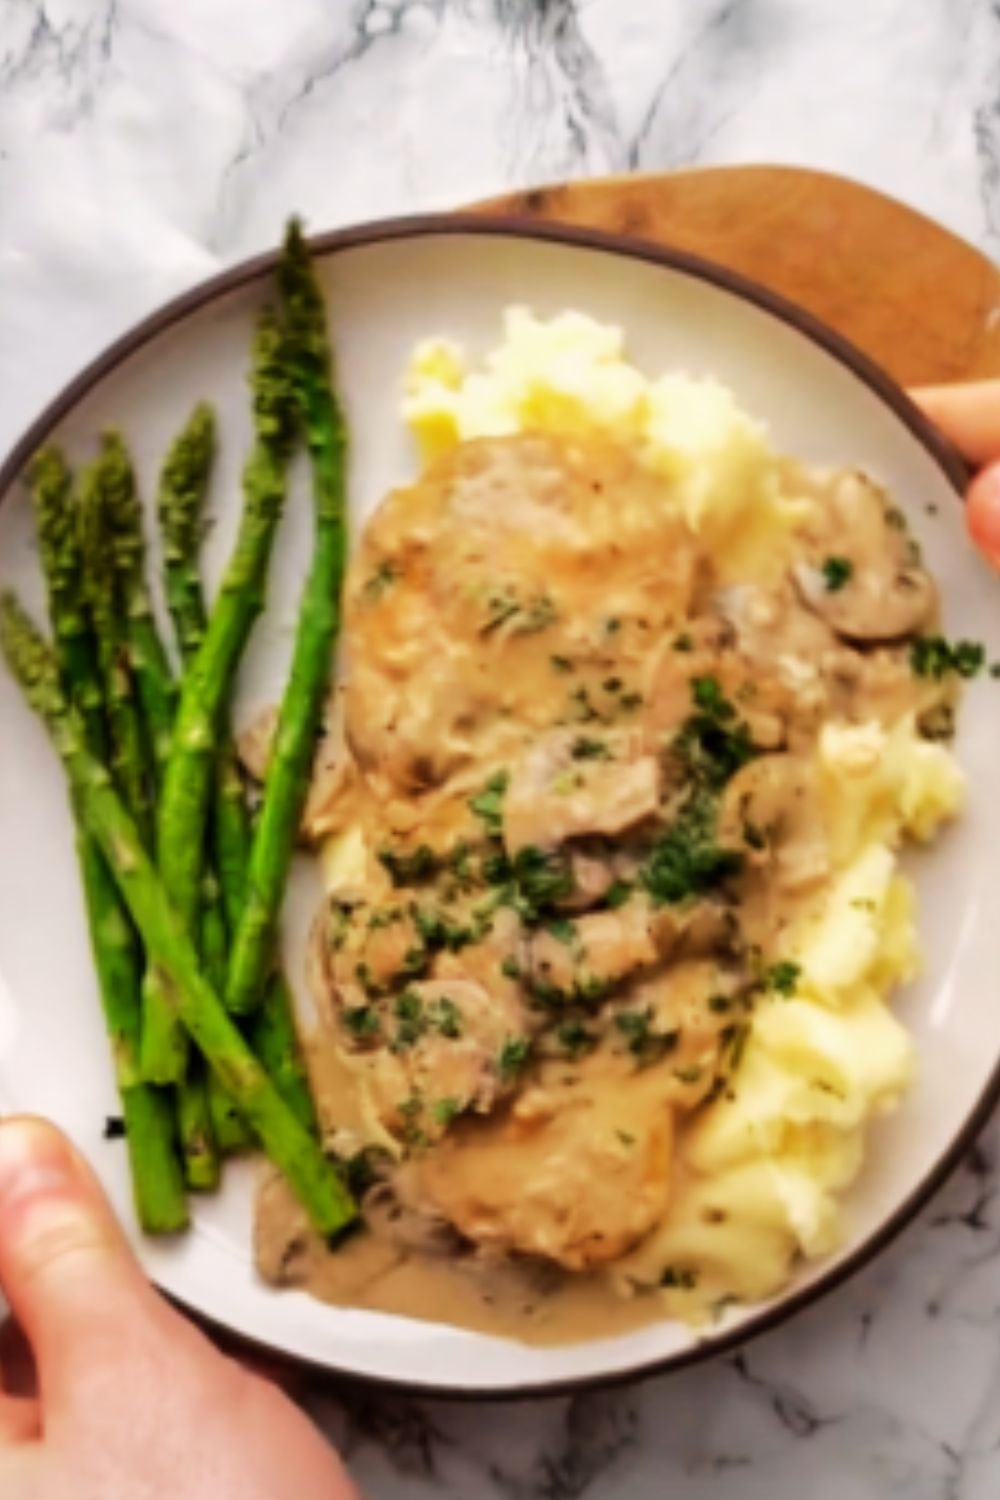
- Place pork chops on plates or a serving platter
- Spoon the luxurious gravy generously over each chop
- Garnish with additional fresh thyme or chopped parsley
These pork chops pair beautifully with:
- Creamy mashed potatoes or cauliflower purée
- Roasted asparagus or green beans
- Buttered egg noodles
- Crusty sourdough bread for sopping up extra gravy
- A simple green salad with lemon vinaigrette
The Science Behind Perfect Pork Chops
Understanding why certain techniques work helps you become a better cook. Here’s why this recipe produces such outstanding results:
| Technique | Why It Works | Result |
|---|---|---|
| Room temperature meat | Cold meat seizes when it hits a hot pan | Even cooking throughout |
| Thoroughly drying the meat | Moisture steams rather than sears | Perfect golden crust |
| Seasoning liberally | Pork needs good seasoning to enhance flavor | Well-seasoned meat in every bite |
| Preheating the pan | Immediate searing seals in juices | Juicy interior with caramelized exterior |
| Resting the meat | Allows juices to redistribute throughout | Juicy chops that don’t leak on your plate |
| Using pan drippings | Contains concentrated meat flavors | Deep, savory gravy |
| Adding aromatics | Infuses meat and gravy with complementary flavors | Complex flavor profile |
Common Mistakes to Avoid
Even experienced cooks can fall into these traps when cooking pork chops:
- Selecting too-thin chops – Thin chops cook too quickly and easily become dry. Stick with 1-inch thickness minimum.
- Cooking cold meat – Taking the chill off ensures even cooking and better browning.
- Constantly flipping – Let that crust form! Frequent flipping prevents proper searing.
- Overcooking out of fear – Modern pork is safe at 145°F and will be juicy and slightly pink.
- Skipping the rest period – This critical step allows juices to redistribute throughout the meat.
- Cutting into the meat too soon – This releases all those precious juices you worked to preserve.
- Not scraping up the fond – Those browned bits on the pan bottom contain massive flavor for your gravy.
Variations to Try
Once you’ve mastered the basic recipe, consider these delicious variations:
Mushroom & Thyme Gravy
Add 8 ounces of sliced mushrooms after sautéing the shallots. Cook until golden brown before continuing with the recipe.
Apple Cider Gravy
Replace ½ cup of the chicken stock with apple cider and add ¼ teaspoon of cinnamon to the seasoning blend.
Creamy Dijon & Herb
Double the Dijon mustard and add 1 tablespoon each of chopped fresh parsley and chives at the end.
Bacon & Onion
Start by cooking 4 slices of diced bacon in the pan, then remove bacon but leave the fat to cook the pork chops. Add the crispy bacon back to the gravy at the end.
Storage and Reheating Tips
While these pork chops are best enjoyed fresh, leftovers can still be delicious:
- Storage: Refrigerate leftover pork chops and gravy in separate airtight containers for up to 3 days.
- Reheating pork chops: For the juiciest results, reheat in a 300°F oven covered with foil and a splash of liquid (broth or water) until warmed through (about 15-20 minutes). Microwaving will toughen the meat.
- Reheating gravy: Warm gently on the stovetop over low heat, whisking occasionally. Add a splash of stock or cream if needed to restore the creamy consistency.
Nutrition Information
For those watching their nutritional intake, here’s the approximate breakdown per serving (1 pork chop with gravy):
| Nutrient | Amount |
|---|---|
| Calories | 490 |
| Protein | 38g |
| Fat | 34g |
| Carbohydrates | 7g |
| Fiber | 1g |
| Sodium | 780mg |
| Calcium | 55mg |
| Iron | 2mg |
Tips for Choosing the Best Pork Chops
Not all pork chops are created equal. Here’s what to look for at the butcher counter:
- Bone-in vs. boneless: Bone-in chops (especially rib chops or center-cut) have more flavor and stay juicier during cooking. The bone acts as an insulator and flavor-enhancer.
- Thickness matters: Always choose chops that are at least 1-inch thick, preferably 1½ inches. Thin chops cook too quickly and dry out before developing a good sear.
- Marbling: Look for chops with small streaks of fat throughout the meat, not just around the edges. This intramuscular fat melts during cooking, keeping the meat moist and flavorful.
- Color: Seek out pork that’s pink-red in color with white (not yellow) fat. Avoid chops that look pale or have dark spots.
- Source: When possible, choose heritage breed pork or meat from humanely raised pigs. The flavor difference is remarkable, and you’ll be supporting better farming practices.
Frequently Asked Questions
Q: Why are my pork chops always tough and dry?
The most common reason for tough pork chops is overcooking. Modern pork is safe to eat at 145°F (slightly pink inside). Using a meat thermometer is the best way to ensure perfect doneness. Also, remember to let your chops rest after cooking to allow juices to redistribute.
Q: Can I use boneless pork chops instead?
Yes, but reduce the cooking time by about 1-2 minutes per side as boneless chops cook more quickly. Bone-in chops typically have more flavor and stay juicier during cooking.
Q: What’s the best pan to use for this recipe?
A cast-iron skillet is ideal because it retains heat exceptionally well and creates the best sear. However, any heavy-bottomed stainless steel pan will work well too. Avoid non-stick pans as they don’t create the same level of fond (browned bits) needed for the gravy.
Q: My gravy has lumps. How can I fix it?
If you end up with lumps, strain the gravy through a fine-mesh sieve or blend it with an immersion blender. To prevent lumps, make sure to whisk constantly while adding the flour and while adding the liquid.
Q: Can I make this recipe dairy-free?
Yes! Replace the butter with additional olive oil or ghee (if tolerated) and substitute the heavy cream with full-fat coconut milk or a dairy-free cream alternative. The flavor profile will change slightly but still be delicious.
Q: How can I tell when the pork chops are done without a meat thermometer?
While a thermometer is strongly recommended for perfect results, you can also check doneness by touch. The meat should feel firm but still have a little give when pressed with your finger. Another method is to make a small cut near the bone – the meat should be mostly white with just a hint of pink.
Q: Can I make this recipe ahead of time for company?
For the best texture and flavor, I recommend cooking the pork chops fresh. However, you can prepare the gravy up to two days ahead and reheat it gently on the stovetop while you cook the chops.
Why This Recipe Works Every Time
After testing dozens of methods, I’ve found these pork chops work consistently well because they follow fundamental cooking principles:
- Temperature management: Starting with room temperature meat and controlling heat during cooking ensures even doneness.
- Moisture control: Thoroughly drying the meat surface creates the perfect environment for browning.
- Fat balance: The combination of oil (for high-heat searing) and butter (for flavor) creates the ideal cooking medium.
- Aromatics: Using fresh herbs and garlic infuses flavor throughout the cooking process.
- Proper resting: Giving the meat time to rest before serving prevents juice loss.
- Fond utilization: Building the gravy in the same pan captures all the concentrated flavors developed during cooking.
These techniques aren’t just applicable to pork chops – they’re foundational cooking skills that will improve many of your meat dishes.
When you master this recipe, you’ll never again wonder what to make for a special dinner or weeknight meal that impresses. These skillet pork chops with pan gravy have that perfect balance of being impressive enough for company yet simple enough for a Tuesday night dinner.
So heat up that skillet, grab some quality pork chops, and prepare to experience what might just become your new signature dish. Trust me, your taste buds – and anyone lucky enough to gather around your table – will thank you.